Acurite rain gauges are popular for tracking weather at home. Sometimes, they can have issues.
Troubleshooting can be simple with the right steps. Owning an Acurite rain gauge means you trust it to provide accurate weather data. But what happens when it stops working? Before you rush to replace it, there are several easy checks you can perform.
Understanding common problems and solutions can save you time and money. This guide will help you identify and fix issues with your Acurite rain gauge. With a few troubleshooting steps, you can get your device back to providing reliable weather information. Stay tuned to learn how to keep your rain gauge in top shape.
Introduction To Acurite Rain Gauges
Acurite rain gauges are reliable tools for measuring rainfall. These devices help you track precipitation levels accurately. They are popular among hobbyists, gardeners, and weather enthusiasts.
Using an Acurite rain gauge, you can better understand local weather patterns. This knowledge can inform gardening, farming, and other outdoor activities. Acurite rain gauges come in various models, each offering unique features and benefits.
Benefits Of Using Acurite Rain Gauges
Accurate rainfall data is crucial for many activities. With an Acurite rain gauge, you get precise measurements. This helps in planning irrigation for gardens and farms.
These gauges are user-friendly. They are easy to install and operate. Most models come with wireless features. This allows you to monitor rainfall from inside your home. Acurite rain gauges are durable. They are designed to withstand various weather conditions.
Common Issues With Acurite Rain Gauges
Like any device, Acurite rain gauges can face issues. Sometimes, the display might show incorrect readings. This can be due to debris blocking the sensor. Cleaning the sensor often resolves this issue.
Another common problem is weak or lost signals. This usually happens with wireless models. Repositioning the sensor or replacing batteries often helps. In some cases, the rain gauge might not record any data. Checking the sensor alignment and ensuring it’s level can fix this.
Regular maintenance is key. This ensures your Acurite rain gauge works properly. Following these steps can help you troubleshoot common issues effectively.
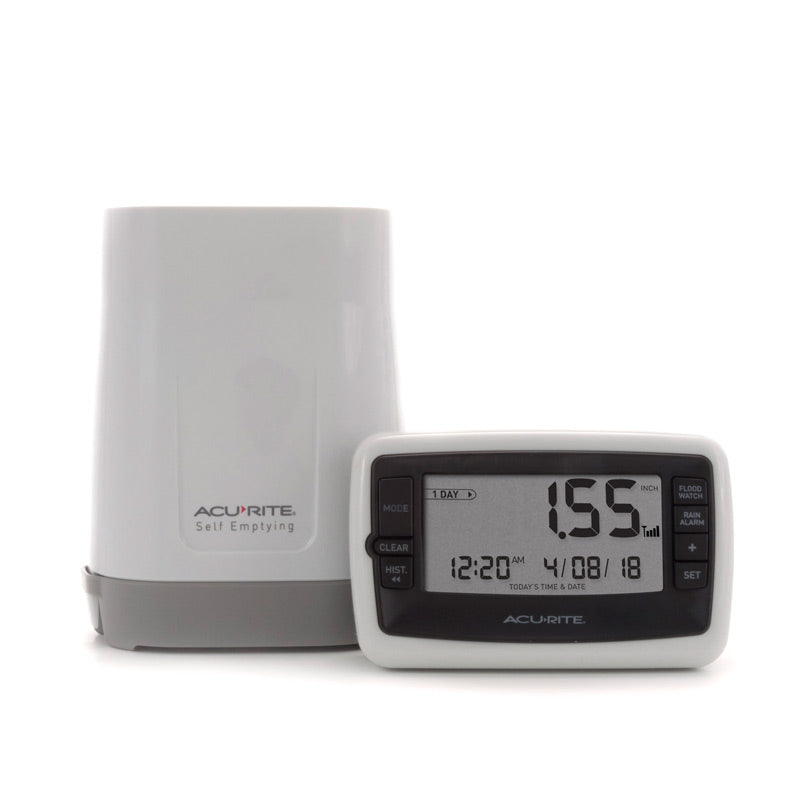
Credit: www.acurite.com
Setting Up Your Acurite Rain Gauge
Setting up your Acurite Rain Gauge is simple and quick. This guide will take you through each step to ensure your rain gauge is ready to use. Follow these instructions carefully for accurate results.
Unboxing And Components
When you unbox your Acurite Rain Gauge, you will find several components. These include:
- The main rain gauge unit
- A mounting bracket
- Screws and wall anchors
- A user manual
- Batteries
Ensure all components are present before proceeding. If any parts are missing, contact customer support.
Proper Installation Tips
Proper installation is key to ensuring accurate measurements. Follow these tips:
- Select a Location: Choose an open area away from trees and buildings. This prevents debris and obstructions.
- Mounting Height: Install the rain gauge at least 2-3 feet above the ground. This height helps avoid splash-back from the ground.
- Secure the Mounting Bracket: Use the provided screws and wall anchors. Secure the bracket firmly to a flat surface.
- Attach the Rain Gauge: Slide the rain gauge onto the mounting bracket. Make sure it clicks into place.
- Level the Gauge: Use a bubble level to ensure the gauge is perfectly horizontal. Accurate leveling is crucial for correct measurements.
- Insert Batteries: Open the battery compartment and insert the batteries. Ensure the polarity matches the markings.
- Test the Gauge: Pour a small amount of water into the gauge to test if it records correctly. Check the readings on the display unit.
Remember, a correctly set up rain gauge provides reliable data. Take your time to ensure everything is in place.
Calibrating Your Rain Gauge
A properly calibrated rain gauge is essential for accurate rainfall measurements. If your Acurite rain gauge is not calibrated, the readings may be inaccurate. This can affect your data collection and weather predictions. In this section, we will cover why calibration is important and provide a step-by-step guide to calibrate your rain gauge.
Why Calibration Is Important
Calibration ensures that your rain gauge provides precise and reliable data. Without calibration, the readings can be off by a significant margin. This can lead to incorrect weather assessments and faulty records. Proper calibration helps in maintaining the accuracy of the data, which is crucial for weather enthusiasts, gardeners, and professionals alike.
Step-by-step Calibration Guide
Follow these steps to calibrate your Acurite rain gauge:
- Prepare the rain gauge: Remove any debris or dirt from the rain gauge. Ensure the collection funnel is clean.
- Place the gauge: Set the rain gauge on a flat and level surface. Use a spirit level to confirm that it is perfectly horizontal.
- Simulate rainfall: Fill a measuring cup with a known quantity of water. A typical amount is 1 inch of water, which is 16.23 cubic inches or 237 milliliters.
- Pour water: Slowly pour the water into the collection funnel of the rain gauge. Ensure you pour evenly to simulate natural rainfall.
- Check the reading: After the water has emptied into the gauge, check the reading. It should match the amount of water you poured.
- Adjust if necessary: If the reading is off, you may need to adjust the calibration screws on the rain gauge. Refer to the user manual for the exact location and method.
Repeat the process until the readings are accurate. Consistency is key to ensuring your rain gauge is properly calibrated.

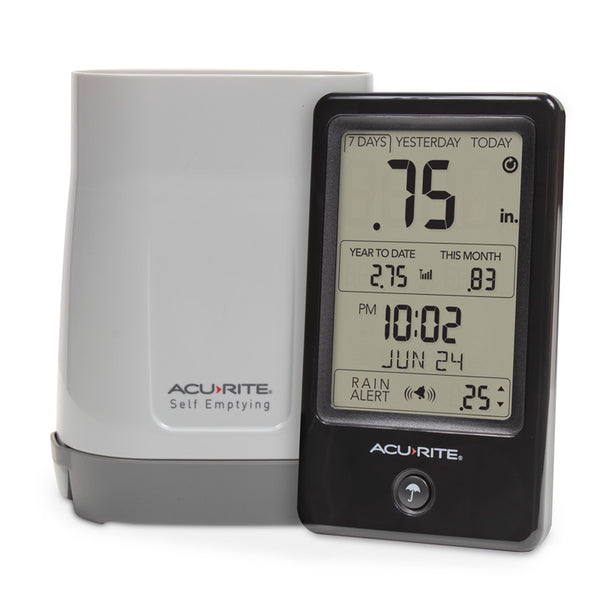
Credit: www.amazon.com
Troubleshooting Signal Issues
Having trouble with your AcuRite rain gauge signal? This is a common issue. Signal problems can disrupt accurate weather data. Fortunately, these issues are usually easy to fix. Here are some steps to troubleshoot signal issues.
Checking Battery Levels
Low battery levels can cause signal problems. Follow these steps to check and replace the batteries:
- Open the battery compartment on both the sensor and the display unit.
- Remove the old batteries.
- Check for any signs of corrosion or leakage.
- Insert new, high-quality batteries. Ensure correct polarity.
- Close the battery compartment securely.
Use only fresh batteries. Rechargeable batteries are not recommended. They may cause signal issues.
Ensuring Proper Signal Range
Ensure that the sensor and display unit are within the proper signal range. Follow these steps to improve the signal range:
- Place the display unit within 330 feet of the sensor.
- Reduce obstructions like walls, metal objects, and electronic devices.
- Elevate the sensor to improve line-of-sight.
- Avoid placing the sensor near large metal objects.
Check for interference. Electronic devices like Wi-Fi routers can cause signal disruption.
By following these simple troubleshooting steps, you can fix most signal issues with your AcuRite rain gauge. Ensure your device works accurately and reliably.
Dealing With Inaccurate Readings
Inaccurate readings from your Acurite rain gauge can be frustrating. These issues often result from simple problems that can be fixed easily. Follow these steps to ensure your rain gauge provides accurate data.
Cleaning The Rain Gauge
Dirt and debris can block the rain gauge, leading to false readings. Regular cleaning helps maintain accuracy. Begin by removing the top cover. Check the funnel for any obstructions. Clear out leaves, dirt, or insects.
Use a soft brush and mild detergent to clean the funnel. Rinse thoroughly with water. Avoid using harsh chemicals. These can damage the sensor. Dry the components completely before reassembling.
Adjusting The Placement
Placement affects the accuracy of your rain gauge. Ensure it is in an open area. Avoid placing it under trees or near buildings. These obstructions can block rain. This leads to incorrect data.
Position the gauge at a level height. Use a spirit level to check. An uneven surface can cause inaccurate readings. Secure it firmly to prevent it from tilting.
Check the placement regularly. Adjust as needed to maintain accuracy. Proper placement ensures reliable data collection.
Credit: www.acurite.com
Maintaining Your Acurite Rain Gauge
Maintaining your Acurite rain gauge ensures accurate readings and a long lifespan. Regular upkeep prevents blockages and malfunctions. Let’s explore some essential maintenance tips.
Regular Cleaning Routine
Clean your Acurite rain gauge every few weeks. Remove the gauge from its mounting bracket. Use mild soap and water to wash the collector funnel and sensor. Rinse thoroughly and let them dry before reassembling. Check for dirt or debris that may block the sensor. Clean the outside as well to prevent buildup.
Seasonal Maintenance Tips
Seasonal changes can affect your rain gauge. Inspect it before and after each season. In spring, remove any leaves or pollen that might have accumulated. Summer heat can cause plastic parts to warp. Check for any signs of damage. In fall, clear out fallen leaves and twigs. Winter requires special attention. Remove any snow or ice build-up. Ensure the gauge is not exposed to freezing temperatures for long periods. Proper seasonal care keeps your device in top condition.
Advanced Troubleshooting Tips
When your Acurite Rain Gauge isn’t working properly, basic troubleshooting might not be enough. For those more difficult issues, advanced tips can help. Here, we will discuss how to reset the device and update its firmware. These steps ensure the device functions correctly.
Resetting The Device
Sometimes, a simple reset can fix many issues. Follow these steps to reset your Acurite Rain Gauge:
- Remove the batteries from the rain gauge.
- Press and hold the reset button for 10 seconds.
- Reinsert the batteries and ensure they are properly placed.
- Wait for the device to reconnect and start working.
Resetting the device can clear any minor glitches. Always ensure the batteries are fresh and properly inserted.
Firmware Updates
Keeping the firmware updated ensures the device runs smoothly. Here is how you can update the firmware of your Acurite Rain Gauge:
- Visit the Acurite website and navigate to the support section.
- Download the latest firmware update for your model.
- Connect your rain gauge to your computer using a USB cable.
- Follow the on-screen instructions to install the firmware update.
Firmware updates can fix bugs and improve performance. Always check for the latest updates to keep your device in top condition.
| Step | Action |
|---|---|
| 1 | Visit the Acurite website. |
| 2 | Download the latest firmware. |
| 3 | Connect the device via USB. |
| 4 | Install the firmware. |
Both resetting the device and updating the firmware are essential advanced troubleshooting steps. They can resolve many issues with your Acurite Rain Gauge.
When To Seek Professional Help
When dealing with an Acurite rain gauge, there are times when you may need professional help. If the device stops working despite your efforts, seeking expert assistance can save time and frustration. Below are some key indicators and steps to consider.
Identifying Hardware Issues
Before contacting support, check for hardware issues. Look for any visible damage. Inspect the sensor and display unit. Ensure batteries are properly installed and not corroded. If any parts are broken or missing, it might be time to seek professional help.
Use this simple checklist to identify hardware issues:
- Check for physical damage
- Ensure batteries are in good condition
- Inspect the sensor and display unit
Contacting Acurite Support
If you can’t resolve the problem, it’s best to contact Acurite support. They have trained professionals who can guide you through troubleshooting steps or arrange for repairs. Here’s how to contact them:
- Visit the Acurite Support Page
- Choose your device model
- Follow the instructions to submit a support request
Provide as much detail as possible about the issue. This will help their team assist you more efficiently.
In some cases, they may request you to send the device for further inspection. Ensure you follow their instructions carefully to avoid any delays.
Remember: Professional help can often resolve issues that are beyond basic troubleshooting steps. Don’t hesitate to reach out when needed.
Conclusion And Final Tips
In this section, we will go over the conclusion and final tips for troubleshooting your Acurite rain gauge. Understanding how to troubleshoot your device ensures it works accurately and provides reliable data. Let’s sum up what we’ve discussed and offer some additional resources to help you further.
Summarizing Key Points
Here are the main points to remember:
- Check the Batteries: Ensure the batteries are new and correctly installed.
- Inspect the Sensor: Clean the sensor and ensure it is not blocked.
- Verify the Display: Check for any error messages and reset if necessary.
- Proper Placement: Place the gauge in an open area, away from obstructions.
- Software Updates: Keep the device firmware up to date.
Additional Resources
For further assistance, consider these resources:
| Resource | Description |
|---|---|
| Acurite Knowledge Base | Official troubleshooting guides and FAQs. |
| Acurite Support | Contact customer support for personalized help. |
| Acurite YouTube Channel | Video tutorials and troubleshooting tips. |
By following these tips and using the provided resources, you can keep your Acurite rain gauge functioning well. Accurate weather data starts with a well-maintained device.
Frequently Asked Questions
Why Is My Acurite Rain Gauge Not Working?
Check the batteries and ensure the sensor is clean. Sometimes debris blocks the sensor.
How Do I Reset My Acurite Rain Gauge?
Remove and reinsert the batteries. This can reset the device and fix minor issues.
How Often Should I Clean My Rain Gauge?
Clean your rain gauge every few months. This helps keep it accurate and functional.
What Should I Do If My Rain Gauge Shows Incorrect Readings?
Recalibrate the sensor. Also, check for any obstructions or debris inside the gauge.
Can I Use My Acurite Rain Gauge In Winter?
Yes, but remove snow and ice regularly. This prevents inaccurate readings and keeps the gauge working.
Conclusion
Troubleshooting your Acurite rain gauge can seem daunting, but it’s manageable. Start with basic checks like battery and sensor placement. Clean the gauge regularly to ensure accurate readings. Address any connectivity issues by resetting or syncing the device. Consistency is key for reliable performance.
Always refer to the user manual for specific instructions. By following these steps, your rain gauge will function properly, giving you accurate weather data. Remember, regular maintenance prevents many common issues. Enjoy reliable weather tracking with your well-maintained Acurite rain gauge.
Happy weather watching!