Have you ever faced the frustration of a stuck bathroom sink drain flange? You’re not alone.
This common household issue can turn a simple maintenance task into a puzzling challenge. But don’t worry! With the right approach, you can tackle this problem effectively. Imagine the relief and satisfaction of restoring your sink to perfect working order, all by yourself.
This article will guide you through simple steps to remove that stubborn flange. No need for expensive tools or professional help. You’ll discover practical tips and tricks that empower you to solve this issue confidently. Dive in and unlock the secrets to a hassle-free sink repair. Your sink’s smooth operation is just a few steps away. Let’s get started!

Credit: diy.stackexchange.com
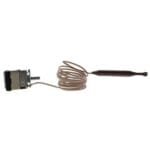
Tools And Materials Needed
Removing a stuck bathroom sink drain flange can be a daunting task. With the right tools and materials, the process becomes manageable. This section outlines the essential items you’ll need. Equip yourself properly to avoid frustration and achieve a smooth removal.
Tools Required
Having the right tools is crucial. You’ll need a wrench to loosen any bolts holding the flange. A screwdriver might be necessary for removing screws. Needle nose pliers help grip small parts. They are useful for pulling out stubborn pieces.
Materials Needed
Gathering the right materials ensures an efficient workflow. Use plumber’s putty to reseal the drain. This prevents leaks after reinstalling the flange. A bucket will catch any water during the process. Gloves protect your hands from grime and sharp edges.
Safety Equipment
Safety should never be overlooked. Safety goggles protect your eyes from debris. A mask keeps you from inhaling dust and particles. Wearing proper safety gear keeps you safe and focused on the task.
Additional Supplies
Keep additional supplies handy. A cloth can wipe away dirt and water. A flashlight illuminates hard-to-see areas under the sink. Having these supplies makes the task easier and less messy.

Credit: www.youtube.com
Safety Precautions
Ensure safety by wearing gloves and protective eyewear. Use appropriate tools to avoid damaging the sink. Disconnect power if using electric tools.
Removing a stuck bathroom sink drain flange might seem daunting, but with the right safety precautions, you can tackle this task with confidence. Safety isn’t just about wearing gloves; it’s about ensuring your workspace is ready and understanding the potential risks involved. Let’s dive into the essential safety measures you need to take before starting this DIY project.Wear Protective Gear
Before you begin, make sure you have the right protective gear. Gloves are crucial to protect your hands from sharp edges and potential chemicals. Safety goggles can shield your eyes from debris or splashes. Reflect on the last time you tackled a home project—did you ever wish you had worn more protection? It’s better to over-prepare than to regret later.Ensure Proper Ventilation
Working under the sink often involves using chemicals or dealing with unpleasant odors. Open windows or use a fan to keep the area well-ventilated. Breathing in fumes can be hazardous to your health. Imagine working in a confined space with strong odors; a simple step like ventilation can make all the difference.Disconnect Power And Water Supply
Turn off the water supply to the sink to prevent accidental leaks. If your sink has an electric component, ensure that the power is disconnected. Have you ever had a surprise splash while fixing a leak? Avoid such mishaps by taking this precaution.Clear The Area
Remove any items or clutter around the sink to create a safe working environment. This not only prevents accidents but also gives you more room to maneuver tools. You don’t want to be tripping over things while handling heavy tools, right?Use Proper Tools
Ensure you’re using the right tools for the job. A wrench, pliers, or a drain key should be readily available. Using improper tools can damage the sink or injure you. Think about the last time you used a tool not suited for the task—did it make the job harder? Avoid that frustration by being prepared.Read Manufacturer Instructions
If you’re using chemicals or new tools, take a moment to read the instructions. Understanding how to use them properly can prevent accidents. Have you ever skipped instructions only to face unexpected challenges? A few minutes of reading can save you hours of trouble. Taking these precautions can transform a potentially risky task into a manageable and even enjoyable one. What steps will you take to ensure your safety today?Preparation Steps
Removing a stuck bathroom sink drain flange can seem daunting. But with proper preparation, the task becomes manageable. Follow these simple steps to ensure a smooth process. By clearing the area and gathering supplies, you’ll be ready to tackle the job efficiently.
Clearing The Area
Begin by removing items around the sink. Clear away toiletries and decorations. This creates more space to work. A clutter-free area prevents accidents. It also makes the task less stressful. Remember to protect the countertop with a cloth.
Gathering Supplies
Ensure you have the necessary tools. Common tools include a wrench, pliers, and a screwdriver. You may need a flashlight for better visibility. Having a bucket or towel nearby helps manage any mess. Check if you need penetrating oil for stubborn flanges.
Assessing The Flange Condition
A stuck bathroom sink drain flange can cause frustration. Carefully assess the flange condition for rust or damage. Gentle tapping or lubricant might ease removal, ensuring a smoother process.
Assessing the flange condition is a crucial step in removing a stuck bathroom sink drain flange. This step will help you decide on the right tools and techniques to use. Before you jump into the removal process, take a moment to evaluate the flange. This ensures you don’t cause unnecessary damage to your sink or plumbing system.Checking For Corrosion
Corrosion can be a significant factor in why your drain flange is stuck. Take a close look at the flange and the surrounding area. Is there rust or discoloration? Corrosion might make the flange brittle or even fused to the sink, making removal trickier. If you spot rust, consider using a rust remover spray to help loosen the flange. Have you ever tried turning a screw only to find it crumbling in your hands? A corroded flange might react similarly, so proceed with caution.Identifying The Type Of Flange
Do you know what type of flange you’re dealing with? Identifying the flange type is vital as different types require different removal methods. Check if it’s a screw-on type or a snap-in model. A screw-on flange might need a wrench for removal, while a snap-in flange could require a flathead screwdriver. Think about the last time you assembled furniture. Did you use the wrong tool and make the process harder? The same goes for flanges. Knowing the type will save you time and frustration.Take a deep breath and examine your flange. Understanding its condition can make the removal process smoother and less stressful. Are you ready to get started? Let’s ensure you have the right tools and knowledge for a successful removal.
Loosening Techniques
Struggling with a stuck bathroom sink drain flange? Try penetrating oil to loosen the stubborn fixture. Gently tap the flange using a rubber mallet, easing it free from the grip. Use a wrench to rotate and carefully remove the flange, ensuring smooth progress without damaging the sink.
When your bathroom sink drain flange is stuck, it can be frustrating. But don’t worry, there are effective loosening techniques you can try to free it up. These methods are easy to follow and require tools you likely already have at home. Let’s dive into some practical solutions that can help you remove that stubborn flange with ease.Using Penetrating Oil
Penetrating oil is your best friend when dealing with stuck parts. Spray it generously around the flange. Give it a few minutes to seep in and work its magic. You might be surprised at how easily the flange loosens afterward. Have you ever tried using penetrating oil for a stuck bolt? It works similarly here, breaking down rust and grime.Applying Heat
Heat can be a game changer for loosening metal parts. Use a hairdryer to warm up the flange area. Be careful not to damage surrounding surfaces. The expansion from the heat can often free up the flange, making it easier to turn. A friend of mine once used this method on her car’s rusted door hinge with remarkable success. Could a little warmth be the solution to your sink problem?Tapping Method
Sometimes, a gentle tap is all that’s needed. Use a rubber mallet to lightly tap around the flange. This can help break the bond between the flange and the sink. If you’re worried about damaging the sink, use a piece of wood to buffer your taps. It’s surprising how a bit of vibration can make a big difference. Have you ever wondered why mechanics tap parts before unscrewing them? It’s all about the vibrations. Which technique do you think will work best for your situation? Try one—or all—and you might find that removing that stuck flange is easier than you imagined!
Credit: www.familyhandyman.com
Removing The Flange
Removing a stuck bathroom sink drain flange can be challenging. With the right tools and techniques, it becomes manageable. This section will guide you through efficient methods to tackle this task. Follow these steps to ensure a smooth removal process.
Unscrewing With A Wrench
A wrench is a handy tool for this task. First, locate the flange under the sink. Ensure the area is dry to prevent slipping. Fit the wrench around the flange’s base. Turn counterclockwise to loosen it. Apply steady pressure to avoid damaging the sink.
If the flange is rusted, spray some lubricant. This can ease the process. Wait a few minutes for the lubricant to work. Then try turning the wrench again.
Using A Flange Removal Tool
A flange removal tool is designed for this job. It grips the flange securely. Insert the tool into the drain opening. Twist the handle to lock it in place. Turn counterclockwise to release the flange. This tool provides better leverage than a wrench.
For stubborn flanges, use penetrating oil. Apply it around the flange’s edges. Let it sit for some time. Then try using the tool again. This should loosen the flange effectively.
Handling Stubborn Flanges
Dealing with a stuck bathroom sink drain flange can be frustrating. These flanges often seize due to rust or wear. Removing them requires patience and the right tools. Let’s explore two effective methods for handling stubborn flanges.
Cutting The Flange
Sometimes, cutting the flange is the best solution. Use a hacksaw or reciprocating saw. Carefully slice through the flange. Avoid damaging surrounding pipes. Wear protective gloves and goggles. This method is precise and effective.
After cutting, remove the flange pieces. Clean the area thoroughly. Ensure no debris remains. This prevents future blockages. Cutting offers a straightforward approach to stubborn flanges.
Using A Pipe Wrench
A pipe wrench provides strong leverage. Wrap the flange in a cloth. This prevents scratches. Firmly grip the flange with the wrench. Apply steady pressure. Twist carefully to break the seal. This method works well for rusted flanges.
Use penetrating oil if necessary. Apply oil around the flange base. Wait a few minutes. The oil loosens rust and grime. Make sure the wrench fits securely. This ensures efficient removal. A pipe wrench is a reliable tool for tough flanges.
Cleaning The Drain Area
Removing a stuck bathroom sink drain flange involves loosening the old seal. Use pliers to twist it carefully. Apply gentle pressure to avoid damaging the surrounding area.
Cleaning the drain area is a crucial step in removing a stuck bathroom sink drain flange. A clean workspace not only makes the process more efficient but also reveals any hidden issues that might complicate your task. You’ll want to ensure that everything is spotless before proceeding further.Removing Debris
Begin by clearing out any visible debris around the drain. Use a small brush or an old toothbrush to scrub away grime and soap scum that might be clinging to the edges. A damp cloth can help wipe away any remaining residue, leaving the area clean and visible. Don’t overlook the importance of wearing gloves to protect your hands. You never know what surprises you might find lodged in the drain. Have you ever found a hairpin or a small earring down there? It’s more common than you think!Inspecting For Damage
Once the debris is removed, inspect the drain area for any signs of damage. Look for cracks or chips in the flange or surrounding sink area. These could indicate deeper issues that might need attention later. If you notice any damage, consider whether a simple repair will suffice, or if you need to replace parts. Remember, a small crack today might lead to a major leak tomorrow. Taking a few extra minutes now can save you hours of trouble in the future. By thoroughly cleaning and inspecting the drain area, you set the stage for a smoother flange removal process. Have you ever tackled a DIY project that became easier just because you prepped well? This is one of those moments.Installing A New Flange
Removing a stuck bathroom sink drain flange requires patience and the right tools. Begin by loosening the flange with penetrating oil. Then, gently pry it off with a wrench or pliers.
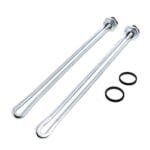
Installing a new flange might seem daunting if you’ve just managed to remove a stuck one, but it’s actually a straightforward process. With a few careful steps, you can ensure your bathroom sink is back in business. A well-installed flange not only prevents leaks but also keeps your sink looking tidy and functioning efficiently.Selecting The Right Flange
Choosing the right flange is crucial. Consider the material of your sink and existing plumbing. Plastic flanges are more flexible and can be a good fit for most sinks, while metal flanges offer durability and strength. Measure the size of the drain opening accurately. A flange that is too small or too large will cause leaks. Many stores have a variety of flanges, so take your time to pick the right one.Securing The Flange Properly
Once you’ve selected the perfect flange, it’s time to secure it. Ensure the area is clean and dry; any moisture can prevent a proper seal. Place the flange into the drain opening, aligning it carefully. Use a good quality plumber’s putty around the bottom edge of the flange. This helps in forming a watertight seal. Tighten the flange into place using a wrench, but avoid over-tightening as this can crack the sink or warp the flange. Have you ever tightened something too much, only to break it? It’s a common mistake, so proceed with caution. Reflect on your efforts when you see the flange sitting perfectly in place, ready for action. It’s a small victory, but one that saves you from unwanted leaks and future hassles.Testing For Leaks
Removing a stuck bathroom sink drain flange involves careful testing for leaks. First, ensure all tools are ready. Then, gently loosen the flange with a wrench. Check for any water leaks to prevent future issues.
Testing for leaks is a crucial step in ensuring your bathroom sink drain flange is securely installed. After all the hard work of removing the stuck flange, the last thing you want is a sneaky leak that can cause further damage. It’s a moment of truth—will your efforts hold up under pressure? This section will guide you through simple methods to confirm your installation is watertight.Running Water Test
Turn on the bathroom faucet and let the water flow. You want to observe how the drain behaves under continuous use. Keep an eye on the flange area to spot any immediate drips or pooling water. Sometimes, leaks may not appear right away. Let the water run for a couple of minutes, mimicking regular use. Don’t just check once and assume everything is fine. Consider repeating this test at different times to account for any pressure changes in your plumbing system.Checking Connections
Inspect all connections around the sink, particularly where the flange meets the drain pipe. You might have tightened them during installation, but it’s always good to double-check. Feel around these areas with your hand to detect any moisture. If you notice dampness, it’s a sign you might need to adjust the connections or apply more plumber’s tape. Ask yourself, did you remember to secure every nut and bolt? It’s easy to overlook a connection, especially when you’re eager to finish the project. If you encounter a leak, don’t panic. Sometimes, a small tweak is all that’s needed to make things right. Have you ever fixed something only to find out there’s still a problem? This is why testing for leaks is essential. It ensures your peace of mind and saves you from potential water damage.Maintenance Tips
Maintaining your bathroom sink drain flange is crucial to avoid the hassle of dealing with a stuck one. Regular upkeep can save you time, money, and frustration. Let’s explore some practical tips to keep your drain flange in top condition.
Regular Inspections
It’s important to check your sink drain flange regularly. Look for signs of rust or wear and tear. A simple inspection every few months can prevent bigger problems. You might be surprised at how a small crack can lead to water leaks or a completely stuck flange.
Use a flashlight to see the hard-to-reach areas. Tighten any loose screws and bolts. If you notice any unusual grime or buildup, clean it immediately. Regular inspections help you catch issues early before they become costly repairs.
Preventing Future Stuck Flanges
Think about the last time you had a stuck drain flange. Was it a nightmare trying to fix it? Avoid that scenario by applying some preventive measures. Consider using a lubricant on the threads of the flange. This can keep the parts moving smoothly, reducing the chances of them getting stuck.
Another tip is to avoid pouring harsh chemicals down the sink. These can corrode the flange and pipes. Instead, opt for natural cleaners. Regular cleaning with vinegar and baking soda can keep your drains clear and your flange free from buildup.
Have you ever overlooked a simple maintenance task, only to regret it later? Don’t let your bathroom sink drain flange be one of those regrets. A little attention now can keep everything running smoothly and avoid unexpected plumbing issues.
By keeping a close eye on your bathroom sink drain flange, you can ensure it remains functional and hassle-free for years. Isn’t it worth the effort to save yourself from future plumbing headaches?
Frequently Asked Questions
How Do I Identify A Stuck Drain Flange?
Check if the flange won’t twist or lift easily. It may be corroded or glued.
What Tools Are Needed To Remove The Flange?
Use a wrench, pliers, or a drain removal tool. Lubricants can help loosen it.
Can I Use Chemical Solutions To Remove It?
Yes, apply a penetrating oil. Wait for it to seep in before trying to remove the flange.
How To Avoid Damaging The Sink?
Be gentle with tools. Avoid excessive force. Use padding if necessary to protect surfaces.
Is Professional Help Required For Removal?
If it remains stuck after attempts, call a plumber. They have tools and experience to remove it safely.
Conclusion
Removing a stuck bathroom sink drain flange can be easy. Follow the steps carefully. Use the right tools and take your time. This method saves you from hiring a plumber. You can do it yourself. Keep your bathroom clean and functional.
Enjoy a stress-free sink maintenance. Practice these steps next time. Feel confident with your home repairs. Share this guide with friends. Everyone can benefit from simple fixes. Keep your home running smoothly with basic DIY skills. Remember, small tasks make a big difference.