Replace worn Mercury prop shaft seals to stop leaks and protect your gearcase.
If you want dry gear lube, a happy lower unit, and fewer boat-bill surprises, you’re in the right cove. I’ve done mercury prop shaft seal replacement on salty workboats, weekend runabouts, and fussy bass rigs. This guide gives clear steps, real-world lessons, and pro tips so you can fix a leak the right way, the first time.
 sterndrives”
style=”max-width: 100%; height: auto; border: 2px solid black; border-radius: 10px; display: block; margin: 0 auto;”
loading=”lazy”
/>
Understanding the prop shaft seal on Mercury outboards and sterndrives
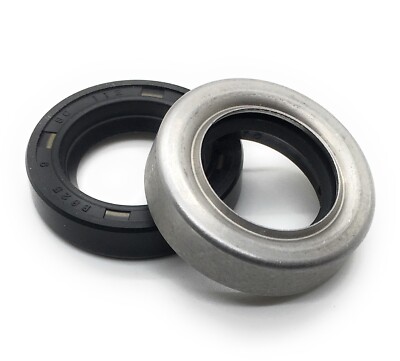
The prop shaft seal sits in the lower unit around the prop shaft. Its job is simple but critical. It keeps water out and gear lube in. Most Mercury gearcases use a double-lip setup with two seals back to back, plus carrier o-rings.
On Mercury outboards and MerCruiser sterndrives, the seal rides on a polished shaft surface. If that surface is grooved, even a new seal will leak. Many kits include two seals, new o-rings, and drain screw gaskets. Always match parts to your engine serial number.

Symptoms of a bad prop shaft seal
- Milky gear lube that looks like coffee with cream.
- Oil sheen at the prop hub while on the trailer.
- Water droplets on the drain screw when checking lube.
- Fish line wrapped behind the prop, especially mono or braid.
- Failed pressure or vacuum test on the gearcase.
A small leak can turn into a big repair fast. Water ruins bearings and gears if you let it ride.
Causes and when to replace
- Fishing line cuts the seal lips and grooves the shaft.
- Sand, silt, and salt wear the sealing edges.
- Corrosion under o-rings or on the carrier.
- Impacts that bend the shaft or carrier.
- Age and heat that harden the rubber.
Plan a mercury prop shaft seal replacement if you see water in the lube, fail a pressure test, or find line behind the prop. If the prop shaft has play, address bearings before seals.

Tools, parts, and prep checklist
Have your parts ready before you pull wrenches. It keeps the project smooth and short.
Parts
- OEM Mercury prop shaft seal kit for your exact serial range.
- Two new drain and vent screw gaskets.
- Mercury High Performance Gear Lube.
- Optional shaft sleeve if the shaft is grooved.
Tools
- Prop wrench or socket, wood block for the prop.
- Snap ring pliers and a seal puller.
- Bearing carrier retainer spanner or wrench for your model.
- Slide hammer with carrier puller adapter for stuck carriers.
- Seal driver or large sockets that match seal OD.
- Gear lube pump that threads into the drain screw.
- Pressure and vacuum tester for lower units.
- Torque wrench and marine grease (Mercury 2-4-C or similar).
- Solvent, emery cloth, blue shop towels.
- Heat gun and penetrating oil for corroded carriers.
Prep and safety
- Trim the motor up, chock the skeg with wood, key out, battery off.
- Work on a stable stand or use the trailer jack for comfort.
- Take clear photos during teardown. Your future self will cheer.

Step-by-step mercury prop shaft seal replacement
The layout varies by model. The flow below works for most Mercury outboards and many MerCruiser sterndrives. Always confirm details with your factory service manual.
- Remove the prop
- Shift to neutral. Block the prop with wood.
- Pull cotter or bend back lock tabs. Remove the prop nut and washers.
- Slide off the prop and hub. Collect the thrust washer.
- Cut and remove any fishing line. Clean the shaft.
- Drain gear lube and baseline test
- Place a pan. Remove the lower drain/fill screw first, then the vent screw.
- Catch a sample. Milk means water. Metal means wear.
- Pressure test to about 10 psi for several minutes. Then vacuum test. Note leaks.
- Remove the bearing carrier retainer
- Your gearcase has a threaded retainer, tabbed ring, or plate. Use the correct spanner.
- Heat and penetrating oil help in salt. Take your time. No hero moves.
- Extract the bearing carrier
- Thread in a puller or use a slide hammer with the right adapter.
- Mark shim stacks and orientation. Keep parts in order.
- Inspect the carrier o-rings and the sealing bore.
- Remove old seals
- Pop the snap ring if fitted. Pry seals out evenly.
- Note orientation before removal. On most Mercury units:
- Inner seal spring faces the gear lube.
- Outer seal spring faces the water.
- Remove any old sealant and clean the groove.
- Inspect and prep
- Check the prop shaft with a fingernail. If you feel a groove, use a sleeve or replace the shaft.
- Lightly polish the journal with fine emery. Wipe clean.
- Lube the lips with gear lube. Never install seals dry.
- Install new seals
- Drive the outer seal to the proper depth using a seal driver.
- Stagger garter spring joints 90 degrees between seals.
- Install the inner seal with the correct orientation.
- Fit the snap ring if used. Confirm it is fully seated.
- Reassemble the carrier
- Replace carrier o-rings. Lightly grease o-rings.
- Some models call for a non-hardening sealant on the carrier OD. Follow your manual.
- Reinstall the carrier. Install and torque the retainer per spec. Do not guess.
- Refit the prop
- Grease the splines and thrust washer lightly. Do not over-grease.
- Install the prop, washers, and nut. Torque to the spec in your manual.
- Fit a new cotter pin or bend tabs as designed.
- Refill and test
- Pump gear lube from the bottom until it exits the vent. Install a new vent gasket and screw.
- Install a new drain gasket and screw. Torque both to spec.
- Pressure and vacuum test again. It should pass now.
- Final checks
- Wipe everything. Run the engine on muffs. Look for seepage at the hub.
- After the first trip, crack the drain slightly. Check for water.
Pro tip
- If the carrier will not budge, stop and soak with penetrating oil overnight. Add gentle heat. A broken gearcase is worse than a long lunch.
This complete flow is the backbone of any mercury prop shaft seal replacement. Take notes on depths, shims, and orientation. Those small details save big money.

Real-world lessons and pro tips
I once chased a mystery leak on a 150 that ate seals like snacks. The culprit was a tiny nick on the shaft from a coiled braid line. A $40 sleeve ended months of pain.
- Always pressure test before and after. It tells you where you stand.
- Never flip seal orientation. One faces oil. One faces water.
- Replace drain screw gaskets every time. They are cheap insurance.
- Do not hammer on the carrier ears. Use the right puller.
- Grease splines, not the prop shaft tip. Grease on the taper can cause slip.
These small habits make mercury prop shaft seal replacement reliable and repeatable.

Cost, time, and difficulty
- DIY parts for mercury prop shaft seal replacement usually run 30 to 120 dollars.
- Gear lube and gaskets add about 15 to 25 dollars.
- Special tools can be borrowed, rented, or bought for 40 to 150 dollars.
- Shop labor for mercury prop shaft seal replacement is often 1.5 to 3.0 hours. Expect 200 to 450 dollars in many markets.
- Saltwater corrosion and stuck carriers can double the time.
Difficulty is moderate for a handy owner. In salt states, add patience and a second coffee.

Aftercare and quick tests
- Check the lube after the first day on the water.
- Inspect again after 10 hours. Look for milk or metal.
- Spin the prop by hand after trailering. Listen for grit.
- Do a yearly pressure and vacuum test. It is a five-minute health check.
These small steps keep your mercury prop shaft seal replacement success long term.

Preventive maintenance for your Mercury lower unit
- Remove the prop every month in heavy weed or line areas.
- Cut away any line and check the seal area and shaft.
- Change gear lube each season or 100 hours, whichever comes first.
- After salt use, flush and spray a corrosion guard on the gearcase.
- Use a prop nut torque that matches your manual. Recheck it now and then.
A little love here beats buying gears later.
Troubleshooting edge cases
Still leaking after mercury prop shaft seal replacement
- Check the drive shaft seal under the water pump.
- Check the shift shaft seal. It hides under a small cover on many models.
- Inspect carrier o-rings and the drain screw gaskets.
Finding the leak point
- Pressurize to about 10 psi. Paint joints with soapy water.
- Bubbles mark the leak. Fix that spot before you button up.
Bent shaft or runout
- If the prop wobbles or the shaft measures out of spec, replace or straighten it. New seals will not fix a bent shaft.
Frequently Asked Questions of mercury prop shaft seal replacement
How do I know I need mercury prop shaft seal replacement?
Milky gear lube and oil at the prop hub are clear signs. A failed pressure or vacuum test confirms the leak.
Can fishing line really ruin seals that fast?
Yes. Thin braid acts like a tiny saw. It can cut the lip in minutes and groove the shaft in a day.
Do I need special tools for mercury prop shaft seal replacement?
You need a carrier spanner, a puller, and a seal driver or equivalent. Without them, you risk damage and stuck parts.
Which way do the seals face on a Mercury gearcase?
The inner seal spring faces the gear lube. The outer seal spring faces the water. Check your manual to confirm for your model.
What gear lube should I use after mercury prop shaft seal replacement?
Use Mercury High Performance Gear Lube unless your manual says otherwise. It protects well under load and resists water.
Can I replace the seals without removing the bearing carrier?
On most models, no. You must remove the carrier to access and seat the seals correctly.
How tight should I torque the prop nut after mercury prop shaft seal replacement?
Follow your factory spec for your engine and prop hub. Many Mercury props are around the mid-50 ft-lb range, but always check the manual.
Is it okay to reuse drain screw gaskets?
No. They crush to seal. Replace them every time you open the lower unit.
How long does mercury prop shaft seal replacement take for a first-timer?
Plan two to four hours. Add more time if the carrier is stuck from corrosion.
Do I need to pressure test if the lube looks fine?
Yes. Some leaks are slow and do not show milk yet. A pressure and vacuum test is cheap proof.
Conclusion
A dry gearcase is a happy gearcase. With the right tools, photos, and patience, mercury prop shaft seal replacement is a solid DIY win. You protect your gears, save cash, and learn your rig inside and out.
Ready to tackle it? Grab the right OEM kit, follow the steps, and pressure test like a pro. Share your results or questions below, and subscribe for more hands-on Mercury maintenance guides.