Imagine walking into your kitchen, only to find your cabinets showing signs of water damage. It’s frustrating, isn’t it?
That sinking feeling when you notice warped wood or peeling veneer is all too familiar. You might be wondering how to fix this without spending a fortune or replacing the cabinets entirely. Well, you’re in the right place. This article is your go-to guide for restoring your kitchen cabinets to their former glory.
You’ll discover practical, step-by-step solutions that you can tackle yourself. Think of the satisfaction you’ll feel, knowing you’ve saved money and improved your home with your own hands. As you read on, you’ll uncover tips and tricks that make the repair process straightforward and stress-free. Let’s turn that kitchen frown upside down and transform your space back into the heart of your home.
Credit: www.servicemasterbyzaba.com
Identifying Water Damage
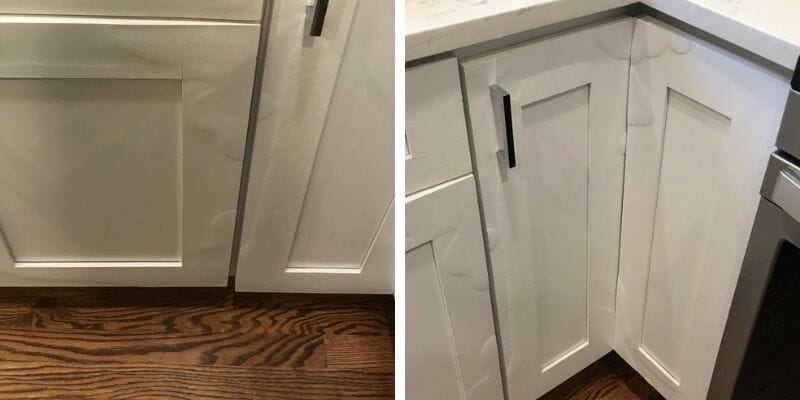
Recognize water damage on kitchen cabinets by spotting discoloration, swelling, or peeling surfaces. Dry affected areas immediately using fans or dehumidifiers. Replace damaged sections with moisture-resistant materials to prevent future issues.
Identifying water damage in your kitchen cabinets is crucial for maintaining the integrity and aesthetics of your kitchen space. Water damage can sneak up on you, often going unnoticed until it’s too late. Catching it early can save you a lot of time and money. But how can you tell if your cabinets are suffering from water damage? Let’s dive into the signs and severity of the issue.Signs Of Water Damage
Look closely at your cabinet surfaces. Bubbling or peeling on the finish is a telltale sign. This happens when water seeps in, causing the material to expand. Check for discoloration. If your cabinets appear darker or exhibit odd stains, water is likely the culprit. Sometimes, the wood might feel soft or spongy to the touch. Another indicator is musty odor. If your kitchen smells damp, it’s possible your cabinets are absorbing moisture. Have you noticed any of these signs? If so, your cabinets might be trying to tell you something.Assessing Severity
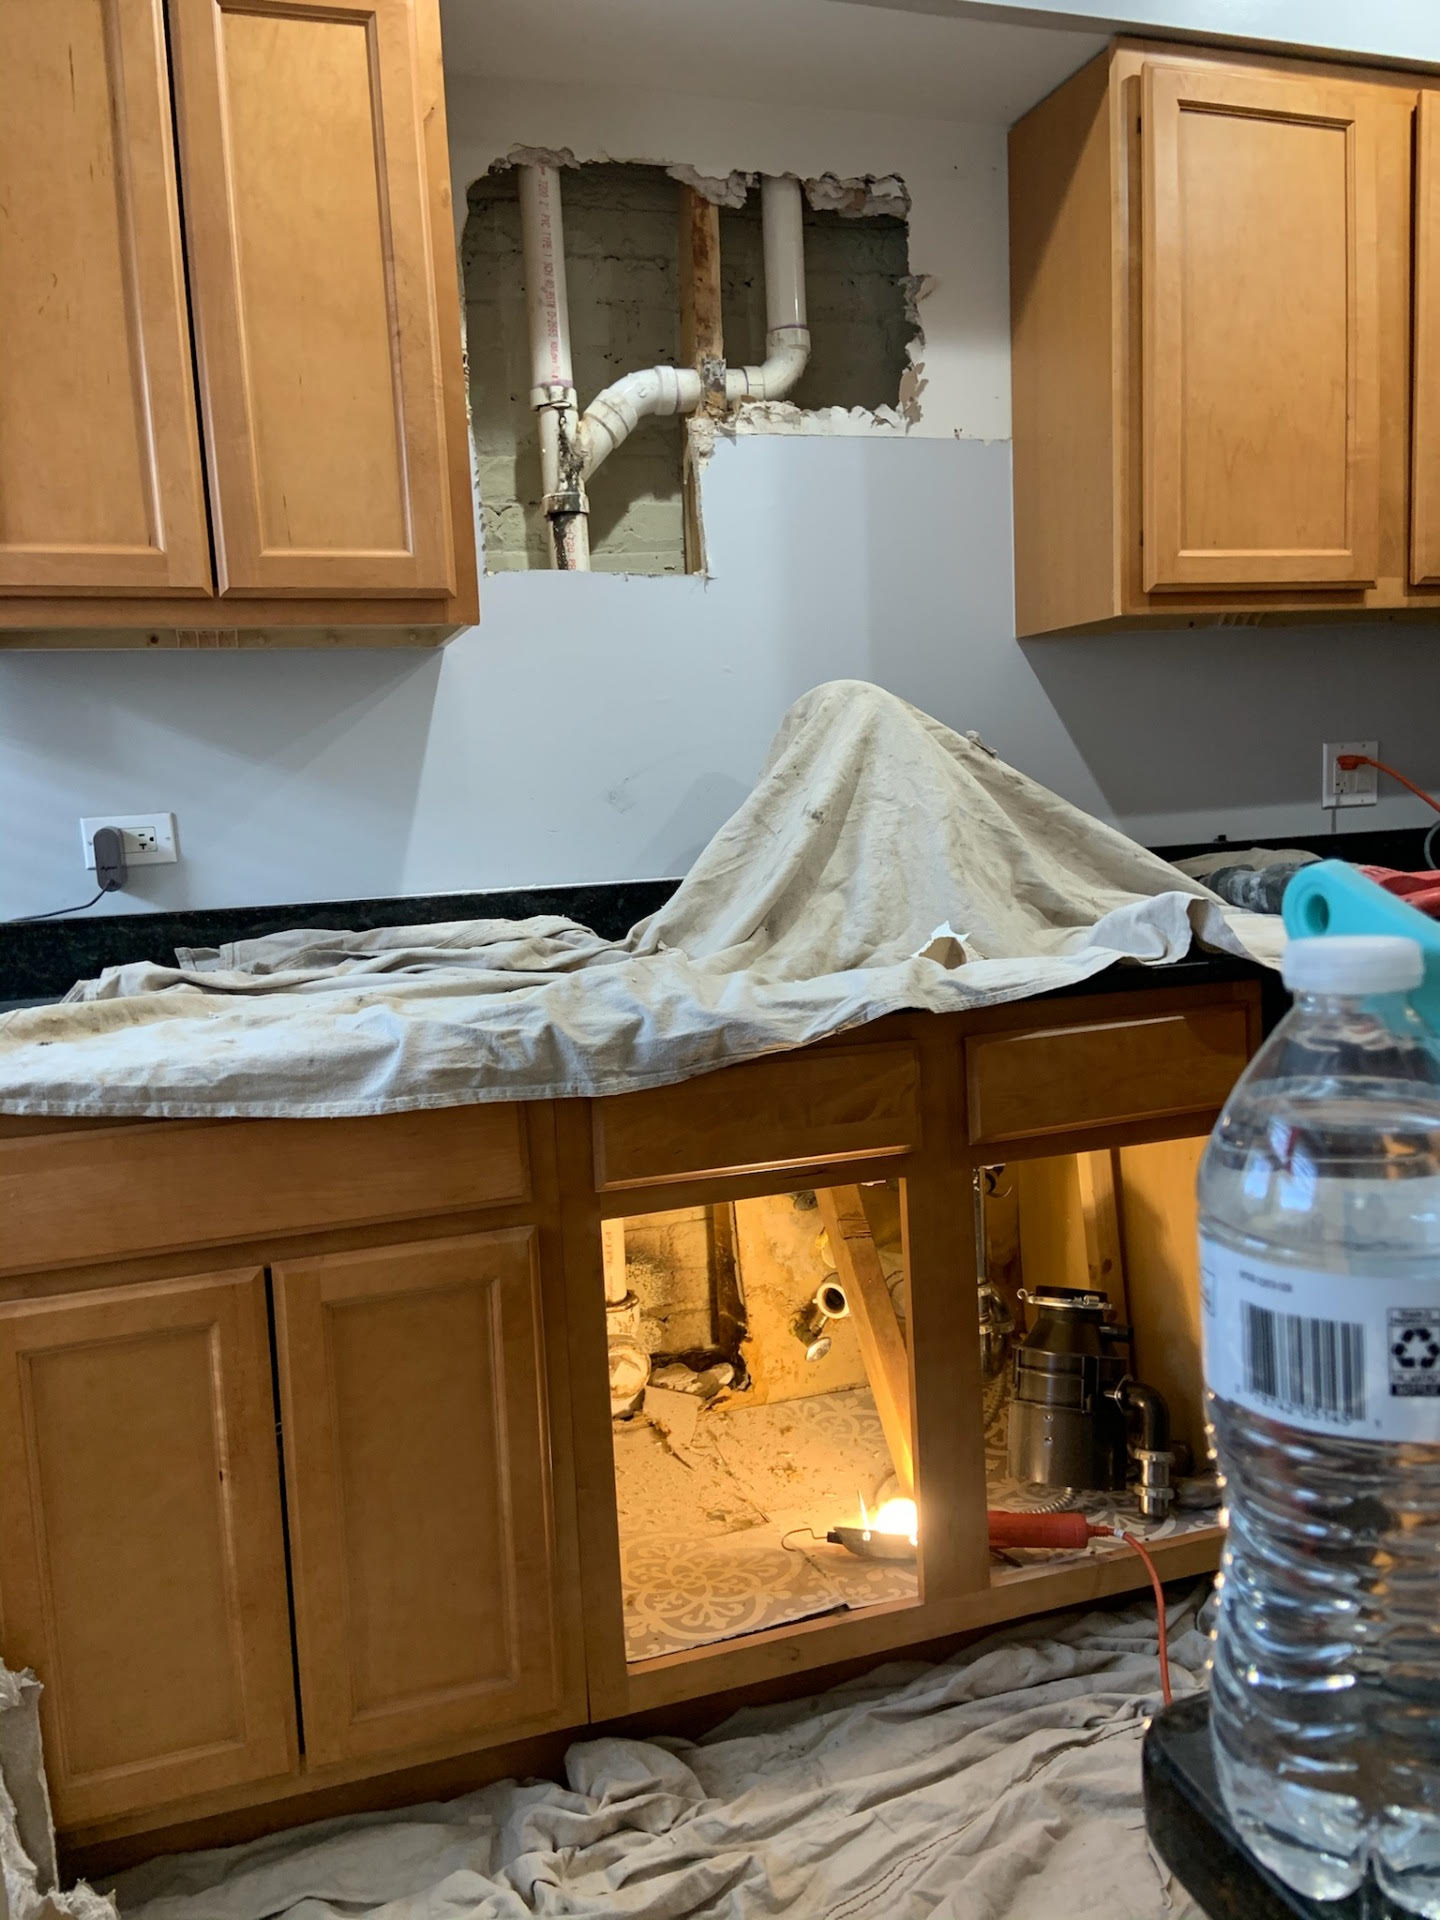
Determine how deep the damage goes. If the damage is superficial, often a simple repair can restore your cabinet’s appearance. For deeper issues, inspect the structure. Are the cabinet doors hanging unevenly or the shelves sagging? This could mean the water has affected the wood’s integrity. Consider the duration of exposure. Cabinets exposed to water over a long period require more intensive repair. Ask yourself: is the damage affecting the functionality of your cabinets? If yes, it’s time to roll up your sleeves and start repairing. Understanding these aspects not only helps in repairing but also in preventing future mishaps. Remember, early detection is your best defense. Keep your kitchen safe and beautiful by staying vigilant.Preparation Steps
Start by removing all items from the cabinets to access the damaged areas. Dry the cabinets thoroughly using towels and fans. Sand the affected surfaces to remove damaged wood layers and prepare for repairs.
Repairing water-damaged kitchen cabinets can seem like a daunting task, but with the right preparation steps, you can tackle this project with confidence. Before diving into repairs, it’s important to set the stage for success by gathering the necessary materials and ensuring safety precautions are in place. These preparation steps will save you time and frustration, and help you achieve the best results for your kitchen cabinets.Gathering Materials
First things first, you need to gather all the materials you’ll need for the repair. This might include sandpaper, wood filler, a putty knife, paint or stain, sealant, and a few clean cloths. Having everything on hand means you won’t have to pause the project to run to the store, saving you both time and hassle. Think about the tools too. A screwdriver, drill, and sander might come in handy. You might even find some of these items already in your toolbox, reducing costs. Check the condition of the materials—old or damaged tools can complicate the job.Safety Precautions
Safety should be your priority. Working on kitchen cabinets involves chemicals and tools that can be hazardous if not handled properly. Make sure you have protective gear like gloves and goggles. Ventilate the area well, especially if you’re using strong adhesives or paints. Have you ever found yourself coughing from paint fumes? An open window or fan can prevent that discomfort. If you have kids or pets, consider their safety too. Keep them away from the workspace and store materials out of reach. Preparation is key to ensuring your repair project goes smoothly. Are you ready to transform your water-damaged cabinets into something you can be proud of? With the right materials and safety measures, you’re well on your way to achieving a successful repair.Drying And Cleaning
Dealing with water damage in kitchen cabinets can be challenging. Drying and cleaning are essential steps to restore their functionality and appearance. Proper drying prevents mold growth and structural issues. Cleaning ensures the cabinets are free from stains and odors. Let’s explore effective techniques for both.
Effective Drying Techniques
Start by removing all items from the cabinets. Open the cabinet doors to allow airflow. Use towels to blot excess moisture from surfaces. Place a fan nearby to circulate air. A dehumidifier can speed up drying. Avoid direct sunlight, which may warp the wood. Check for dryness by touching the surfaces. Ensure no dampness remains before proceeding to cleaning.
Cleaning The Cabinets
Once dry, prepare a gentle cleaning solution. Mix warm water with mild dish soap. Avoid harsh chemicals that could damage the finish. Use a soft cloth to wipe down all surfaces. Pay special attention to corners and edges. If stains persist, apply a baking soda paste. Let it sit, then wipe it off with a clean cloth. Rinse with plain water to remove any residue. Dry the cabinets thoroughly with a towel.
Repair Techniques
Repairing water-damaged kitchen cabinets can seem like a daunting task. However, armed with the right techniques, you can restore your cabinets to their former glory. The focus here is on practical steps that anyone can follow, even if you’re not a seasoned DIYer. Let’s dive into the repair techniques.
Replacing Damaged Parts
When water wreaks havoc on your cabinets, sometimes the best solution is to replace the affected parts. Start by identifying the sections that are beyond repair. This might be a door, a shelf, or even the entire cabinet base.
Remove the damaged parts carefully using a screwdriver or drill. Measure the parts accurately so that replacements fit perfectly. Many hardware stores offer pre-cut cabinet parts, or you can have them custom-made to match your existing cabinetry.
Have you ever considered how replacing a single door can transform the entire look of your kitchen? It’s often these small changes that make the biggest difference. Once you’ve fitted the new parts, secure them with screws and ensure they align correctly with the rest of the cabinet.
Fixing Surface Damage
Surface damage like stains or peeling can be tackled without replacing the entire cabinet. Start by sanding the affected area with fine-grit sandpaper. This removes any peeling paint or finish and smooths out the surface.
Next, apply a wood filler to any cracks or dents. Let it dry completely before sanding it down to ensure a smooth finish. Choose a paint or stain that matches your cabinet’s original color, and apply a fresh coat.
Have you noticed how a fresh coat of paint can completely change the vibe of your kitchen? It’s a simple yet effective way to breathe new life into tired cabinets. Once the paint is dry, apply a sealant to protect your work from future water damage.
Have you ever tackled a project like this and felt overwhelmed? Remember, taking it step by step makes the task manageable. What techniques have you used in your own kitchen repairs? Your insights could be invaluable to someone else facing a similar challenge.
Refinishing Cabinets
Fixing water damage on kitchen cabinets involves simple steps. Start by drying the area completely. Sand the damaged surfaces gently. Apply wood filler to cracks and sand again for a smooth finish. Finally, paint or stain to match existing cabinets.
This refreshes your kitchen’s look without a full replacement.
Refinishing your water-damaged kitchen cabinets can breathe new life into them. It’s a cost-effective way to restore their beauty. This process involves removing the old finish and applying a new one. It requires patience and attention to detail. But the results are worth the effort.Sanding And Smoothing
Start by sanding the cabinet surfaces. Use medium-grit sandpaper for this task. This removes the old finish and smooths out imperfections. Ensure you sand in the direction of the wood grain. It prevents scratches and ensures an even surface. Once done, switch to fine-grit sandpaper. This step creates a smooth finish ready for the new application. Remove all dust with a damp cloth. Dust can ruin the new finish.Applying New Finish
Select a finish that suits your kitchen’s style. Use a brush or cloth to apply the finish. Apply thin, even coats for the best results. Allow each coat to dry completely before adding the next. This ensures a smooth and durable finish. Apply at least two to three coats. It enhances the durability and appearance of the cabinets. Let the final coat cure completely before using the cabinets. This ensures the finish lasts longer. `
Credit: www.youtube.com
Preventative Measures
Kitchen cabinets face constant threats from water damage. Even small spills and humidity can cause harm over time. Preventative measures are crucial to maintain their condition. By taking proactive steps, you can extend the lifespan of your cabinets.
Protecting Against Future Damage
Seal your cabinets with a water-resistant finish. This adds a protective layer. Use mats or liners inside cabinets. They catch spills and prevent seepage. Install exhaust fans in the kitchen. This reduces humidity levels effectively. Keep cabinet doors closed while cooking. It minimizes exposure to steam.
Regular Maintenance Tips
Inspect your cabinets monthly for signs of water damage. Look for discoloration or warping. Wipe cabinet surfaces with a dry cloth after use. This removes moisture immediately. Tighten screws and hinges regularly. Loose parts can lead to gaps where water enters. Use mild cleaning agents only. Harsh chemicals can weaken cabinet materials over time.
Credit: chicagohandyman.net
Frequently Asked Questions
What Causes Water Damage In Kitchen Cabinets?
Water leaks, high humidity, or spills can cause water damage. Check pipes and seals regularly to prevent this.
How Can I Dry Wet Cabinets Quickly?
Use fans or a dehumidifier to dry cabinets. Keep windows open for airflow. Remove excess water immediately.
Can I Repair Warped Cabinet Doors?
Yes, you can repair warped doors. Use clamps to reshape them. Replace severely damaged doors if needed.
What Materials Help Prevent Future Water Damage?
Water-resistant materials like marine plywood or laminate are good choices. Seal edges and surfaces for added protection.
How Do I Clean Mold From Cabinets?
Use vinegar or mild detergent to clean mold. Dry thoroughly after cleaning. Ensure proper ventilation to prevent mold growth.
Conclusion
Fixing water damaged kitchen cabinets isn’t too hard. Start by assessing the damage. Remove any affected parts carefully. Dry everything thoroughly to prevent mold. Use wood filler to fix small gaps. Sand and repaint for a fresh look. Protect them from future water damage.
Regular maintenance helps keep them in good shape. You can save money by doing it yourself. Just follow these steps patiently. Your kitchen will look great again. Remember, a little effort goes a long way. Keep your cabinets dry to avoid future problems.
Happy repairing!