Are the worn spots on your kitchen cabinets driving you crazy? You’re not alone.
Many homeowners find themselves frustrated when their once pristine cabinets start showing signs of wear and tear. But don’t worry, you’re in the right place. Imagine stepping into your kitchen and seeing cabinets that look as good as new—no more unsightly patches or faded surfaces.
This guide will show you how to breathe new life into your kitchen cabinets with simple, effective solutions. You’ll discover easy-to-follow steps that can make a significant difference in your kitchen’s appearance, boosting both its aesthetic and your mood. Get ready to transform those tired cabinets and fall in love with your kitchen all over again. Dive in to find out how!

Credit: www.pinterest.com
Identifying Worn Spots
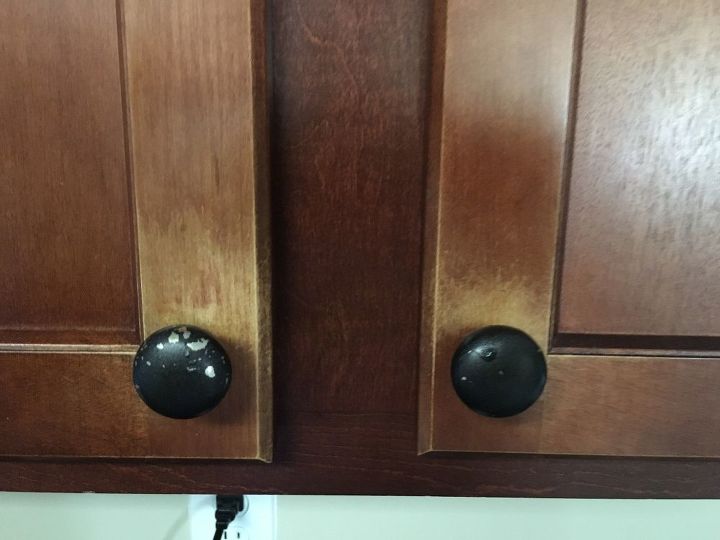
Kitchen cabinets can show signs of wear over time. Identifying these spots early helps maintain their appearance. Understanding worn spots can save you time and money. Let’s explore the signs and what to look for.
Common Signs Of Wear
Worn spots on cabinets may appear as faded areas. You might notice scratches or peeling. These signs often occur around handles or edges. Check for discoloration or dull patches. These are telltale indicators of wear.
Materials And Finish Types
Cabinet materials vary and affect wear patterns. Wood cabinets show scratches easily. Laminate finishes might peel or bubble. Painted surfaces can chip over time. Knowing your cabinet material helps in identifying wear. Each finish type requires different care.

Credit: www.reddit.com
Preparing The Cabinets
Preparing the cabinets is a crucial step in fixing worn spots. Proper preparation ensures a smooth and lasting finish. It involves cleaning and securing the work area. Done right, this sets the stage for a successful restoration. Let’s dive into the essential steps for preparing your kitchen cabinets.
Cleaning Techniques
Begin with a thorough cleaning of the cabinet surfaces. Use a mild detergent mixed with warm water. This removes grease and grime effectively. Apply the solution with a soft cloth or sponge. Ensure you reach all corners and edges. For stubborn stains, consider a specialized cleaner. Avoid abrasive scrubbers to prevent scratches. Rinse the cabinets with clean water. Dry them thoroughly using a lint-free towel.
Safety Precautions
Safety is paramount during the preparation process. Wear gloves to protect your hands from chemicals. Use a mask if working with strong cleaners. Ensure good ventilation in the kitchen. This minimizes exposure to fumes. Keep cleaning materials away from flames. Follow manufacturer’s instructions for each product used. Always prioritize safety while preparing your cabinets.
Choosing Repair Materials
Choosing the right repair materials can make all the difference when it comes to fixing worn spots on your kitchen cabinets. Whether you’re dealing with small scratches or larger patches of damage, the material you select will determine both the durability and appearance of the repair. Ever tried using wood filler that didn’t match the cabinet color? I have, and it wasn’t pretty. That’s why understanding your options is crucial.
Wood Fillers And Putties
Wood fillers and putties are your go-to materials for filling gaps and scratches in wooden cabinets. These products are perfect for minor repairs and can blend seamlessly if chosen correctly. If you’re patching up a small scratch, a wood filler might be sufficient. Remember, not all fillers are created equal. Some are specifically designed for interior use and can be sanded smoothly, while others might be better suited for outdoor repairs.
Look for options that are stainable and paintable. This gives you the flexibility to match the repair to the existing cabinet color. Ever tried using a non-stainable filler on a stained cabinet? You end up with an unsightly patch that sticks out like a sore thumb. Consider the color and texture of your cabinets when selecting your filler.
Paints And Stains
Once you’ve filled the worn spot, it’s time to address the color. Paints and stains are crucial for a seamless finish. If your cabinets are painted, choose a matching paint to cover the filler. You’ll want a paint that matches in both color and sheen to ensure a flawless look. Have you ever thought about how a glossy finish can highlight imperfections while a matte finish might conceal them?
Stains offer a different approach for wooden cabinets. They can deepen the color and enhance the grain, giving your cabinets a refreshed look. When using stains, test a small area first. This lets you see how the stain interacts with the wood and filler. Don’t rush this step; patience pays off with a stunning finish that looks as good as new.
Choosing the right materials requires a bit of thought and a keen eye for detail. What’s your biggest concern when selecting repair materials? Is it the color match, the durability, or something else entirely? Identifying your priorities will guide you to the best choice.
Repair Process
Refresh your kitchen cabinets by fixing worn spots with a simple repair process. Sand the affected areas gently, then apply a matching wood stain. Finish with a protective clear coat for lasting shine.
Repairing worn spots on kitchen cabinets can breathe new life into your cooking space without a full remodel. A well-executed repair process not only enhances the aesthetics but also extends the lifespan of your cabinets. Whether you’re tackling this task for the first time or looking to refine your technique, understanding the process can make all the difference.
Filling And Sanding
Start by cleaning the worn areas with a damp cloth to remove dust and grease. Examine the spots carefully—do they need a filler? Using a wood filler, apply it generously over the worn-out areas. Ensure it’s slightly overfilled so it can be sanded down smoothly later. Once the filler dries completely, usually within a few hours, sand the area using fine-grit sandpaper. Sanding helps create a smooth, even surface for the finish. Be gentle but thorough. You want a smooth surface without removing too much of the surrounding material.
Applying New Finish
Before applying the new finish, ensure your cabinets are dust-free. A tack cloth works wonders for this. Choose a finish that matches your existing cabinet color or opt for a fresh look. Have you considered a semi-gloss finish for added durability? Use a high-quality brush or a cloth to apply the new finish. Start with a thin layer and allow it to dry completely. You might need multiple coats to achieve your desired look. Patience is key here, so don’t rush the drying process. After the final coat, let the cabinets dry for at least 24 hours before using them again. This allows the finish to cure properly, ensuring lasting results. Doesn’t it feel gratifying to see your cabinets looking fresh and new? This repair process might inspire you to tackle other home improvement projects.
Maintenance Tips
Maintaining kitchen cabinets can extend their life and look. Regular care prevents worn spots and keeps them fresh. Simple maintenance steps ensure your cabinets stay in top shape.
Regular Cleaning
Wipe cabinets weekly with a soft, damp cloth. This removes dust and grime. Use mild soap for sticky spots. Avoid harsh chemicals, which can damage the finish. Dry with a clean towel to prevent moisture damage. Regular cleaning keeps cabinets looking new.
Preventive Measures
Protect cabinets from direct sunlight. Sunlight can fade and warp wood. Install blinds or curtains in sunny kitchens. Use liners for shelves and drawers. Liners protect surfaces from spills and stains. Avoid hanging wet towels on cabinet doors. Moisture can cause wood to swell and warp. Handle cabinets gently. Soft-close hinges prevent slamming and reduce wear. Inspect hinges and knobs regularly. Tighten loose parts to avoid further damage.
Credit: www.hometalk.com
Frequently Asked Questions
How Can I Identify Worn Spots On Cabinets?
Look for faded colors, scratches, or peeling paint. These are signs of worn spots.
What Materials Are Best For Cabinet Repair?
Use wood filler, sandpaper, and matching paint. They work well to fix worn spots.
Can I Fix Worn Spots Myself?
Yes, it’s easy with basic tools. Follow simple steps for a neat repair.
How Long Does Cabinet Repair Take?
It depends on damage. Small repairs might take a few hours.
Do I Need To Repaint The Entire Cabinet?
No, just repaint the affected spots. Match the color for a seamless look.
Conclusion
Restoring worn kitchen cabinets is easier than you might think. Basic tools and a little effort can make them look new again. Start by cleaning the surface. Next, sand the worn spots gently. Apply a matching stain or paint. Finish with a clear protective coat for lasting shine.
Regular maintenance helps prevent future wear. A small task with big impact. Your kitchen will feel refreshed and inviting. Enjoy cooking in your newly polished space. With these steps, your cabinets will stand the test of time. A rewarding project to enhance your home.