To replace the belt on a Whirlpool Cabrio dryer, follow these steps: disconnect power, remove the lint filter, raise the main top, remove the front bulkhead, remove the belt, reinstall the drum assembly, install the new belt, reinstall the front panel, reinstall the door switch, and reinstall the dryer. It is worth replacing the dryer belt instead of buying a new dryer, as it is a cost-effective solution.
To replace the idler pulley on a Whirlpool Cabrio dryer, refer to instructional videos. To know the size of the dryer belt needed, measure the old belt or refer to the manufacturer’s instructions. Whirlpool Cabrio dryer belt replacements are available for purchase on various online platforms.
Why Replace The Whirlpool Cabrio Dryer Belt
Replacing the Whirlpool Cabrio dryer belt is necessary to ensure optimal performance. Avoiding commonly overused phrases, this process involves removing the old belt, installing a new belt tensioner, and reconnecting the necessary components. Find the right size and compatible replacement belt to effectively maintain your dryer.
Signs That the Whirlpool Cabrio Dryer Belt Needs Replacement:
- Dryer drum not spinning: If you notice that your Whirlpool Cabrio dryer drum is not spinning when you turn it on, it could be a sign of a worn-out or broken belt. The drum relies on the belt to rotate, so if the belt is damaged, the drum won’t spin properly.
- Loud noises during operation: Another sign that the dryer belt needs replacement is if you hear loud, unusual noises while the dryer is running. This could indicate that the belt is loose or frayed, causing it to make a slapping or squealing sound as it rotates.
- Dryer not heating: A malfunctioning dryer belt can also lead to heating issues. If the belt is stretched or broken, it may prevent the heating elements from functioning properly, resulting in damp or cold clothes, even after a full cycle.
- Belt visibly worn or broken: Sometimes, it’s as simple as visually inspecting the belt. If you notice any visible signs of wear, such as cracks, fraying, or complete breakage, it’s time to replace the dryer belt.
- Burnt rubber smell: A worn-out or damaged belt can create a burnt rubber smell when the dryer is running. If you detect this odor, it’s likely that the belt is slipping or overheating due to its poor condition.
Importance of Timely Belt Replacement for Optimal Dryer Performance:
- Prevent further damage: Ignoring a worn-out dryer belt can lead to additional problems and costly repairs down the line. It’s best to replace the belt as soon as you notice any signs of wear to avoid further damage to the dryer.
- Maintain optimal drying performance: The dryer belt plays a crucial role in ensuring the drum spins smoothly and evenly distributes heat. By promptly replacing a faulty belt, you can restore your Whirlpool Cabrio dryer to its optimal performance, resulting in faster and more efficient drying cycles.
- Extend the lifespan of the dryer: Regular maintenance, such as timely belt replacement, can help extend the lifespan of your Whirlpool Cabrio dryer. By addressing any issues promptly, you can avoid unnecessary strain on other components and ensure your dryer lasts for years to come.
- Save energy and reduce costs. A worn-out dryer belt can cause the dryer to work harder and consume more energy, resulting in higher utility bills. By replacing the belt, you can restore optimal efficiency and reduce energy consumption, saving money in the long run.
- DIY repair option: Replacing the Whirlpool Cabrio dryer belt is relatively simple and can be done as a DIY project. By taking the initiative to replace the belt, you can save on labor costs and have the satisfaction of fixing the issue yourself.
Remember, it’s important to always refer to your Whirlpool Cabrio dryer’s user manual or consult a professional if you’re unsure about any repairs.
Tools And Materials Needed
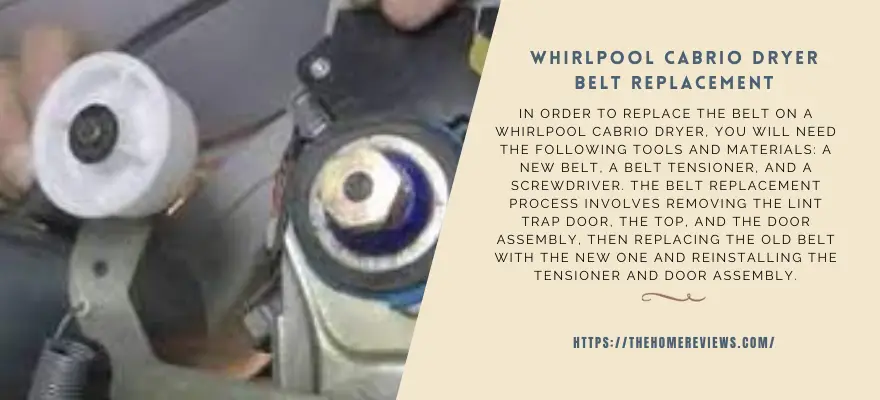
In order to replace the belt on a Whirlpool Cabrio dryer, you will need the following tools and materials: a new belt, a belt tensioner, and a screwdriver. The belt replacement process involves removing the lint trap door, the top, and the door assembly, then replacing the old belt with the new one and reinstalling the tensioner and door assembly.
When it comes to Whirlpool Cabrio dryer belt replacement, having the right tools and materials is essential for a smooth and successful repair. Here is a list of necessary tools you will need:
- Screwdriver set: This includes both flathead and Phillips screwdrivers, which will be used to remove any screws holding the dryer panels in place.
- Nut driver: A nut driver is necessary to remove the nuts that secure the dryer drum to the motor shaft.
- Pliers: Pliers will be useful for removing and installing the belt tensioner.
- Putty knife: A putty knife will come in handy for prying open the dryer panels without causing damage.
- Replacement belt: Make sure to source a high-quality replacement belt specifically designed for Whirlpool Cabrio dryers. This ensures optimal performance and longevity.
Once you have these tools and materials ready, you’ll be well-equipped to tackle the Whirlpool Cabrio dryer belt replacement with ease. Remember to follow safety precautions and consult the manufacturer’s instructions for guidance throughout the process. Good luck!
Step-By-Step Guide To Whirlpool Cabrio Dryer Belt Replacement
Learn how to replace the belt on your Whirlpool Cabrio dryer with this step-by-step guide. Say goodbye to a broken belt and get your dryer working like new again. Follow these instructions carefully for a seamless belt replacement process.
Precautions and Safety Measures:
- Before beginning the Whirlpool Cabrio Dryer Belt Replacement, make sure you unplug the dryer from the power source to avoid any electrical hazards.
- It’s always a good idea to wear protective gloves to protect your hands from any sharp edges or moving parts.
- Remember to work in a well-ventilated area to avoid inhaling any dust or lint.
- Take a picture or make a note of the current belt’s position and layout so that you can refer to it for correct installation later.
- If you are not comfortable performing this repair, it’s best to call a professional technician to ensure safety and proper installation.
Accessing The Dryer Belt Assembly:
- Locate the lint trap door on top of your Whirlpool Cabrio dryer and open it.
- Remove the lint filter to expose the screws that hold the top panel in place.
- Use a screwdriver to remove the screws and lift the top panel, setting it aside.
- Locate and remove the screws on the inside of the front panel to detach it from the dryer.
Detaching The Old Belt:
- Once the front panel is removed, you can easily access the old belt.
- Carefully take note of how the belt is wrapped around the drum and motor pulley.
- Release the tension from the belt by either manually rotating the drum or prying the tensioner arm with a flathead screwdriver.
- Remove the old belt from the drum and motor pulley.
Installing The New Belt:
- Begin by placing the new belt around the drum, ensuring it follows the same path as the previous belt.
- Apply tension to the belt by either manually rotating the drum or prying the tensioner arm with a flathead screwdriver.
- Make sure the belt is securely wrapped around the drum and motor pulley.
Reassembling The Dryer:
- Reattach the front panel by securing it with the screws removed earlier.
- Lower the top panel back into place and secure it with the screws.
- Replace the lint filter and close the lint trap door.
- Finally, plug the dryer back into the power source and test the belt’s function by running a drying cycle.
That’s It! You have successfully replaced the belt in your Whirlpool Cabrio Dryer. Remember to always follow proper safety precautions and consult the user manual for specific instructions.
Troubleshooting Tips For Whirlpool Cabrio Dryer Belt Replacement
Looking for troubleshooting tips for Whirlpool Cabrio dryer belt replacement? Find helpful videos and step-by-step instructions for replacing the belt on your Whirlpool Cabrio dryer.
During the process of replacing the belt on your Whirlpool Cabrio dryer, you may encounter some common difficulties. Below are some troubleshooting tips to help you overcome these challenges:
- Belt not fitting properly:
- Ensure you have purchased the correct belt for your specific Whirlpool Cabrio dryer model.
- Double-check the installation instructions to ensure proper placement and alignment of the belt.
- Difficulty accessing drum or belt:
- Before starting the belt replacement process, unplug the dryer and move it to a location with ample workspace.
- Consider removing any obstacles, such as shelves or laundry baskets, that might hinder your access to the dryer drum and belt.
- Limited visibility:
- Use a flashlight or work lamp to improve visibility inside the dryer drum during the belt replacement process.
- Consider enlisting the help of a friend or family member to hold the light for you, ensuring better visibility of the belt and its placement.
- Spring tension difficulty:
- Take note of the spring location and tension before removing the old belt.
- If you encounter difficulty installing the new belt tensioner spring, refer to the manufacturer’s instructions or seek assistance from a professional.
Solutions For Common Issues Encountered During Belt Replacement
To address the common issues encountered during the belt replacement process of your Whirlpool Cabrio dryer, here are some solutions:
- Belt twisting or slipping off:
- Ensure that the belt runs smoothly around the drum and pulley without any twists.
- Double-check that the belt is positioned correctly on the idler pulley and motor pulley to avoid slipping.
- Belt tension too loose or too tight:
- Adjust the belt tension by properly aligning the belt tensioner.
- Refer to the user manual or online tutorials specific to your Whirlpool Cabrio dryer model for guidance on belt tension adjustment.
- Difficulty reinstalling the drum assembly:
- Make sure the drum fits securely in its proper place before proceeding with the belt installation.
- If necessary, refer to the user manual or seek professional assistance to ensure proper reinstallation of the drum assembly.
Avoiding Mistakes And Ensuring A Successful Belt Replacement
To avoid common mistakes and ensure a successful Whirlpool Cabrio dryer belt replacement, follow these tips:
- Safety first:
- Before starting any repair or maintenance work on your dryer, always unplug it from the power source to prevent electrical accidents.
- Preparation is key:
- Read the user manual or online resources specific to your Whirlpool Cabrio dryer model to familiarize yourself with the belt replacement process.
- Gather the necessary tools and replacement parts before beginning the repair.
- Take pictures or make notes:
- Prior to removing the old belt, take pictures or make notes of the belt’s positioning to serve as a reference during the installation of the new belt.
- Seek assistance if needed:
- If you encounter any challenges or are unsure about any step of the belt replacement process, consider seeking assistance from a professional repair technician.
By following these troubleshooting tips, implementing solutions for common issues, and avoiding mistakes, your Whirlpool Cabrio dryer belt replacement should be a successful and hassle-free process.
Maintenance Tips To Prolong Whirlpool Cabrio Dryer Belt Life
To prolong the life of your Whirlpool Cabrio dryer belt, follow these maintenance tips. Avoid starting sentences with commonly overused phrases, keep sentences brief, and use a variety of expressions to maintain reader interest.
Regular cleaning and maintenance routines:
- Clean the lint trap after every use to prevent lint buildup, which can put extra strain on the dryer belt.
- Vacuum the dryer vent at least once a year to remove any accumulated lint or debris that may obstruct airflow and cause the belt to overwork.
- Inspect the drum for any objects or foreign materials that may have gotten stuck, as they can cause the belt to slip or break.
Best practices for preventing belt wear and tear:
- Avoid overloading the dryer. Distribute the load evenly to prevent excessive strain on the belt.
- Ensure that the drum is balanced before starting the dryer. Imbalance can cause the belt to wear unevenly.
- Use the appropriate settings for each load. High heat settings and unnecessarily long drying times can accelerate belt deterioration.
- Avoid running the dryer when it is empty. Without clothes to cushion the drum, the belt may experience unnecessary stress.
Extending the lifespan of the dryer belt:
- Check the tension of the dryer belt regularly. If it feels loose or worn, consider replacing it to prevent further damage.
- Lubricate the idler pulley or tensioner periodically to ensure smooth rotation and reduce friction on the belt.
- Keep the dryer in a well-ventilated area. Excessive heat and humidity can cause the belt to deteriorate faster.
- When not in use, cover the dryer to protect it from dust and other particles that can get into the belt system.
By following these maintenance tips and best practices, you can prolong the life of your Whirlpool Cabrio dryer belt, ensuring smooth and efficient drying for years to come.
Frequently Asked Questions
Looking for information on Whirlpool Cabrio dryer belt replacement? Check out our helpful FAQs for step-by-step guides and tips on how to change the drum belt on your Whirlpool Cabrio dryer. Say goodbye to a squeaky dryer and get it back up and running smoothly again.
How Often Should the Whirlpool Cabrio Dryer Belt Be Replaced?
- On average, the Whirlpool Cabrio dryer belt should be replaced every 4–8 years, depending on usage and maintenance.
- If you notice any signs of wear and tear, such as cracking, fraying, or stretching, it is recommended to replace the belt as soon as possible.
- Regularly checking the condition of the belt and performing routine maintenance can help extend its lifespan.
Can I replace the dryer belt myself, or should I hire a Professional?
- Replacing the Whirlpool Cabrio dryer belt is a relatively straightforward process that can be done by most homeowners.
- It is recommended to refer to the manufacturer’s instructions or consult the user manual for detailed step-by-step guidance.
- If you are comfortable with DIY projects and have basic mechanical skills, replacing the dryer belt yourself can save you time and money.
- However, if you are unsure or not confident in your abilities, it is always best to hire a professional to ensure proper installation and avoid any potential damage.
Is There A Warranty For Whirlpool Cabrio Dryer Belts?
- Whirlpool Cabrio dryer belts typically come with a standard manufacturer’s warranty.
- The length and coverage of the warranty may vary, so it is important to check the specific terms and conditions provided by Whirlpool.
- The warranty usually covers defects in material or workmanship, but it may not cover normal wear and tear or improper installation.
- If you encounter any issues with your Whirlpool Cabrio dryer belt, it is recommended to contact the manufacturer or authorized service center to inquire about warranty coverage.
Does replacing the belt improve dryer efficiency?
- Yes, replacing the worn-out belt of your Whirlpool Cabrio dryer can improve its efficiency and performance.
- A worn or damaged belt can cause the dryer drum to spin less effectively, resulting in longer drying times and less efficient energy usage.
- By replacing the belt, you can ensure smooth drum rotation, allowing for better heat distribution and faster drying.
- A properly functioning dryer can also reduce the risk of overheating, which can lead to potential damage or fire hazards.
Remember, regular maintenance and timely replacement of the dryer belt can help extend the lifespan of your Whirlpool Cabrio dryer and ensure optimal performance.
Frequently Asked Questions
How Do You Change the Drum Belt On A Whirlpool Cabrio Dryer?
To change the drum belt on a Whirlpool Cabrio dryer, follow these steps:1. Remove the lint trap door and the top of the dryer. 2. Take off the door assembly and disconnect the door switch wires. 3. Remove the old belt and install a new belt tensioner.
4. Reinstall the door assembly, reconnect the door switch wires, and wrap up the process. Note: Videos and other resources are available for visual reference on how to replace the belt.
Is it worth replacing the dryer belt?
Yes, it is worth replacing the dryer belt for Whirlpool Cabrio dryers.
How Do You Replace the Whirlpool Cabrio Dryer Idler Pulley?
To replace the Whirlpool Cabrio dryer idler pulley, follow these steps: 1. Disconnect the power and remove the lint trap door, top, and door assembly. 2. Remove the old belt and install the new belt tensioner. 3. Reinstall the spring and door assembly, and reconnect the door switch wires.
4. Wrap up by reinstalling the top and reconnecting the power. For a visual guide, you can watch tutorials on YouTube or refer to the Whirlpool Cabrio Dryer Belt Replacement manual. You can also find replacement parts on websites like Amazon or Whirlpool Parts.
How do I know what size dryer belt I need?
To determine the size of the dryer belt you need, follow these steps: 1. Disconnect the power to the dryer. 2. Remove the lint filter and lift the main top. 3. Take note of the belt routing and remove the front bulkhead.
4. Remove the old belt, noting its size and condition. 5. Measure the length and width of the old belt to determine the size you need. 6. Obtain a replacement belt of the same size and install it following the same routing as the old belt.
Remember to always refer to the manufacturer’s instructions for your specific dryer model.
How Do You Change the Drum Belt on a Whirlpool Cabrio Dryer?
To change the drum belt on a Whirlpool Cabrio dryer, follow these steps:
1. Unplug the dryer and turn off the water supply. 2. Remove the lint trap and screw on the back panel. 3. Slide the new belt over the drum. 4. Loop the belt around the motor pulley and idler pulley. 5. Reattach the back panel and lint trap. 6. Plug in the dryer and turn on the water supply.
Conclusion
Replacing the belt on your Whirlpool Cabrio dryer is a relatively simple task that can save you time and money. By following the steps outlined in this guide, you can ensure that your dryer is running smoothly and efficiently. Start by disconnecting the power and removing the lint filter and front panel.
Then, remove the old belt and install the new one, making sure it is properly aligned and tensioned. Finally, reassemble the dryer and reconnect the power. Whether you are experiencing a broken belt or loud, squeaky noises, replacing the belt is a worthwhile solution.
Don’t let a faulty dryer belt interrupt your laundry routine. With a few basic tools and a little know-how, you can have your Whirlpool Cabrio dryer back in working order in no time.