Using Rit dye on leather is not recommended, as it is designed for canvas and silk materials. The only exception is for Uggs® Sheepskin boots.
If dyeing leather, it is best to use an alcohol-based dye for optimal penetration. However, dye transfer from clothing can cause discolouration on light leather colours, and leather sealant should be used to prevent rubbing off. Shibori, an ancient Japanese dyeing technique, can also be used on leather with Rit dye.
We will explore the pros and cons of using Rit dye on leather, the difference between alcohol and water-based leather dye, and how to prevent dye transfer stains on leather. We will also provide tips on how to dye leather with Rit brand dye.
Choosing The Right Dye For Leather
When it comes to dyeing leather, choosing the right dye is crucial for achieving the desired results. One popular dye choice for leather is Rit Dye, known for its vibrant colors and ease of use. In this article, we will explore the types of leather dyes available, and the pros and cons of using Rit Dye on leather.
Types Of Leather Dyes
There are two main types of leather dyes: alcohol-based dyes and water-based dyes. Alcohol-based dyes are favored for their superior penetration of the leather, resulting in long-lasting and vibrant colors. On the other hand, water-based dyes are known for their ease of use and environmental friendliness. When choosing a dye for leather, consider the type of leather and the desired color intensity to determine the most suitable option.
Pros And Cons Of Rit Dye On Leather
Using Rit Dye on leather offers several advantages, such as a wide range of color options, affordability, and ease of application. Rit Dye is also readily available in many retail stores, making it convenient for DIY leather projects. However, it’s essential to consider the limitations of Rit Dye, including its suitability for specific leather types and the potential for color transfer. Additionally, Rit Dye may require multiple coats to achieve the desired color intensity, and a sealant is recommended to prevent color rub-off.
Pre-dyeing Leather Preparation
Before dyeing leather with Rit Dye, it’s crucial to prepare the leather properly. Pre-dyeing leather preparation involves cleaning the leather and assessing its condition to ensure the best results.
Cleaning The Leather
When preparing leather for dyeing, start by cleaning it thoroughly. Use a mild soap and water solution to remove any dirt, oils, or residues from the leather surface. Gently scrub the leather with a soft cloth or sponge to ensure a clean and smooth surface for the dye to adhere to.
Assessing Leather Condition
Prior to dyeing, it’s essential to assess the condition of the leather. Check for any scratches, cracks, or imperfections that may affect the dyeing process. Address any issues such as rough spots or blemishes by sanding or conditioning the leather as needed to ensure an even application of the dye.
Application Techniques For Rit Dye
Achieving the perfect dye on leather requires careful application. Use alcohol-based dye for effective penetration and prevent dye transfer by cleaning the leather thoroughly. If you want to darken the leather, rough up the dyed surface with denatured alcohol before applying a new dye.
Step-by-step Dyeing Process
To achieve the best results when dyeing leather with Rit Dye, it is important to follow a step-by-step process. Here is a simple guide to help you through the dyeing process:
- Prepare the leather: Start by cleaning the leather surface thoroughly. Use a reliable leather cleaner to remove any dirt, oils, or stains that may interfere with the dye absorption. This step ensures even color distribution.
- Test for sensitivity: Before applying the dye to the entire leather surface, it is recommended to test a small, inconspicuous area to check for any adverse reactions or color changes. This step helps avoid any unwanted surprises.
- Apply the dye: Once you have ensured the leather is clean and the dye is safe to use, you can start applying the Rit Dye. Use a clean, lint-free cloth or sponge to apply an even layer of dye to the leather. Work in small sections, making sure to cover the entire surface.
- Allow for absorption: After applying the dye, it is crucial to let it absorb into the leather. The absorption time may vary depending on the type and thickness of the leather, so be patient and allow sufficient time for the dye to penetrate the material.
- Repeat the process: For a deeper and more intense color, you may need to apply multiple coats of dye. Allow each layer to dry before applying the next one. This step helps achieve the desired color intensity.
- Seal the dye: Once you have achieved the desired color, it is essential to seal the dye to prevent it from rubbing off or fading over time. Use a leather sealant or finisher specifically designed for dyed leather to protect and preserve the color.
Tips For Even Color Distribution
To ensure even color distribution when dyeing leather with Rit Dye, consider the following tips:
- Work in a well-ventilated area: Dyeing leather can involve strong odors and fumes, so it is important to work in a well-ventilated space to avoid any discomfort.
- Use gloves: Protect your hands from the dye by wearing gloves throughout the dyeing process. This not only prevents staining but also ensures a cleaner application.
- Apply dye in layers: Instead of saturating the leather with a heavy coat of dye, it is better to apply thin, even layers. This helps achieve a more uniform color and avoids excess dye buildup.
- Blend overlapping areas: When working on larger leather surfaces or multiple pieces, make sure to blend the overlapping areas to create a seamless transition between the dyed sections.
- Avoid excessive rubbing: While applying the dye, avoid excessive rubbing or scrubbing, as it can cause the dye to streak or create uneven patches. Instead, apply gentle pressure and let the dye absorb naturally.
- Allow for drying time: After each coat of dye, allow sufficient drying time before applying the next one. This ensures proper absorption and prevents smudging or smearing of the dye.
By following these step-by-step application techniques and tips for even color distribution, you can achieve beautiful and vibrant results when dyeing leather with Rit Dye. Remember to always test the dye on a small area and work patiently to achieve the desired color intensity.
Post-dyeing Leather Care
After dyeing leather with Rit Dye, it’s crucial to follow a few care tips to maintain the color and texture. Use a reliable leather cleaner to prevent the dye from rubbing off and causing stains. Additionally, consider using a leather sealant to protect the dyed surface and ensure long-lasting results.
Sealing The Dyed Leather
Once you have successfully dyed your leather using Rit Dye, it is important to take proper care of it to ensure the longevity of the color and prevent any damage. One crucial step in post-dyeing leather care is sealing the dyed leather. Sealing the leather helps to protect it from moisture, dirt, and other external factors that can potentially fade or damage the dye.
To seal the dyed leather, you can use a leather sealant or finish. This product creates a protective barrier on the surface of the leather, preventing the dye from rubbing off or fading. It also helps to maintain the color vibrancy and enhances the overall appearance of the leather.
When applying the leather sealant, make sure to follow the manufacturer’s instructions carefully. Clean the leather surface thoroughly to remove any dirt or residue before applying the sealant. Use a soft cloth or sponge to evenly apply the sealant, making sure to cover the entire dyed area. Allow it to dry completely before using or storing the leather item.
Maintaining Dyed Leather
Proper maintenance is essential to keep your dyed leather looking its best. Here are some tips to help you maintain the color and condition of your dyed leather:
1. Keep it clean: Regularly clean your dyed leather using a mild leather cleaner or saddle soap. Avoid using harsh chemicals or abrasive materials that can damage the dye or the leather surface.
2. Avoid excessive moisture: Leather is susceptible to water damage, so it’s important to protect your dyed leather items from excessive moisture. If your leather gets wet, gently pat it dry with a soft cloth and allow it to air dry naturally. Avoid using heat sources to dry the leather, as it can cause the dye to fade or crack.
3. Protect from sunlight: Prolonged exposure to direct sunlight can cause the dye to fade and the leather to dry out. To prevent this, store your dyed leather items in a cool, dry place away from direct sunlight when not in use. If you need to display or use them in a sunny area, consider using curtains or blinds to shield them from the sun’s rays.
4. Avoid abrasive surfaces: Be cautious when placing your dyed leather items on rough or abrasive surfaces, as they can scratch or damage the dye. Use protective mats or coasters to prevent direct contact between the leather and these surfaces.
5. Regular conditioning: Conditioning your dyed leather regularly helps to keep it soft, supple, and nourished. Use a leather conditioner specifically designed for dyed leather and follow the instructions on the product label for best results.
By following these simple tips, you can ensure that your dyed leather maintains its vibrant color and remains in good condition for years to come. Proper post-dyeing leather care, including sealing and maintenance, is crucial to protect your investment and enjoy the beauty of dyed leather items.
Common Mistakes To Avoid
When dyeing leather with Rit Dye, avoid common mistakes such as using it on leather shoes, as it’s only recommended for canvas or silk shoes. Always use alcohol-based dye for leather, and be cautious about dye transfer from clothing. To prevent dye from coming off, ensure thorough cleaning and use a reliable leather cleaner.
Common Mistakes to Avoid When Dyeing Leather with Rit Dye
Dyeing leather with Rit Dye can be a great way to revamp old leather items or create new, colorful leather pieces. However, there are some common mistakes to avoid to ensure that you get the best results possible. Here are some of the most important things to keep in mind when dyeing leather with Rit Dye.
Over-dyeing Leather
Over-dyeing leather can lead to a number of problems, including uneven color and damage to the leather. It’s important to remember that leather is a natural material, and it can only absorb so much dye. Before dyeing leather with Rit Dye, be sure to test a small, inconspicuous area first to see how the leather reacts to the dye. If you’re not happy with the color after the first application, it’s better to apply a second coat rather than trying to over-dye the leather.
Using Incorrect Dye For Leather Type
Not all leather is created equal, and different types of leather require different types of dye. Using the wrong type of dye can result in uneven color, damage to the leather, and even complete color loss. Before dyeing leather with Rit Dye, be sure to check the label to ensure that it’s suitable for the type of leather you’re using. If you’re not sure what type of leather you have, it’s best to consult with a professional leatherworker or do some research to determine the best type of dye to use.
In conclusion, dyeing leather with Rit Dye can be a great way to breathe new life into old leather items or create unique, colorful leather pieces. However, it’s important to remember to avoid common mistakes like over-dyeing and using the wrong type of dye to ensure that you get the best results possible. By following these tips and taking the time to properly prepare your leather, you can achieve beautiful, long-lasting color that will stand the test of time.

Credit: www.reddit.com
Creative Ideas For Leather Dyeing
Looking for creative ideas for leather dyeing? Check out Rit Dye on Leather for unique and vibrant results. Discover how to use alcohol-based dye for better penetration and learn how to prevent dye transfer stains on leather. Don’t forget to explore Shibori with Rit for a Japanese-inspired dyeing technique.
Color Mixing For Unique Shades
Leather dyeing is an exciting and creative way to give your old leather items a new and fresh look. One of the best things about leather dyeing is that you can mix different colors to create unique shades that are not available in the market. The Rit Dye can be used to dye leather, and it comes in various colors that can be blended to create an infinite range of colors. For instance, if you mix a small amount of black with blue, you can get a beautiful navy blue color. Similarly, you can mix yellow and red to get a bright orange color.
Pattern And Design Techniques
Dyeing your leather items is not just about changing the color; it’s also about adding patterns and designs to make them look more attractive. There are several techniques that you can use to create patterns on your leather items. For example, you can use a stencil to create a specific design or use a paintbrush to create a freehand design. You can also use masking tape to create straight lines or geometric shapes. Another popular technique is to create a tie-dye effect by crumpling the leather and applying dye with a sponge or a brush.
Protecting Your Dyed Leather
Once you have dyed your leather item, it’s essential to protect it from fading or rubbing off. You can use a leather sealant or conditioner to protect the dye and prevent it from coming off. It’s also important to keep your dyed leather items away from direct sunlight and heat as these can cause the dye to fade quickly.
Overall, dyeing your leather items with Rit Dye is an excellent way to give them a new lease of life. With these creative ideas and techniques, you can create unique and beautiful leather items that are sure to turn heads. So, go ahead and unleash your creativity with Rit Dye!
Troubleshooting Dyeing Issues
Dyeing leather with Rit Dye can be a tricky process, and troubleshooting issues can be even more difficult. While Rit Dye is not recommended for leather shoes, it can be used on certain types of leather with careful preparation and multiple coats.
It’s important to use the right dye and sealant to prevent color transfer and ensure long-lasting results.
Fixing Uneven Color
If you find that the color of your leather after dyeing is uneven, there are a few steps you can take to fix the issue. First, make sure that you have thoroughly cleaned the leather before dyeing it. Any dirt or residue on the surface can affect the absorption of the dye and result in uneven color.
To fix uneven color, you can try applying additional coats of dye to the lighter areas. Make sure to apply the dye evenly and allow it to dry completely between coats. If the color still appears uneven, you can lightly sand the leather with fine-grit sandpaper to remove the excess dye from the darker areas. Be gentle when sanding to avoid damaging the leather.
Another option is to use a leather dye remover to strip the dye from the leather and start the dyeing process again. This can be useful if the uneven color is significant and cannot be easily fixed with additional coats of dye. Make sure to follow the instructions provided with the dye remover and test it on a small, inconspicuous area of the leather before applying it to the entire surface.
Addressing Dye Bleed
Dye bleed occurs when the dye transfers or seeps onto other areas of the leather, resulting in unwanted color transfer. To address this issue, there are a few steps you can take.
First, make sure that you are using a dye specifically designed for leather. Some fabric dyes may not adhere properly to leather and can easily bleed. Using a high-quality leather dye can help minimize the chances of dye bleed.
If you notice dye bleed on your leather, you can try blotting the affected area with a clean, dry cloth to absorb the excess dye. Avoid rubbing the cloth on the leather, as this can spread the dye further.
To prevent future dye bleed, you can apply a leather sealant or finisher after dyeing. This will create a protective barrier on the surface of the leather, preventing the dye from transferring onto other areas. Make sure to follow the instructions provided with the sealant and apply it evenly to the entire surface of the leather.
In conclusion, troubleshooting dyeing issues on leather, such as uneven color and dye bleed, requires proper cleaning and preparation before dyeing, as well as careful application and protection after dyeing. By following these steps, you can achieve a more successful and satisfactory dyeing result on your leather projects.

Credit: www.youtube.com
Real-life Applications And Examples
When it comes to dyeing leather, Rit Dye offers a versatile solution that can be used in a variety of real-life applications. From transforming old leather jackets to creating unique leather accessories, Rit Dye provides endless possibilities for adding color and character to your leather items.
Case Studies Of Rit Dye On Leather
Let’s take a look at some real-life case studies that showcase the effectiveness of Rit Dye on leather:
- Leather Jacket Transformation: A worn-out leather jacket can be given a new lease on life with Rit Dye. By carefully selecting the dye color and following the dyeing process, you can completely transform the look of your jacket, making it appear vibrant and stylish once again.
- Custom Leather Accessories: Rit Dye can be used to create custom leather accessories, such as belts, wallets, and handbags. By dyeing the leather in unique colors and patterns, you can design one-of-a-kind accessories that reflect your personal style.
- Reviving Vintage Leather Furniture: Vintage leather furniture often loses its original color and charm over time. Rit Dye can be used to revive the faded leather, bringing back its original beauty. Whether it’s a classic armchair or a retro sofa, dyeing leather furniture can give it a fresh and modern look.
Showcasing Finished Projects
Here are some examples of finished projects that demonstrate the incredible results achieved with Rit Dye on leather:
 Leather Jacket Transformation: Before and after dyeing using Rit Dye, showcasing the remarkable change in color and appearance. |
 Custom Leather Accessories: Handcrafted leather accessories dyed with Rit Dye, featuring unique colors and patterns. |
 Reviving Vintage Leather Furniture: A vintage leather armchair restored to its former glory with the help of Rit Dye, showcasing the power of color transformation. |
 Leather Dyeing Tutorial: Step-by-step guide on dyeing leather using Rit Dye, providing inspiration and guidance for DIY enthusiasts. |
These real-life examples demonstrate the effectiveness of Rit Dye on leather, whether it’s for personalizing your accessories or rejuvenating old leather items. With Rit Dye, you can unleash your creativity and bring new life to your leather possessions.
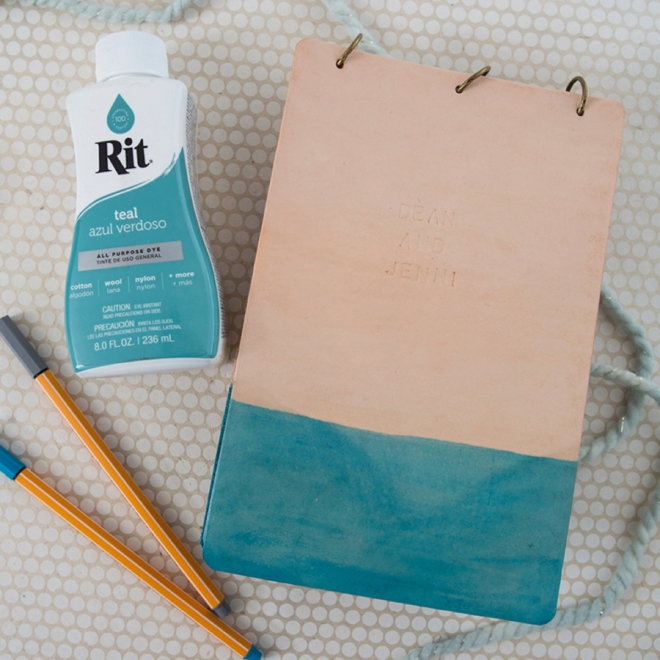
Credit: somethingturquoise.com
Frequently Asked Questions
Can You Use Rit Dye On Leather?
While Rit dye can be used on canvas or silk shoes, it is not recommended for leather shoes except for Uggs® Sheepskin boots. If you want to dye leather, an alcohol-based dye is the best option as it penetrates the material well.
However, be aware that fabric dye can transfer onto light-colored leather, causing discoloration. To prevent this, use a reliable leather cleaner and carry out thorough cleaning before dyeing.
What Dye Works On Leather?
Alcohol-based dye is commonly used on leather for good penetration. However, it is not recommended to dye leather shoes, except for Uggs® Sheepskin boots. Dye transfer stains on light leather colors can occur from clothing, such as jackets, pants, and belts.
To prevent dye from rubbing off, use a reliable leather cleaner and avoid other materials that may cause cracking. Rit dye can be used on leather but requires several coats and a leather sealant.
Will Fabric Dye Stain Leather?
Fabric dye can potentially stain leather, especially light-colored leather, causing discoloration from clothing and accessories. It’s advisable to use leather-specific dyes for coloring leather items to prevent any unwanted staining. Regular cleaning and using a leather sealant can help prevent dye transfer.
How Do You Keep Dye From Coming Off Leather?
To keep dye from coming off leather, use a reliable leather cleaner and test it on a small area. Thoroughly clean the leather and ensure there are no other materials around. Check for any signs of cracking in the leather.
Can You Dye Leather With Rit Dye?
Rit Dye is not recommended for dyeing leather shoes, except for Uggs® Sheepskin boots. It is best used for canvas or silk shoes.
Conclusion
When it comes to dyeing leather, it is not recommended to use Rit dye. While it may work on certain types of leather, such as Uggs® Sheepskin boots, it is not suitable for most leather shoes or jackets. Additionally, there is a risk of dye transfer and the need for thorough cleaning to prevent color rubbing off.
It is best to use specific leather dyes and follow proper techniques for the best results.