Imagine discovering a hairline crack in your PVC pipe. It seems minor, but it can lead to major issues like water damage or leaks.
As you stand there, you wonder if you need to call a professional. But guess what? You can fix it yourself. Repairing a hairline crack in PVC pipe is simpler than you might think, and doing it yourself can save you money and time.
You’ve come to the right place to learn how. This article will guide you through easy steps to make your PVC pipe as good as new. With clear instructions and helpful tips, you’ll gain the confidence to tackle this problem head-on. Let’s dive in, so you can say goodbye to leaks and hello to a smooth-running system.
Identifying The Hairline Crack
Spotting the hairline crack in a PVC pipe is crucial for repair. Look for small, thin lines on the surface. These tiny cracks can cause leaks if not fixed quickly.
Identifying a hairline crack in a PVC pipe may seem like a daunting task. However, with the right approach, you can pinpoint the issue before it escalates into a major problem. Knowing where to look and what to look for is the first step towards preventing further damage and ensuring the longevity of your plumbing system.Visual Inspection Techniques
Start by examining the PVC pipe closely in a well-lit area. Use a flashlight to illuminate the surface and check for any irregularities. Run your fingers gently along the pipe to feel for any subtle changes in texture or temperature. Consider using a magnifying glass for an enhanced view of the pipe’s surface. This tool can help you identify even the smallest cracks that are invisible to the naked eye. Have you ever thought about how many issues could be avoided with just a little extra attention to detail?Common Signs Of Damage
Be on the lookout for water spots or damp areas around the pipe. These can be early indicators of a leak or crack. If you notice any discoloration, it may suggest that water has been seeping through the pipe over time. Listen for any unusual sounds coming from your plumbing system. A persistent dripping sound could indicate a crack that isn’t visible but is still causing water leakage. Are you noticing increased water bills? That might be a sign of an undiscovered crack. By using these techniques, you can identify hairline cracks in PVC pipes before they lead to more serious issues. Stay vigilant and proactive in your inspections to maintain your plumbing system’s efficiency and reliability.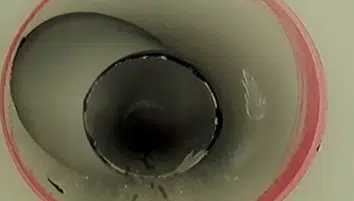
Credit: www.pipereliningsolutions.com.au
Gathering Necessary Tools
Start by gathering necessary tools like a pipe cutter, PVC cleaner, and adhesive. These items are crucial for repairing a hairline crack in a PVC pipe efficiently. Having the right tools ensures a smooth repair process.
Gathering Necessary Tools Repairing a hairline crack in a PVC pipe can be a straightforward task if you have the right tools on hand. Imagine you’re getting ready to tackle a small but annoying leak in your garden’s irrigation system. You don’t want to make multiple trips to the store, so having a checklist of tools can save time and hassle. Let’s dive into what you’ll need to efficiently repair that crack.Basic Tools For Repair
To start, you’ll need some basic tools that are common in most households. A simple PVC pipe cutter will allow you to make clean cuts to remove any damaged sections. If you don’t have one, a hacksaw can be a handy alternative. A clean cloth is essential for wiping down the pipe before applying any repair materials. This ensures a clean surface, allowing adhesives to bond effectively. Sandpaper or a file can help smooth out rough edges on the pipe, creating a better seal when connecting new pieces. Consider this: have you ever tried to fix something only to realize you’re missing a crucial tool? Planning ahead can prevent that frustration.Safety Equipment Required
Safety is paramount when dealing with repairs, even minor ones like a crack in a PVC pipe. Safety goggles protect your eyes from any flying debris when cutting or sanding the pipe. Gloves are also important. They not only keep your hands clean but also shield you from any sharp edges or chemicals in adhesives. Finally, think about ventilation. If you’re working indoors, ensure there’s a good airflow, especially when using strong adhesives or solvents. A small fan or opening a window can make a big difference. Have you considered the importance of safety gear in simple home repairs? It’s often overlooked but can prevent injuries and make the process smoother. Gathering these tools and equipment can transform your repair from a daunting task into a manageable project. Take a few moments to prepare, and you’ll find the repair process much less intimidating.Preparing The Pvc Pipe
Thoroughly clean the PVC pipe surface to remove dirt and debris. Sand the cracked area lightly for better adhesion. Ensure the pipe is dry before applying any repair material.
Repairing a hairline crack in a PVC pipe might seem daunting, but with the right preparation, you can tackle this task with confidence. Proper preparation is crucial to ensure a durable repair that prevents leaks. Without it, your efforts might be in vain. So, where do you start? Let’s dive into the steps involved in preparing your PVC pipe for repair.Cleaning The Surface
Before you do anything else, it’s essential to clean the surface of the PVC pipe thoroughly. Dirt and debris can interfere with the effectiveness of the repair materials, leading to leaks later on. Use a mild detergent mixed with water to gently scrub the pipe’s surface. Ensure you cover the entire area surrounding the crack. If you’ve ever tried to paint a dirty wall, you know how the paint fails to stick. Similarly, cleaning the surface ensures that the adhesive bonds properly. Do you have an old toothbrush lying around? They make excellent cleaning tools for small, hard-to-reach areas.Drying The Area
After cleaning, drying the area is equally important. Any moisture left on the pipe can compromise the adhesive’s ability to stick. Use a clean, dry cloth to wipe down the pipe. If you’re in a hurry, a hairdryer can speed up the drying process. Remember, even a small amount of moisture can lead to failure in your repair job. Ever had a bandage slip off because your skin was wet? The same principle applies here. Consider your local climate; if it’s particularly humid, allow extra time for drying. What tricks do you use to ensure a surface is completely dry? By taking the time to prepare your PVC pipe correctly, you’ll set yourself up for a successful repair.Choosing The Right Repair Method
Choosing the right repair method for a hairline crack in a PVC pipe is crucial. The right choice ensures long-lasting results and prevents further damage. With various options available, understanding each can guide you to the best solution. This section explores common methods, providing insights to make an informed decision.
Sealants And Epoxy Options
Sealants and epoxy can effectively fix hairline cracks. They offer a simple and cost-effective solution. Most sealants are easy to apply and dry quickly. Choose a sealant specifically designed for PVC pipes. This ensures a proper bond and prevents leaks.
Epoxy is another excellent choice. It creates a strong, durable seal. Epoxy products come in two parts. They require mixing before application. This mixture forms a hard, protective layer over the crack. Ensure the pipe surface is clean before applying epoxy. This step improves adhesion and effectiveness.
Alternative Repair Solutions
Consider alternative solutions if sealants or epoxy don’t suit your needs. Pipe repair clamps offer a quick fix. They are easy to use and provide immediate results. Simply place the clamp over the crack and tighten it.
Fiberglass wraps are another option. They provide a robust, long-lasting repair. These wraps are applied wet and then harden around the pipe. They adapt to the pipe’s shape, ensuring a snug fit. This method is ideal for larger cracks or areas with high pressure.
For those with plumbing skills, pipe replacement is a long-term solution. It involves removing the damaged section and installing a new piece. This guarantees a completely leak-free system. Always ensure the new piece matches the existing pipe diameter and material.
Executing The Repair Process
Repairing a hairline crack in a PVC pipe requires careful steps. Clean the area thoroughly to ensure adhesive bonds well. Apply a suitable PVC sealant, ensuring the crack is completely covered. Allow it to dry fully before testing the repair.
Repairing a hairline crack in a PVC pipe might seem daunting, but executing the repair process is straightforward with the right steps. You don’t need to be a seasoned plumber to tackle this task. With patience and the right materials, you can ensure your pipes are as good as new. Let’s dive into how you can efficiently execute the repair process.Applying The Chosen Material
Once you’ve identified the crack, it’s time to apply your chosen repair material. Epoxy putty and PVC repair tape are popular options. If you’re using epoxy putty, knead a small amount in your hands until it’s pliable. Then, press it firmly onto the crack, ensuring you cover the entire area. For PVC repair tape, wrap it tightly around the pipe, extending a bit beyond the crack on each side. This method works great for sealing the crack quickly. Remember, preparation is key. Clean the pipe thoroughly to remove any debris or moisture. This ensures the material adheres properly and provides a more durable repair.Ensuring A Secure Seal
After applying the repair material, ensure a secure seal. This step is crucial to prevent future leaks. Allow the material to cure as per the manufacturer’s instructions. This might take anywhere from a few minutes to a couple of hours. While you wait, think about this: What could happen if the seal isn’t tight enough? A minor oversight could lead to significant water damage over time. Once cured, test the repair by slowly turning the water back on. Keep an eye on the repaired section for any signs of leaks. If you notice any drips, don’t panic. It might mean a bit more material is needed or the wrap needs to be tighter. Adjust accordingly until the seal is completely secure. Having repaired a hairline crack in my own home, I learned that attention to detail during the repair process makes all the difference. Your patience and precision can lead to a long-lasting fix, saving you from future plumbing headaches. By following these actionable steps, you ensure your repair process is effective and efficient. What’s stopping you from tackling that PVC pipe crack today?
Credit: sylwrap.com
Testing The Repair
To ensure the repair holds, test the PVC pipe by running water through it. Watch closely for any leaks. A dry surface confirms the crack is sealed.
Testing the repair of a hairline crack in a PVC pipe is crucial. It ensures the fix is secure and the pipe functions properly. This process involves several steps to guarantee no further leaks or issues. After you’ve completed the repair, it’s time to evaluate its effectiveness. This involves checking for leaks and monitoring the overall performance of the pipe.Checking For Leaks
Start by turning on the water supply to the repaired pipe. Observe the area closely for any signs of moisture. Use a dry cloth to wipe the pipe’s surface. This helps detect smaller leaks you might miss. Look for water droplets forming around the repaired crack. If you notice any moisture, the repair might not be sealed properly. It may require additional sealing.Monitoring Performance
After ensuring no immediate leaks, focus on the pipe’s performance. Let water flow through the pipe for a longer period. Check the water pressure and flow rate. They should remain consistent. Any drop in pressure might indicate a hidden issue. Listen for any unusual sounds. Gurgling or whistling noises can signal air or water escaping. Continue to observe the repaired area over several days. Regular checks help ensure the repair holds up under normal usage conditions.Maintaining Pvc Pipes
Fixing a hairline crack in PVC pipes prevents leaks and ensures smooth water flow. Use PVC solvent cement for sealing cracks. This method extends the pipe’s lifespan without costly replacements.
Maintaining PVC pipes is essential to ensure they last longer and perform efficiently. Whether it’s in your home or garden, PVC pipes are a common choice due to their durability and cost-effectiveness. However, like any material, they need regular care to prevent damage and ensure they continue to function properly.Regular Inspection Tips
Set a schedule to check your PVC pipes at least twice a year. Look for any visible signs of wear or potential issues, such as discoloration or bulging. A small hairline crack today can lead to significant water damage tomorrow. Listen for any unusual sounds when water flows through the pipes. Whistling or banging noises might indicate a problem. Catching these early can save you from unexpected repairs. Feel the pipes if accessible; any change in temperature or moisture can be a clue to underlying issues. By staying alert, you can prevent minor problems from becoming major headaches.Preventive Measures
Consider insulating your pipes if they are in areas exposed to extreme temperatures. Insulation can prevent cracks caused by freezing or overheating. It’s a simple step that can protect your investment. Secure your pipes with appropriate brackets and supports to prevent sagging. This helps maintain their structure and avoid stress points that can lead to cracks. Limit the use of chemical cleaners, which can weaken PVC material over time. Opt for eco-friendly solutions that are gentler on your pipes. This small change can have a big impact on pipe longevity. Have you ever thought about the impact of soil movement on your buried pipes? Ensure the ground around them is stable and free from heavy roots that can exert pressure. This can be as simple as choosing the right plants for your garden. Being proactive in maintaining your PVC pipes not only saves you money but also ensures your home’s plumbing system runs smoothly. When was the last time you inspected your pipes? It might be time to take a closer look.
Credit: www.youtube.com
Frequently Asked Questions
How Do You Identify A Hairline Crack In Pvc Pipe?
Look for small, thin lines on the pipe surface. Water leakage is a strong indicator.
What Materials Are Needed To Repair Pvc Pipe Cracks?
You need PVC glue, sandpaper, and a clean cloth. These tools help ensure a strong repair.
Can Hairline Cracks In Pvc Pipes Cause Major Issues?
Yes, over time, small cracks can lead to leaks. This may cause water damage or mold growth.
Is It Difficult To Fix A Hairline Crack In Pvc Pipes?
No, it’s easy with the right tools. Simple steps can effectively seal and repair the crack.
How Long Does Pvc Pipe Repair Take To Dry?
Usually, it takes about 2-4 hours. Drying time ensures a strong bond and leak prevention.
Conclusion
Fixing a hairline crack in a PVC pipe is simple. Start by gathering the right tools. Clean the crack area thoroughly. Apply PVC primer and cement carefully. Let it dry for a secure seal. Regular inspection prevents future issues. This quick repair saves money and time.
No need for a plumber. You can handle it yourself with ease. Remember, safety first when working with tools. Your PVC pipes can last longer with proper care. A little effort goes a long way in keeping your plumbing in good shape.