Is your Kitchenaid dishwasher giving you trouble by leaking all over your kitchen floor? You’re not alone.
Many people face this annoying issue, which can quickly turn your convenient appliance into a source of stress. Imagine walking into your kitchen, ready to tackle the day, only to be greeted by a puddle of water. You want to fix it fast, but where do you start?
This blog post is here to guide you. We’ll explore the common reasons behind a leaking Kitchenaid dishwasher and provide you with simple, actionable solutions. Get ready to restore peace and efficiency to your kitchen in no time. Dive in, and let’s solve this problem together.
Common Causes Of Leaks
Leaks in Kitchenaid dishwashers often happen due to worn-out door seals or clogged drain hoses. Misaligned doors can also cause water leakage. Regular inspection can prevent these issues and keep your dishwasher in good condition.
When your Kitchenaid dishwasher starts leaking, it can be both frustrating and inconvenient. Understanding the common causes of leaks can save you time and prevent further damage. By identifying the root of the problem, you can address it promptly and keep your kitchen running smoothly. Let’s dive into some frequent culprits that might be causing your dishwasher to leak.Worn Door Gasket
The door gasket is a crucial component designed to seal the dishwasher door tightly. Over time, it can wear out, crack, or even become misaligned. If you notice water pooling around the door, the gasket might be the issue. To check, inspect the gasket for visible wear or damage. Replacing it is usually straightforward and can prevent future leaks. Remember to clean the area around the gasket to ensure it seals properly.Loose Or Damaged Hose Connections
Hose connections are vital for carrying water in and out of your dishwasher. If these connections become loose or damaged, it can lead to leaks. Have you ever noticed a small puddle beneath your dishwasher after a cycle? Examine the hoses under your sink or behind your dishwasher. Tighten any loose connections and replace damaged hoses to stop leaks. Regularly checking these connections can save you from unexpected water issues.Faulty Water Inlet Valve
The water inlet valve controls the flow of water into your dishwasher. If it malfunctions, it might allow too much water to enter, causing an overflow. This can lead to leaks that might seem mysterious at first. Test the valve by turning off the power and water supply, then removing the access panel. If it’s faulty, a simple replacement can resolve the issue. Consider whether a professional should inspect it if you’re unsure about handling it yourself.Clogged Drain
A clogged drain can cause water to back up and leak out of your dishwasher. This is often due to food particles or debris obstructing the flow. Have you checked the bottom of your dishwasher for any trapped food lately? Clear the drain by removing any visible debris and running a cleaning cycle with a dishwasher-safe cleaner. Keeping the drain clear not only prevents leaks but also ensures your dishes come out sparkling clean. In tackling these issues, a proactive approach will keep your kitchen dry and your dishwasher functioning efficiently. Have you encountered any of these problems before? Share your experiences and solutions in the comments below!Tools And Materials Needed
Experiencing a leaking KitchenAid dishwasher can be frustrating. Understanding the tools and materials needed for a successful repair is crucial. Proper preparation ensures you handle the issue efficiently and safely. Let’s explore what you need to get the job done right.
Basic Tools
Start with a screwdriver set. It helps in removing panels and accessing internal parts. A wrench is essential for loosening nuts and bolts. A flashlight assists in seeing inside dark or hard-to-reach areas. A towel or cloth absorbs any excess water during the repair process.
Replacement Parts
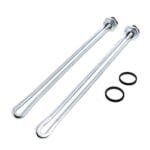
Identify the source of the leak first. You might need a new hose or seal. Check for worn-out gaskets or valves. Ensure you have the correct part number. This avoids unnecessary trips to the store.
Safety Gear
Safety is important. Wear gloves to protect your hands from sharp parts. Safety goggles shield your eyes from potential splashes or debris. Ensure you work in a well-ventilated area. Unplug the dishwasher before starting any repairs.
Inspecting The Door Gasket
A leaking Kitchenaid dishwasher can be frustrating. One common culprit is the door gasket. This rubber seal keeps water from escaping. Inspecting the door gasket is crucial in solving the leak problem. Regular checks can prevent bigger issues down the line.
Checking For Wear And Tear
Start by examining the gasket closely. Look for cracks or splits. Feel around for any rough edges. These signs indicate wear and tear. A worn gasket cannot seal properly. This allows water to leak out during cycles.
Make sure the gasket is clean. Debris can affect its sealing ability. Use a damp cloth to wipe it down. Also, check its position. It should sit flush against the door. Misalignment can cause leaks too.
Replacing The Gasket
If the gasket shows damage, consider replacing it. First, purchase the correct model for your dishwasher. Follow the manufacturer’s instructions carefully. Remove the old gasket gently. Avoid damaging the surrounding area.
Install the new gasket with precision. Ensure it fits snugly in place. Check for any gaps or loose sections. A new gasket should create a tight seal. This helps prevent future leaks effectively.
Checking Hose Connections
When your Kitchenaid dishwasher starts leaking, one of the most common culprits is often found in the hose connections. These vital components can become loose or damaged over time, leading to leaks that might flood your kitchen floor. Luckily, checking hose connections is a straightforward process that can save you a lot of trouble. Let’s dive into what you can do to fix those pesky leaks.
Tightening Loose Hoses
Have you ever noticed how some things tend to loosen over time? Hose connections are no different. A loose hose can be the source of your dishwasher’s leaking problem. Use a wrench to ensure each connection is tight. But be careful not to over-tighten, as this can cause additional damage.
If you’re like me, you might find that a gentle nudge is all it takes to stop a leak. It’s surprising how a simple twist can make a big difference. After tightening, run your dishwasher to check if the leak persists. Does it feel like magic when the leak disappears?
Replacing Damaged Hoses
Sometimes, tightening isn’t enough. Hoses can crack or wear out, especially if they’re old. Inspect each hose for visible damage like cracks or bulges. If you find any, it’s time to replace them.
Replacing a hose might seem daunting, but it’s easier than you think. You can find replacement hoses at your local hardware store. Before purchasing, ensure the hose matches your dishwasher’s model. Have you ever had that satisfying feeling when you fixed something yourself?
Don’t forget to turn off the water supply before replacing hoses. This prevents water from spilling everywhere. Once replaced, check to make sure everything is secure. You’ll be amazed at how a fresh hose can breathe new life into your dishwasher.
How confident are you in your ability to tackle these hose issues? With a bit of patience and effort, you’ll keep your kitchen floor dry and your dishwasher running smoothly.
Addressing Water Inlet Valve Issues
Experiencing leaks in your Kitchenaid dishwasher often points to water inlet valve issues. This valve controls water flow, and if faulty, it causes water overflow. Regular maintenance and timely replacement help prevent leaks and ensure efficient operation.
If your KitchenAid dishwasher is leaking, the water inlet valve might be the culprit. This small component controls the flow of water into the dishwasher. When it malfunctions, it can cause water to overflow or leak, leading to a messy kitchen floor. Understanding how to test and replace this valve can save you from a potentially costly repair.Testing Valve Functionality
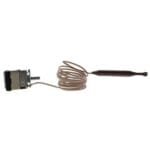
Before you rush to replace the water inlet valve, it’s smart to test if it’s functioning properly. Start by disconnecting your dishwasher from power and water supply. Safety first! Then, locate the valve, which is usually at the bottom of the dishwasher. You might need to remove a panel to access it. Have you ever thought about how such a tiny part can cause so much trouble? Once you have access, use a multimeter to test the valve’s electrical continuity. If the reading is outside the manufacturer’s specifications, the valve might be faulty. A multimeter is an inexpensive tool that can save you time and stress.Replacing A Faulty Valve
If testing shows the valve is faulty, replacing it is the next step. First, ensure you have the right replacement part. Check the model number of your dishwasher to find the correct valve. After securing the part, follow these steps: 1. Turn off the dishwasher – Ensure the power and water supply are completely off. 2. Remove the old valve – Unscrew it carefully and disconnect the wires. 3. Install the new valve – Connect the wires and secure it with screws. 4. Restore power and water – Turn everything back on and test the dishwasher. Replacing the valve might sound daunting, but it’s quite manageable with patience. Have you ever felt the satisfaction of fixing something yourself? It’s incredibly rewarding! Addressing the water inlet valve issue can stop leaks and extend the life of your dishwasher. Remember, a little DIY can go a long way in keeping your kitchen running smoothly.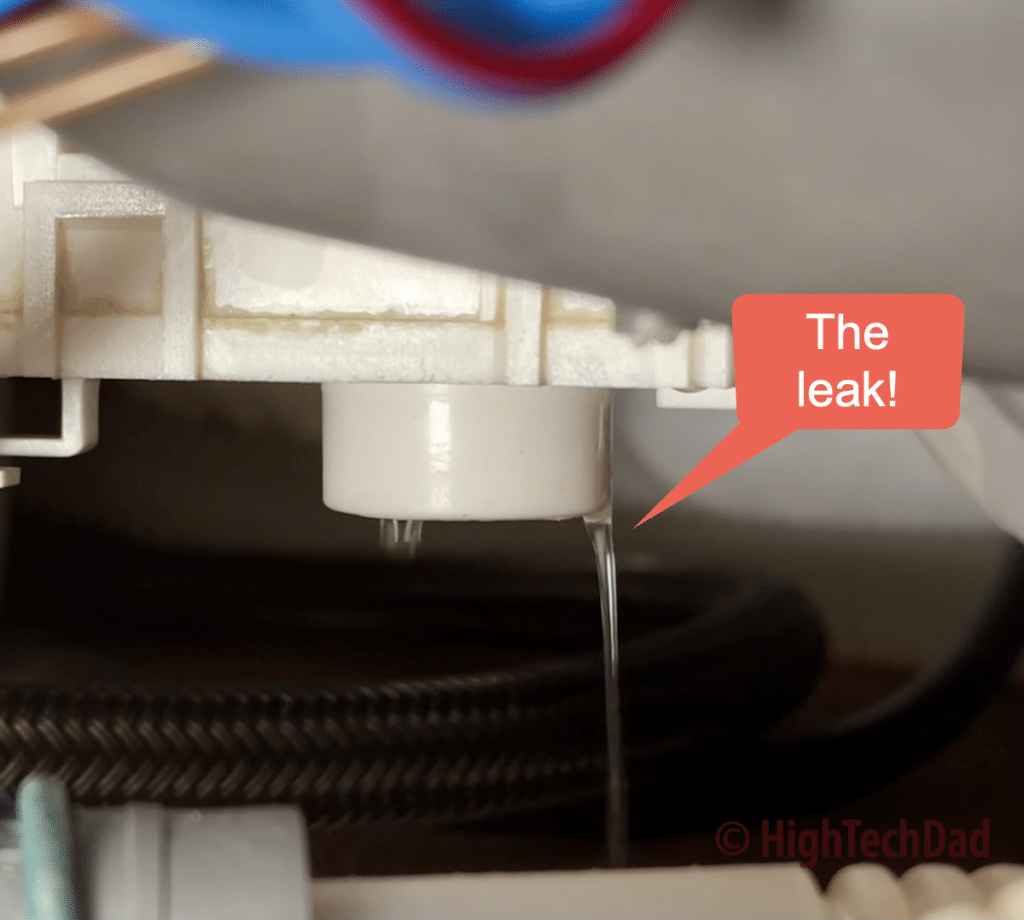
Credit: www.hightechdad.com
Clearing A Clogged Drain
A leaky Kitchenaid dishwasher can be troubling. One common cause is a clogged drain. Clearing the drain can often solve the problem and prevent future leaks. Let’s explore how to clear a clogged drain effectively.
Identifying Drain Blockages
Before you start, identify where the blockage is. Check for water pooling in the dishwasher. This is a clear sign of a drain issue. Look inside the dishwasher for food debris. This often causes clogs. Examine the drain hose for kinks or bends. These can restrict water flow. Listen for unusual sounds during the drain cycle. This might indicate a blockage.
Cleaning The Drain
Start by removing the bottom dish rack. This allows easy access to the drain. Check the drain and remove any visible debris. Use a soft brush to clean around the drain. This helps dislodge stubborn particles. Next, inspect the drain filter. Remove and clean it thoroughly. Make sure it’s free of food particles.
For more stubborn clogs, use a mixture of vinegar and baking soda. Pour the mixture down the drain. Let it sit for 15 minutes. Rinse with hot water to clear the blockage. Ensure the drain hose is free of obstructions. Gently straighten any kinks in the hose. This helps maintain proper water flow.
Regular Maintenance Tips
Experiencing leaks in your Kitchenaid dishwasher? Check door seals and clear spray arms regularly. This simple maintenance can prevent water escaping and keep your kitchen dry.
Regular maintenance is essential to keep your KitchenAid dishwasher performing at its best and preventing leaks. You might not think about it often, but simple upkeep can save you from unexpected water puddles and costly repairs. Let’s dive into some practical tips that will help you keep your dishwasher in top shape.Routine Cleaning
Regular cleaning is crucial for your dishwasher’s longevity. Food particles can build up and cause blockages, leading to leaks. A simple wipe-down of the door seals can prevent water from escaping. Once a month, run an empty cycle with a cup of white vinegar. This helps remove any lingering grime and keeps the interior fresh.Periodic Inspections
Periodic inspections can catch potential issues before they become major problems. Check hoses and connections for any signs of wear or damage. Look for small cracks or loose fittings. These might seem minor but can lead to significant leaks if ignored. Inspect the spray arms for clogs. A blocked spray arm can cause uneven water distribution, putting strain on seals and gaskets.Usage Best Practices
How you use your dishwasher can impact its performance and prevent leaks. Are you loading it correctly? Overloading can cause water to spill over the sides. Ensure dishes don’t block the spray arms. Proper loading ensures effective cleaning and reduces stress on the machine. Use recommended detergent types. Incorrect detergents can cause excessive suds, leading to overflows. Have you ever found yourself with a dishwasher leak? What did you do to fix it? Regular maintenance might just be your best defense against such surprises.
Credit: www.reddit.com
When To Call A Professional
A leaking Kitchenaid dishwasher can disrupt daily chores. Fixing leaks by yourself might seem tempting. But certain situations require expert help. Knowing when to call a professional saves time and prevents further damage. Below, we explore scenarios where professional assistance becomes essential.
Persistent Leaks
Some leaks just don’t stop. You’ve tightened the connections and checked for visible damage. Yet, the water keeps seeping out. Persistent leaks may indicate hidden issues. These could involve internal components. A professional can diagnose and fix these problems efficiently.
Complex Repairs
Not every dishwasher issue is simple. Some problems involve intricate parts. Replacing or fixing these requires technical expertise. Attempting complex repairs without knowledge can cause more damage. Professionals have the right tools and skills. They ensure proper and safe repairs.
Warranty Considerations
Your dishwasher may still be under warranty. Attempting repairs yourself might void it. Manufacturers often require certified professionals for repairs. This maintains the warranty’s validity. Before you start fixing, check your warranty terms. Calling a professional might be the best choice.

Credit: www.youtube.com
Frequently Asked Questions
Why Is My Kitchenaid Dishwasher Leaking?
Leaking can occur due to a faulty door seal, blocked drain, or loose hose connections.
How Do I Fix A Leaking Dishwasher Door?
Check the door gasket for damage. Replace it if worn or torn. Tighten any loose screws.
Can A Clogged Drain Cause Dishwasher Leaks?
Yes, a clogged drain can cause water to back up and leak onto the floor. Clean the drain regularly.
Is A Loose Hose A Common Leak Cause?
Yes, loose hoses can cause leaks. Check and tighten all hose connections to prevent water escape.
Should I Call A Professional For Dishwasher Leaks?
If simple checks don’t stop the leak, consider calling a professional for further diagnosis and repair.
Conclusion
Fixing a leaking Kitchenaid dishwasher is crucial. It prevents further damage. Check seals and hoses regularly. They often cause leaks. Tighten loose connections promptly. Replace worn-out parts. A little maintenance goes a long way. Keep your kitchen clean and dry.
Avoid costly repairs later. Simple steps make a big difference. Save time and money. Enjoy a hassle-free dishwasher experience. Follow the tips shared here. Make smart decisions for your appliances. Ensure longevity and efficiency. Keep your kitchen running smoothly. Happy dishwashing days ahead!