Using your oven as a dehydrator can open up a world of possibilities in your kitchen. Imagine making your own dried fruits, crispy vegetable chips, or even homemade jerky, all without buying a separate appliance. Many people do not realize that their regular oven can do more than bake or roast—it can gently remove moisture from food, preserving flavors and nutrients.
This method is not only practical but also lets you control ingredients, avoid preservatives, and save money.
Dehydrating at home is an age-old technique for preserving food. Traditionally, people used the sun or specialized dehydrators. However, not everyone has space or budget for a big machine. Your oven, with just a few simple adjustments, can work nearly as well for most foods.
This guide will walk you through everything you need to know—from preparation, setting temperatures, timing, to storage and safety. You’ll learn step-by-step how to turn your oven into a reliable dehydrator, discover tips that most beginners miss, and see why this method is worth trying.
Why Dehydrate Food?
Dehydrating means removing moisture from food. When water is gone, bacteria and mold cannot grow easily, so your food lasts longer. Dried foods are light, easy to store, and great for snacks or cooking. Some reasons people love dehydrating:
- Preservation: Keeps fruits, vegetables, and meats edible for months.
- Healthy snacks: No added sugar or chemicals.
- Reduce waste: Save food before it spoils.
- Save space: Dried food is lighter and smaller.
- Convenience: Great for hiking, travel, or school lunches.
Many commercial dried foods use additives or lots of salt. Doing it yourself means you control the process.
How Does Dehydration Work In An Oven?
A dehydrator blows warm air over food for many hours. Ovens can do something similar if you use low heat and let moisture escape. For best results, you need:
- Low temperature (ideally 50–80°C or 120–175°F)
- Good airflow (so steam can leave)
- Time (sometimes 2–12 hours)
Not all ovens are the same, and some are better for this job than others. However, almost any home oven can work with a bit of care.
Credit: www.therawchef.com
Essential Equipment And Tools
Before you begin, gather the right tools. Each item helps ensure good results and safety.
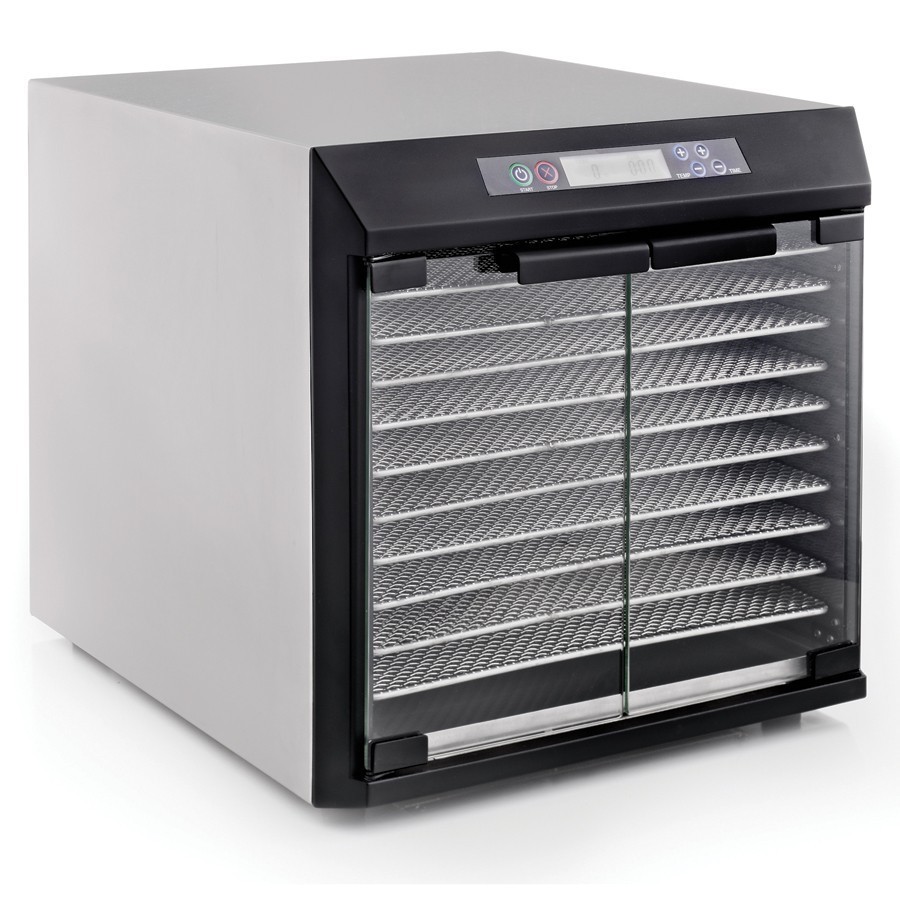
- Oven: Any standard oven will work, but a convection oven (with a fan) is best because it circulates air.
- Baking sheets: Use rimmed trays to catch drips.
- Cooling racks or mesh screens: Lift food off the tray so air can reach all sides.
- Parchment paper or silicone mats: Prevent sticking.
- Oven thermometer: Most ovens are not accurate at low temperatures. A thermometer helps you check.
- Wooden spoon or heat-safe object: To prop open the oven door and let moisture escape.
- Sharp knife or mandoline: For even slicing.
- Airtight containers or jars: For storage.
Using racks or mesh lets air flow around food, speeding up drying and making results more even.
Preparing Food For Dehydration
How you prepare your food affects drying time, texture, and taste. Here’s how to get ready:
Cleaning And Slicing
Wash all produce well. Even small bits of dirt can ruin dried food. Peel if you prefer, but skins often hold nutrients and flavor.
Slice evenly. Thin slices (3–6 mm or 1/8–1/4 inch) dry faster and more evenly. A mandoline slicer gives perfect thickness.
Blanching And Pretreating
Some foods, especially vegetables, benefit from blanching—briefly boiling, then cooling. This step:
- Kills bacteria
- Keeps colors bright
- Softens tough skins
To blanch: Place sliced vegetables in boiling water for 1–3 minutes, then move to ice water. Dry before dehydrating.
For fruits like apples or pears, dipping in lemon water or ascorbic acid stops browning.
Seasoning
You can add flavor before drying. For example, toss apple slices with cinnamon, or sprinkle salt on zucchini chips. Season lightly—flavors get stronger as water leaves.
Setting Up Your Oven
Turning your oven into a dehydrator takes a few simple adjustments.
Setting The Temperature
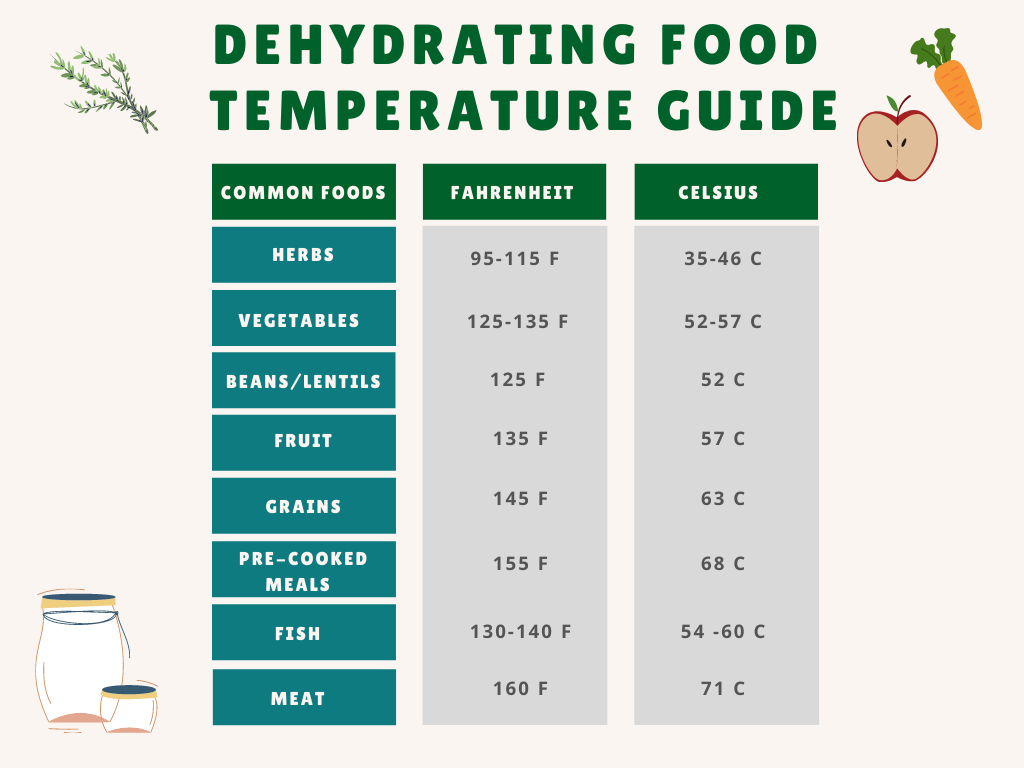
Set your oven as low as it will go. Most ovens go down to about 70°C (160°F). If yours only goes to 90°C (200°F), prop the door open a little more. For best results:
- Fruits: 50–60°C (120–140°F)
- Vegetables: 50–60°C (120–140°F)
- Meat jerky: 70–80°C (160–175°F) (higher for safety)
Use an oven thermometer to check actual temperature. Ovens can be 10–20°C off, especially at low settings.
Arranging The Food
Place food in single layers on racks or trays. Do not let pieces overlap. Space helps air flow and speeds up drying.
If possible, put trays in the middle of the oven. If you have several racks, rotate them every hour or so.
Letting Moisture Escape
Ovens are closed systems, so steam cannot escape easily. To fix this, wedge the oven door open with a wooden spoon or heat-safe object. A gap of 2–5 cm (1–2 inches) is enough.
Caution: This method uses more energy and your kitchen may get warm. Keep children and pets away from the open door.
Step-by-step Guide: Dehydrating In The Oven
Let’s go through the full process, using apple slices as an example. The steps are nearly the same for most fruits and vegetables.
- Prepare the apples: Wash, core, and slice apples into 3 mm (1/8 inch) rings. Dip in lemon water to prevent browning if desired.
- Arrange on racks: Lay slices in a single layer on mesh racks or parchment-lined trays.
- Set oven: Preheat to the lowest setting, ideally 60°C (140°F). Place oven thermometer inside.
- Open the door: Prop the oven door open by 5 cm (2 inches) to let moisture out.
- Drying time: Bake for 4–8 hours. Flip slices once or twice for even drying.
- Check for doneness: Apples should be leathery, not sticky or wet. Let cool; they will firm up more.
- Conditioning: Place dried apples in a jar for a few days, shaking daily. If moisture collects, dry them longer.
- Store: Keep in airtight jars in a cool, dark place.
This method works for peaches, pears, bananas, and most fruits. Vegetables may dry faster.
Drying Times For Common Foods
How long food takes to dehydrate depends on thickness, moisture, temperature, and your oven. Here is a handy comparison:
| Food | Slice Thickness | Oven Temp | Approx. Time |
|---|---|---|---|
| Apple slices | 3 mm (1/8 in) | 60°C (140°F) | 6–8 hours |
| Banana chips | 6 mm (1/4 in) | 60°C (140°F) | 8–10 hours |
| Zucchini chips | 3 mm (1/8 in) | 60°C (140°F) | 4–6 hours |
| Beef jerky | 6 mm (1/4 in) | 75°C (170°F) | 4–6 hours |
| Tomato halves | Half | 60°C (140°F) | 8–12 hours |
Check food every hour after the minimum time. If it feels sticky or bends without breaking, it needs more time.
Foods You Can Dehydrate In The Oven
Some foods dry better than others. Here are popular choices and how they behave:
- Fruits: Apples, pears, bananas, mangoes, strawberries, pineapples, peaches. Sweet, chewy, and easy for beginners.
- Vegetables: Zucchini, tomatoes, carrots, sweet potatoes, peppers, kale. Often crisp, great for chips.
- Herbs: Parsley, mint, basil, oregano. Dry quickly and keep flavor well.
- Meat: Beef, turkey, chicken. Needs extra care for safety; always use higher temperatures.
- Mushrooms: Slice thin for soups or risotto.
Some foods (like watermelon or cucumber) have so much water that they shrink to almost nothing, so they are not ideal.
Safety Tips When Using Your Oven As A Dehydrator
Dehydrating is safe if you follow some simple rules. These tips help avoid common mistakes:
- Watch the temperature: Too high, and food cooks instead of dries. Too low, and bacteria may survive, especially in meat.
- Open the door: Never skip this step. Moisture must escape.
- Use clean tools: Dirty knives or trays can spread bacteria.
- Condition dried food: After drying, place in a jar for a few days. If you see moisture, dry more.
- Store properly: Use airtight containers. Check for mold before eating.
- For jerky: Always use lean meat and trim fat. Fat does not dry and will spoil.
Non-obvious insight: Ovens often have hot spots. Rotate trays and move food around for even results.
Oven Vs. Food Dehydrator: How Do They Compare?
If you are curious about which method is better, here’s how ovens stack up against dedicated dehydrators:
| Feature | Oven | Food Dehydrator |
|---|---|---|
| Temperature control | Less precise | Very precise |
| Airflow | Needs open door | Built-in fan |
| Cost | Uses existing appliance | Extra purchase |
| Batch size | Limited by oven size | Often larger capacity |
| Energy use | Usually higher | More efficient |
| Noise | Silent | Fan can be noisy |
Non-obvious insight: Ovens can produce slightly different textures—sometimes a bit crispier—because they lack the gentle, even airflow of a dehydrator.
Troubleshooting Common Problems
Dehydrating in an oven works well, but beginners sometimes face a few issues.
Problem: Food Is Sticky Or Soft
- Solution: Dry longer, keep the door open, and check temperature.
- Slices may be too thick; try thinner next time.
Problem: Food Is Browning Or Cooking
- Solution: Oven is too hot. Lower the temperature, or prop the door open wider.
Problem: Uneven Drying
- Solution: Rotate trays every hour. Move food around if edges are drying faster.
Problem: Mold Appears During Storage
- Solution: Food was not fully dried. Return to oven, dry longer, then cool and store again.
Problem: Loss Of Flavor
- Solution: Blanch vegetables before drying to lock in color and taste. Store dried food in a cool, dark place.
How To Store And Use Dehydrated Foods
Proper storage is key to keeping food fresh for months.
- Cool completely: Hot food traps steam in containers.
- Use airtight jars or bags: Oxygen and moisture will spoil dried food.
- Label and date: So you know what’s inside and when you made it.
- Keep away from light: Sunlight fades colors and flavors.
- Check regularly: If you see mold or off smells, discard.
Dehydrated foods are very flexible. Eat them as snacks, add to oatmeal, mix in trail mix, or rehydrate with water for soups and stews.
Credit: www.campkitchen.ca
Creative Recipes And Ideas
Trying new things can be fun and tasty. Here are a few ideas for using your oven-dehydrated foods:
- Apple chips: Sprinkle with cinnamon for a sweet snack.
- Tomato crisps: Add herbs before drying for flavorful salad toppers.
- Kale chips: Toss with olive oil and a pinch of salt before dehydrating.
- Dried fruit mix: Combine apples, pears, and bananas for homemade trail mix.
- Vegetable soup mix: Dry carrots, celery, onions, and add to a jar. Just add boiling water.
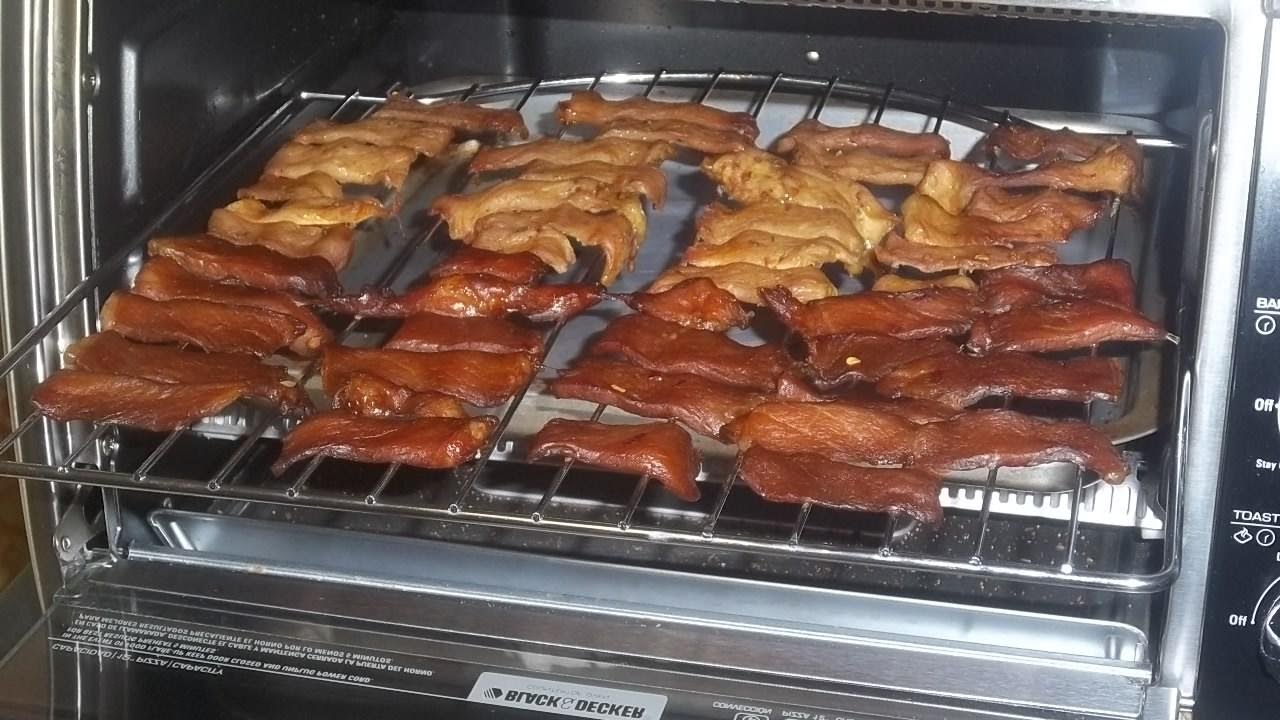
- Homemade jerky: Marinate beef strips, then dehydrate for a protein-rich snack.
Try mixing spices and herbs before drying for endless flavor combinations.
Cleaning Up And Oven Care After Dehydration
Dehydrating is a clean process, but sticky fruit juices or vegetable bits can leave residue. Follow these steps:
- Let oven cool: Safety first.
- Remove racks and trays: Wash with hot, soapy water.
- Wipe oven walls: Use a damp cloth to remove any splatters.
- Check door seals: Make sure no food is stuck.
If you use parchment or silicone mats, cleaning is even easier. Never use harsh chemicals inside the oven.
Credit: food-hacks.wonderhowto.com
Energy Use And Cost Considerations
Oven dehydration takes several hours, so it does use more energy than a dehydrator. However, you save money by not buying a new appliance. Here are some ways to make the process more efficient:
- Dry larger batches at once
- Slice food evenly for faster drying
- Use the convection setting if you have it
- Dehydrate on cooler days, so your kitchen does not get too hot
If you dehydrate often, you may want to compare costs over time. For occasional use, the oven is a good choice.
When Not To Use The Oven For Dehydration
There are times when an oven is not the best tool:
- Large batches: Ovens hold less than dehydrators.
- Very wet foods: Foods like watermelon or cucumber do not dry well and may stay sticky.
- Heat-sensitive herbs: Delicate herbs can lose flavor quickly. Try air drying instead.
Still, for most home cooks, the oven works for 90% of dried foods.
Tips For The Best Results
- Choose fresh produce: The better the starting food, the better the dried result.
- Cut evenly: Uniform size dries at the same rate.
- Rotate trays: Especially important in ovens with hot spots.
- Don’t rush: Low and slow is key. High heat cooks, not dries.
- Condition dried food: Place in containers, shake daily, and check for moisture before long-term storage.
Extra tip: For the best flavor, dry foods during peak season. Summer fruits and autumn vegetables taste better when dried.
Food Safety: What You Must Know
Drying removes most, but not all, bacteria. For certain foods, take extra steps:
- Meat jerky: Marinate in salt and spices. Always dry at 75°C (170°F) or higher.
- Egg-based foods: Not recommended for oven dehydration.
- Nuts and seeds: Can be dried, but are best roasted for flavor.
If you are ever unsure about safety, use recipes from trusted sources like the USDA or USDA Food Safety.
Frequently Asked Questions
How Do I Know When Food Is Fully Dehydrated In The Oven?
Fully dried food feels leathery and tough, not sticky or wet. When cooled, it should not bend easily. For fruits, there should be no moisture when you tear a piece. For vegetables, they should snap or feel crisp. Always let food cool before checking, as warm food can feel softer than it really is.
Can I Use My Oven To Dehydrate Herbs?
Yes, but use the lowest possible heat. Spread herbs in a single layer and dry for 1–3 hours with the door slightly open. Check often—herbs dry quickly and can burn. For delicate herbs, air drying is sometimes better to preserve flavor.
Why Do I Need To Keep The Oven Door Open When Dehydrating?
Keeping the oven door open lets moist air escape. If the door is closed, steam stays inside and food may cook or stay wet. The open door also helps keep the temperature lower, closer to ideal dehydrating levels.
Is It Safe To Make Jerky In The Oven?
Yes, but you must follow safety rules. Use lean meat, slice thin, marinate, and always dry at 75°C (170°F) or higher. Check that jerky is firm and no longer pink. If you are unsure, briefly bake finished jerky at 80°C (175°F) for 10 minutes to kill any remaining bacteria.
How Long Do Homemade Oven-dried Foods Last?
If fully dried and stored in airtight containers, most dried fruits and vegetables last 6–12 months. Jerky lasts 2–3 months. Always check for mold, strange smells, or changes in texture before eating.
Turning your oven into a dehydrator is a simple way to make healthy, delicious snacks and preserve seasonal produce. With just a little practice, you’ll find the method that works best for you. Remember to start with fresh ingredients, keep temperatures low, and let moisture escape.
Dehydrating at home gives you more control, saves money, and makes your kitchen a place of endless creativity.