Making milk kefir at home is rewarding and surprisingly simple. The tiny living organisms called milk kefir grains do all the hard work, turning milk into a tangy, probiotic-rich drink. But whether you are a beginner or a seasoned kefir maker, you will eventually face a key question: how do you store milk kefir grains when you want to take a break, travel, or just slow down production? Improper storage can damage or even kill your grains, so understanding the safest, most effective methods is essential.
Storing kefir grains isn’t just about keeping them alive—it’s also about keeping them healthy and strong, so they will ferment well when you start again. There are several storage options, and each has its own pros, cons, and best-use scenarios.
This article will guide you step by step through all the major methods, from short-term pauses to long-term preservation. Along the way, you’ll discover common mistakes, helpful tips, and lesser-known insights that can save you time and frustration.
If you want to pause your kefir production for a few days, weeks, or even months, this guide will show you exactly how to keep your milk kefir grains safe and ready for use. Let’s explore the complete process of storing milk kefir grains, so you can enjoy fresh kefir on your schedule without worry.
Understanding Milk Kefir Grains
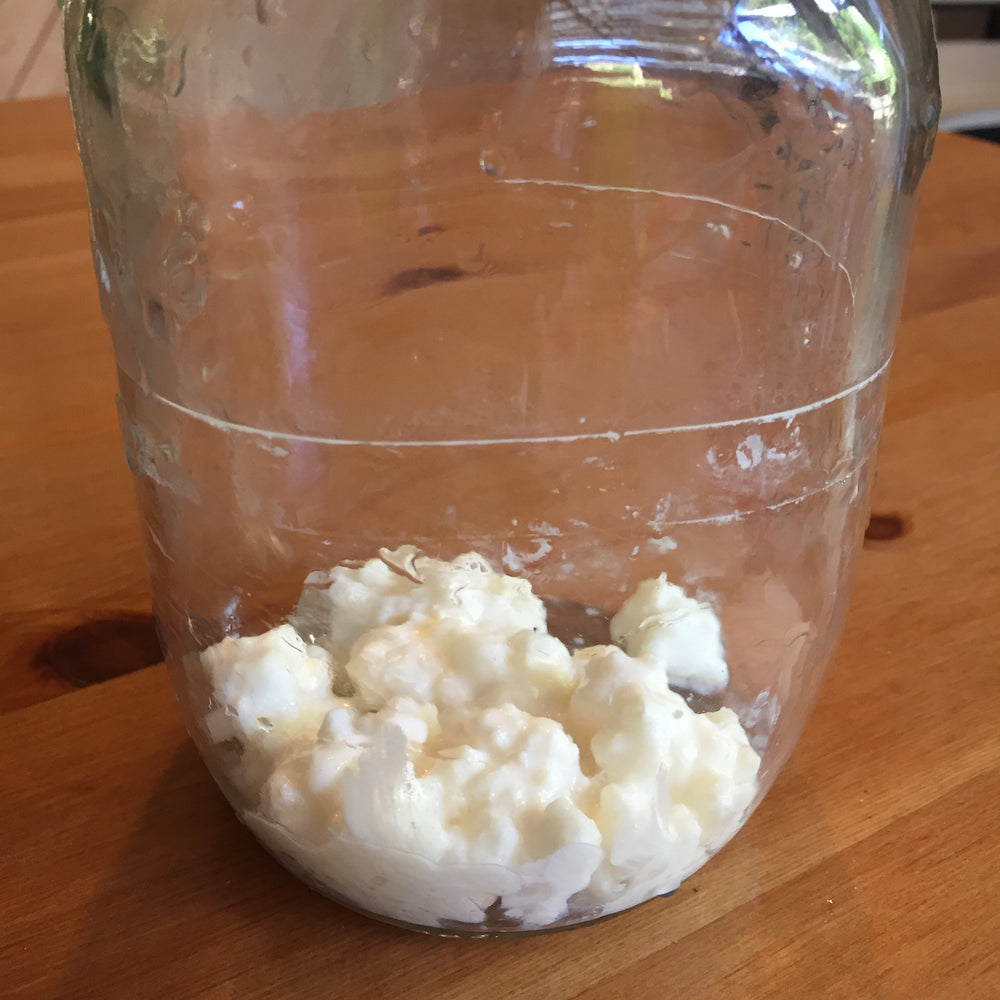
Before diving into storage methods, it’s helpful to know what milk kefir grains actually are. These are not “grains” like rice or wheat. They are clusters of bacteria and yeast living together in a symbiotic relationship. The grains look like small cauliflower florets, usually white or yellowish, with a springy texture.
What makes them special is their mix of lactic acid bacteria and beneficial yeast. These microbes feed on the lactose in milk, producing lactic acid (which gives kefir its tangy flavor), a small amount of alcohol, and carbon dioxide. This fermentation process also produces probiotics, which are good for your gut health.
Milk kefir grains are considered self-renewing; they grow and multiply as you make new batches of kefir. But they need proper care and the right environment to stay active and healthy, especially when you are not using them every day.
Why Proper Storage Matters
Many people assume that kefir grains are tough and can survive anything. While they are quite resilient, they can become weak, contaminated, or even die if stored incorrectly. Here’s why proper storage is so important:
- Maintains grain health: Healthy storage keeps the balance of bacteria and yeast stable, so your next kefir batch will ferment quickly and taste good.
- Prevents contamination: Bad storage practices can invite mold, harmful bacteria, or off-flavors, making your grains unsafe.
- Saves money and time: If grains die, you’ll have to find new ones, which can be expensive or hard to source, especially for rare heirloom strains.
- Supports consistent kefir quality: Strong grains make reliable, tasty kefir every time.
A common mistake is letting grains sit too long in old milk, which can turn sour and damage the microbes. Another is storing grains in plain water, which starves them of nutrients.

Credit: www.youtube.com
Factors To Consider Before Storing
Not every storage method fits every situation. Think about these factors before choosing how to store your milk kefir grains:
- How long you need to store them: Will it be a few days, weeks, or months?
- How healthy your grains are: Weak or damaged grains may not survive long-term storage.
- How much fridge or freezer space you have: Some methods need more space or special containers.
- How quickly you want to restart fermentation: Some methods require more time to reactivate the grains.
Short-term storage is best for up to two weeks. Longer breaks need more robust methods like drying or freezing.
Supplies You’ll Need
To store milk kefir grains safely, gather these basic supplies:
- Clean glass jar with a lid (plastic lids are best to avoid corrosion)
- Fresh milk (ideally whole milk, but any type can work)
- Fine mesh plastic or stainless steel strainer
- Clean spoon (plastic or stainless steel)
- paper towels or clean cloth
- Zip-lock bags (for freezing or drying)
- Baking sheet (for drying)
- non-chlorinated water (for rinsing, if needed)
- Labels and marker (to note storage date)
Always sanitize your tools before use to reduce the risk of contamination. Avoid aluminum or copper, as these can react with the acids in kefir.
Short-term Storage Methods (up To 2 Weeks)
If you need to pause your kefir routine for a week or two, you can easily keep your grains healthy in the fridge with minimal effort.
1. Refrigeration In Fresh Milk
This is the most popular and reliable method for short breaks.
How to do it:
- Strain your kefir grains from the finished kefir.
- Place the grains in a clean glass jar.
- Add enough fresh milk to cover the grains completely (about 250 ml for 1–2 tablespoons of grains).
- Close the jar loosely to let gases escape, or use a lid with a small hole.
- Place the jar in the refrigerator (at 4°C or 39°F).
In the fridge, the cold slows down fermentation. The grains remain alive but mostly dormant. This way, they can rest for 7–14 days without problems.
Tips:
- Use whole milk if possible; the extra fat helps protect the grains.
- Change the milk every 7 days if storing for longer than a week.
- If the milk smells very sour or separates, replace it sooner.
2. Storing In A Milk Slurry
This is similar to the first method, but you use a thicker mix.
How to do it:
- Mix the grains with a small amount of milk to make a slurry.
- Pour into a jar, cover loosely, and store in the fridge.
The thicker slurry gives a bit more protection, especially for small grain amounts.
3. Storing In Milk With Sugar
Adding a teaspoon of sugar to the milk can give the grains extra food during storage.
How to do it:
- Add 1 teaspoon of white sugar per cup of milk.
- Mix well, then add the grains and store in the fridge.
This method is helpful if you have low-lactose milk or very cold fridge temperatures.
Common Mistakes In Short-term Storage
- Storing grains in plain water (they need milk nutrients).
- Sealing the jar too tightly (pressure can build up and cause spills).
- Forgetting to change the milk if storing longer than 1 week.
Medium-term Storage Methods (2 Weeks To 3 Months)
If you need to store your grains for longer than two weeks but less than three months, you need a sturdier approach. The fridge is still your friend, but you need to be extra careful.
1. Milk Refresh Method
Every 2–3 weeks, replace the milk with fresh milk. This keeps the grains fed.
Steps:
- Remove the old milk, which may be very sour.
- Rinse the grains briefly in non-chlorinated water (optional, only if milk is extremely sour).
- Add fresh milk and return to the fridge.
2. Double Milk Method
Use twice the usual amount of milk, which gives the grains more food to last longer.
Steps:
- Place grains in a jar.
- Add double the normal milk (e.g., 500 ml for 2 tablespoons grains).
- Store in the fridge for up to 3 weeks, refreshing as needed.
3. Use Goat Or Sheep Milk
Grains stored in goat or sheep milk often survive longer, as these types of milk have different proteins and fats that can be gentler on the grains during dormancy.
Note: Some grains may need a few batches to adjust to a different milk type.
Table: Short Vs. Medium-term Storage Methods
| Method | Best For | Milk Needed | Storage Time | Maintenance |
|---|---|---|---|---|
| Refrigeration in Milk | Short breaks (1-2 weeks) | Regular amount | 7-14 days | Change milk at 7 days |
| Milk Slurry | Small grain amounts | Small amount | 7-10 days | None |
| Double Milk | Medium breaks | Double milk | 2-3 weeks | Change milk at 2-3 weeks |
| Milk + Sugar | Low-lactose milk | Regular + sugar | 1-2 weeks | Change if sour |
Common Mistakes In Medium-term Storage
- Forgetting to refresh milk, causing grains to starve.
- Using ultra-pasteurized or UHT milk, which may not support the grains well.
- Letting grains sit in sour milk for months, which can weaken or kill them.
Credit: www.yemoos.com
Long-term Storage Methods (more Than 3 Months)
If you need to store your milk kefir grains for several months or even longer, you must use methods that allow the grains to “hibernate” safely. These methods carry more risk, but with proper care, many people have success.
1. Drying Milk Kefir Grains
Drying is a simple way to store grains for up to 6–12 months. It reduces the water content, slowing down all biological processes.
How to dry grains:
- Rinse the grains with non-chlorinated water to remove milk residues.
- Place them on a clean paper towel or cloth on a baking sheet.
- Cover lightly with a second towel to keep out dust.
- Leave at room temperature (18–25°C / 65–77°F) in a well-ventilated, shaded place.
- Let dry for 2–5 days, or until grains are hard and crumbly.
- Store the dried grains in a zip-lock bag or airtight container, ideally with a little powdered milk to absorb moisture.
- Keep in the fridge or freezer.
Tips:
- Avoid direct sunlight, which can kill the microbes.
- Don’t use a food dehydrator unless it can stay below 30°C (86°F).
- Write the date on the bag.
Dried grains can last up to a year, but some lose strength over time. Rehydration can take several days, and not all grains will survive.
2. Freezing Milk Kefir Grains
Freezing is another option for long-term storage, but it is riskier than drying. Some grains do not survive freezing well, but many do if properly prepared.
How to freeze grains:
- Rinse grains in non-chlorinated water.
- Pat dry with a paper towel.
- Place in a zip-lock bag with a little powdered milk (optional, helps protect cells from ice damage).
- Squeeze out excess air and seal.
- Place in the coldest part of the freezer.
Frozen grains can last 6–12 months, sometimes longer. When you are ready to use them, thaw in milk at room temperature, then start fermenting again. It may take a few batches for the grains to become active.
3. Dehydration With Milk Powder
This is a hybrid method, often used for shipping grains or long-term backup.
How to do it:
- Rinse and dry grains as described above.
- Roll the dried grains in milk powder until coated.
- Store in an airtight container in the fridge or freezer.
The milk powder acts as a protective layer, helping grains survive longer.
Table: Long-term Storage Methods
| Method | Duration | Success Rate | Special Notes |
|---|---|---|---|
| Drying | 6-12 months | Medium to High | Easy to ship; slow reactivation |
| Freezing | 6-12 months | Medium | Some grains may die; use milk powder |
| Dehydration with Milk Powder | Up to 1 year | Medium to High | Best for backup or sharing |
Hidden Risks In Long-term Storage
Many beginners do not realize that:
- Repeated freezing and thawing can weaken grains.
- If grains are not completely dry, mold or bacteria can grow during storage.
- Some grains never fully recover after long-term storage, producing slower or weaker kefir.
To improve your chances, always store extra grains as backup, and never freeze or dry all your grains at once.
How To Reactivate Stored Milk Kefir Grains
When you are ready to make kefir again, you need to “wake up” your grains gently. The process depends on the storage method used.
1. From The Fridge (short/medium-term)
- Remove grains from the fridge.
- Strain and discard the storage milk.
- Add grains to fresh milk (same ratio as usual).
- Ferment at room temperature (18–25°C / 65–77°F) for 24 hours.
- Discard the first batch if it smells or tastes odd.
- Repeat with fresh milk. Usually, grains are back to full strength within 1–3 batches.
2. From Dried Or Frozen State
- If dried, soak grains in a small amount of milk for 2–3 hours at room temperature.
- Discard milk, then add fresh milk and ferment as normal.
- The first 2–5 batches may ferment slowly or have odd textures.
- Gradually, grains should regain their full activity.
Pro tip: Some people add a pinch of sugar to the milk during the first couple of batches. This helps feed the yeast and bacteria, making recovery faster.
Table: Expected Recovery Times
| Storage Type | First Batch Usable? | Full Recovery Time | Signs of Success |
|---|---|---|---|
| Refrigerated | Often yes | 1-2 days | Normal smell, tangy flavor |
| Dried | No | 3-7 days | Consistent thickening, no off-odors |
| Frozen | No | 2-5 days | Grains float, bubbly kefir |
Common Problems After Storage
- Slow fermentation: Grains may need several batches to regain strength.
- Off-flavors: Discard the first couple of batches if they taste bad.
- Texture changes: Sometimes kefir is thinner or lumpier until grains adjust.
If grains don’t recover after a week, they may not have survived. Always keep a backup batch if possible.

Credit: www.youtube.com
Advanced Tips For Storing And Caring For Kefir Grains
Even experienced kefir makers can miss some of these important details:
- Label your storage jars with the date and method used. This helps track how long grains have been stored and which methods work best for you.
- Store extra grains as insurance. If you have more grains than you need, keep a small batch dried or frozen. If your main batch fails, you’ll have a backup.
- Never store grains in honey. While honey is a good preservative for some foods, it contains antibacterial compounds that can kill kefir microbes.
- Don’t use chlorinated water for rinsing. Chlorine can kill the bacteria and yeast in your grains.
- Avoid metal containers for long-term storage. Stainless steel strainers and spoons are fine for short use, but long storage in metal can leach ions that harm grains.
- Consider sharing: If you have many grains, give some to friends. This way, if you lose yours, you might get them back later.
Many people do not realize that grains can sometimes survive over a year in a dried state, but their fermenting power may be weaker. It’s also possible to revive “tired” grains by fermenting in goat’s milk or adding a bit of sugar for a few batches.
Safety And Hygiene When Storing Kefir Grains
Kefir grains are generally safe to handle, but good hygiene is crucial:
- Wash your hands before touching grains.
- Use clean, sanitized jars and utensils.
- Discard any grains that develop visible mold (blue, green, or black spots).
- If grains smell rotten or putrid, do not use them.
- Always use fresh, high-quality milk for storage and fermentation.
Pro tip: If you ever see pink or orange discoloration in the milk or on the grains, throw them out. This usually signals contamination.
Storing Kefir Grains For Travel Or Shipping
If you need to send grains to a friend or take them on a trip:
- Dry or dehydrate the grains first. Dry grains travel better and are less likely to spoil.
- Use an airtight bag or container, and include a note with reactivation instructions.
- If shipping in hot weather, try to insulate the package.
Some kefir communities and commercial suppliers use this method to share grains worldwide. For more information on the science behind kefir and its storage, you can visit the Kefir Wikipedia page.
Frequently Asked Questions
What Happens If I Forget To Change The Milk During Storage?
If you forget to change the milk, it may become very sour or even spoil. The grains might suffer from lack of nutrients or be exposed to harmful byproducts. In most cases, you can rinse the grains and restart with fresh milk, but if there’s mold or a rotten smell, it’s safer to discard them.
Can I Store Milk Kefir Grains In Water?
No, never store milk kefir grains in plain water. They need the nutrients in milk to survive. Water storage can starve the grains, weaken them, and often leads to failure. Always use fresh milk or, for long-term storage, dry or freeze the grains.
How Do I Know If My Stored Kefir Grains Are Still Alive?
Live grains are usually creamy white, rubbery, and have a clean, sour-milk smell. When placed in fresh milk, they should start to ferment within 24–48 hours, thickening the milk and producing a tangy taste. If there’s no change after several days, or if you see mold or smell bad odors, the grains may be dead.
Is It Safe To Eat Kefir Made From Stored Grains?
Yes, as long as the grains look and smell healthy after storage and the kefir ferments normally (tangy, slightly carbonated, no off-colors or rotten smells), the drink should be safe. Always discard the first batch after long storage, just in case.
What Is The Best Way To Revive Weak Or Sluggish Kefir Grains?
If your grains are slow or weak after storage, try fermenting them in small amounts of milk at room temperature, changing the milk daily. Adding a pinch of sugar can help. Sometimes, using goat’s or sheep’s milk for a few batches boosts their activity.
Avoid using metal containers during recovery.
Storing milk kefir grains correctly gives you freedom and flexibility, letting you enjoy homemade kefir on your terms. With a bit of planning and care, your grains will stay strong and healthy—ready to provide delicious, probiotic-rich kefir whenever you wish.