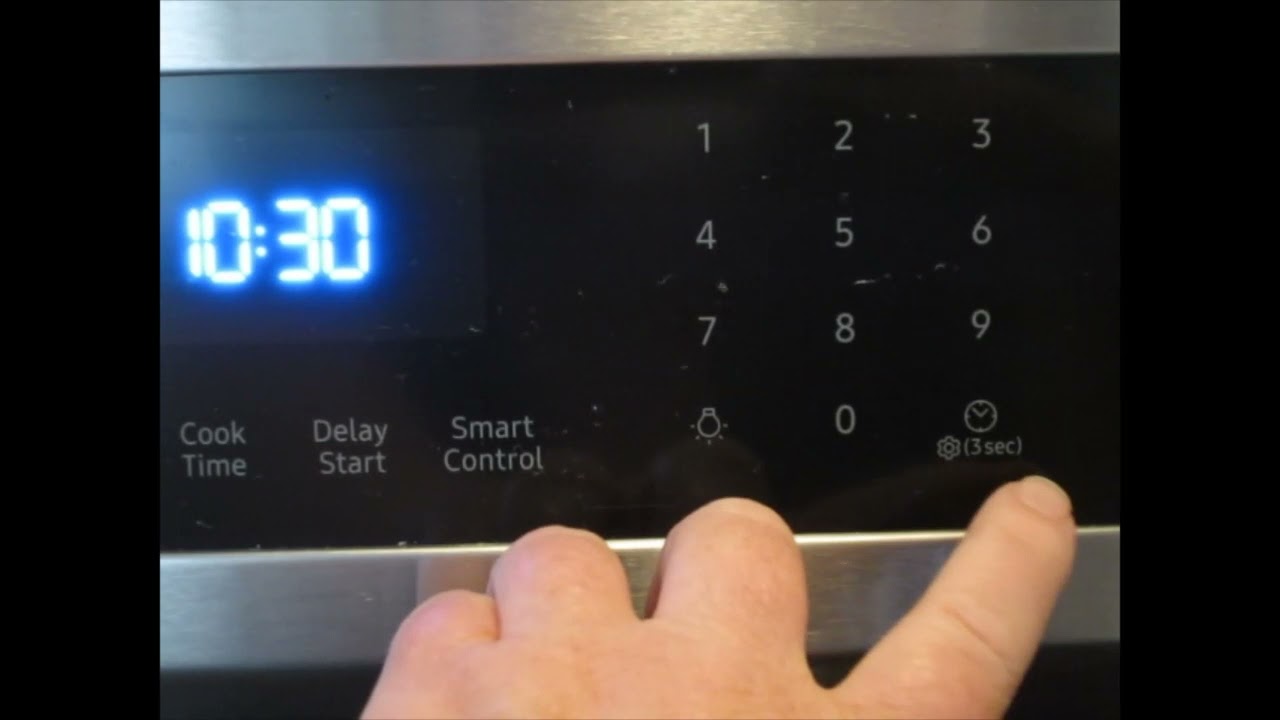
To set the clock on a Samsung SmartThings stove, press the ‘Clock’ button, then adjust the hours and minutes using the numerical keypad. Confirm by pressing ‘Start’ or ‘Clock’ again, depending on your model.
Setting up your Samsung SmartThings stove correctly is crucial for daily convenience and ensuring your meals are perfectly timed. Modern kitchens benefit immensely from smart appliances that streamline cooking routines and add a touch of sophistication. The Samsung SmartThings stove, with its innovative features, is a prime example of this advancement.
However, getting familiar with its functionalities, like adjusting the clock, can sometimes pose a challenge. This brief guide aims to simplify this process, making it accessible to everyone. Whether you’re a tech-savvy individual or someone who prefers straightforward appliances, understanding how to manage the clock setting on your Samsung stove is the first step towards a seamless cooking experience.
Credit: m.youtube.com
Introduction To Samsung Smartthings Stove
Welcome to the world of Samsung SmartThings Stove. Smart stoves make cooking easy and efficient. With cutting-edge technology, these appliances are changing kitchens everywhere. Let’s explore the integration and benefits of a synced stove clock.
Smart Appliance Integration
Integrating smart appliances brings convenience and control. The Samsung SmartThings Stove connects with other smart devices. This creates a seamless kitchen environment.
- Control with voice or app
- Receive real-time updates
- Manage settings remotely
Benefits Of A Synchronized Kitchen Clock
A synchronized kitchen clock ensures timely meals. It helps in coordinating cooking tasks. Here are some benefits:
- Accurate timing for perfect dishes
- Syncs with other smart appliances
- Adjusts for daylight savings, no manual reset
Initial Setup Of Your Smartthings Stove
Welcome to the initial setup of your new Samsung SmartThings stove.
Follow this guide to start cooking with smart technology.
Unboxing And Installation
Open the box and remove your SmartThings stove carefully.
Check for the installation manual, warranty card, and accessories.
- Place the stove in a suitable spot.
- Connect the power cord to a safe outlet.
- Secure any loose parts for safety.
Install as per the manual to ensure proper function.
Connecting To Wi-fi
Turn on your stove and find the Wi-Fi settings.
- Select your home network from the list.
- Enter the Wi-Fi password when prompted.
Your stove will connect to Wi-Fi automatically.
Ensure your smartphone has the SmartThings app installed.
Pair your stove with the app for full control.
Navigating The Smartthings App
Welcome to the ‘Navigating the SmartThings App’ section of our blog. Here, you’ll learn how to manage your Samsung SmartThings stove efficiently. The SmartThings app is your control hub. Let’s dive into the steps for setting your stove’s clock through this intuitive app.
Downloading The App
First, ensure you have the SmartThings app. It’s essential for syncing your appliances. Follow these steps:
- Visit your phone’s app store.
- Search for ‘SmartThings’.
- Tap download and install.
Pairing Your Stove
Next, pair your stove with the app. This will allow clock adjustments. Pairing is straightforward:
- Open SmartThings on your device.
- Tap the ‘+’ sign to add a device.
- Select ‘Stove’ from the list.
- Follow on-screen instructions to pair.
Once paired, you’re ready to set the clock. Your stove’s time syncs with your smartphone for accuracy.
Adjusting The Clock Settings
Setting the right time on your Samsung SmartThings stove is easy. It helps your cooking tasks stay on track. Let’s dive into adjusting the clock settings.
Accessing The Clock Settings
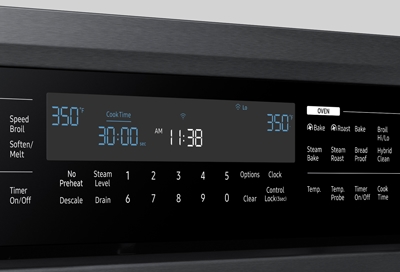
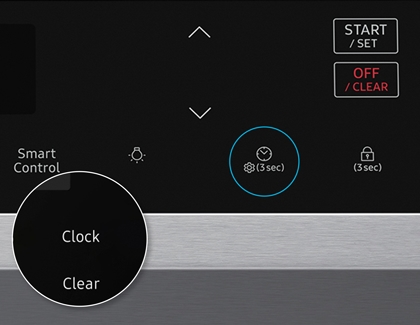
First, make sure your stove is on. Then, touch the Settings icon. It looks like a gear. Next, find and select Clock. You are now in the clock settings.
Manual Vs. Automatic Time Set
- Manual Time Set: Choose this to set the clock yourself. Here’s how:
- Under Clock, select Manual.
- Use the + and – buttons to set the hour and minutes.
- Press OK to save.
- Automatic Time Set: Lets your stove set the time. It uses your Wi-Fi. Follow these steps:
- Select Automatic under Clock.
- Make sure your stove connects to Wi-Fi.
- The time updates by itself.
Remember, setting the time helps your cooking. Always check it is right. Enjoy your cooking with the correct time on your Samsung SmartThings stove!
Troubleshooting Common Issues
Setting the clock on your Samsung SmartThings stove should be easy. Sometimes, you might run into issues. Let’s troubleshoot some common problems.
Connectivity Problems
Connectivity issues can make setting the clock hard. Try these steps:
- Check your Wi-Fi connection. It should be strong.
- Restart your stove and router. This often fixes the problem.
- Make sure the SmartThings app is up-to-date.
If these steps don’t work, contact Samsung support.
Incorrect Time Display
Seeing the wrong time on your stove? Here’s what to do:
- Open the SmartThings app on your phone.
- Go to your stove’s settings.
- Choose ‘Clock Settings’.
- Set the correct time.
Remember, your stove’s time updates with daylight saving changes.
Credit: www.samsung.com
Maintaining The Clock Accuracy
Keeping your Samsung SmartThings stove’s clock accurate is crucial. A precise clock ensures timely cooking starts and safety features work correctly. Let’s explore easy steps to ensure your stove’s clock stays on track.
Regular Updates
Check for software updates often. These can improve your stove’s time-keeping. To update:
- Navigate to ‘Settings’ on your stove’s display.
- Select ‘Software Update’.
- Follow prompts to install any available updates.
Updates may include clock enhancements. They keep your stove running smoothly.
Power Outage Considerations
Power outages can reset your stove’s clock. To maintain accuracy:
- Have a backup battery if possible.
- Reset the clock after an outage quickly.
For resetting, press ‘Clock’ on the stove’s control panel. Use the hour and minute buttons to adjust. Confirm your settings to save.
Remember these tips for a clock that always shows the right time.
Using Voice Commands
Welcome to the future of kitchen convenience with Samsung SmartThings stoves. Setting the clock is a breeze with voice commands. Let’s dive into how to integrate your stove with voice assistants and set the time using just your voice.
Integration With Voice Assistants
Modern Samsung stoves work seamlessly with voice assistants. These include Bixby, Alexa, and Google Assistant. With simple setup steps, you can control your stove hands-free. Here’s how:
- Open the SmartThings app on your phone.
- Go to the voice assistant settings.
- Link your Samsung account.
- Follow the in-app instructions to complete the setup.
Once connected, you have the power to control your stove with voice commands.
Setting The Clock Using Voice
Forget the buttons, and just speak to set your stove’s clock. It’s that simple. Here’s what you need to do:
- Activate your chosen voice assistant.
- Say, “Set the stove clock to [time].”
- Wait for the assistant to confirm the time set.
Enjoy accurate time settings with a quick voice command.
Credit: www.samsung.com
Advanced Features And Customization
Samsung SmartThings stoves boast impressive tech. They make cooking easy and fun. Let’s explore how to use their advanced features.
Setting Multiple Timers
Ever wish you could manage different dishes at once? Samsung stoves let you do just that. Here’s how to set multiple timers:
- Touch the ‘Timer’ button on your stove’s screen.
- Select ‘Add Timer’ for each new dish.
- Adjust the time for each using ‘+’ or ‘-‘.
- Press ‘Start’ and let the stove handle the rest.
Manage several dishes without stress. Your stove signals when each is done.
Customizing Display Preferences
Love a personalized touch? Samsung gets it. Customize your stove’s display with these steps:
- Open the SmartThings app on your device.
- Choose your stove from the list of devices.
- Tap ‘Settings’ then ‘Display Preferences’.
- Pick your theme, color, and brightness.
- Save your settings and enjoy the new look.
Your stove now reflects your style. It’s not just smart; it’s personalized.
Frequently Asked Questions
Can Samsung Smartthings Control My Stove’s Clock?
Samsung SmartThings can indeed control your stove’s clock, allowing for seamless synchronization with your smart home setup.
Where Do I Find The Clock Setting On Smartthings?
To set the clock on your Samsung SmartThings stove, navigate to the appliance’s settings in the SmartThings app.
Is Setting The Clock On Smartthings Intuitive?
Yes, setting the clock is designed to be user-friendly within the SmartThings app, ensuring a straightforward process.
Can Smartthings Adjust The Stove’s Clock Automatically?
SmartThings may adjust your stove’s clock for daylight savings or time zone changes if connected to Wi-Fi.
What Are The Steps To Manually Set The Clock?
Manually setting the clock involves selecting your stove in the app, choosing ‘Settings’, and entering the correct time.
Conclusion
Setting your Samsung SmartThings stove’s clock is a breeze with these steps. Embrace the convenience of modern appliances and enjoy the extra time on your hands. Remember, a synchronized kitchen is just the start to a smart home experience. Keep exploring, and stay savvy with your smart devices!