To run plumbing to a detached garage, first obtain necessary permits and then design the system layout. Consult with local building codes to ensure compliance.
Transforming your detached garage into a fully functional space often involves adding plumbing. This upgrade can significantly boost your property’s value and utility. Running water lines to a detached garage opens up possibilities for a workshop, laundry room, or even a guest suite.
The process requires careful planning and adherence to local regulations. Before starting, familiarize yourself with the specifics of your project. This includes understanding the depth at which pipes must be buried to prevent freezing and determining the best route for the plumbing lines. Engaging with professionals can simplify this process, ensuring that the job is done correctly and efficiently. Remember, meticulous preparation and compliance with building codes are crucial for a successful installation.
Credit: princetonplumbingpros.com
Assessing Your Detached Garage’s Plumbing Needs
Planning to run plumbing to your detached garage requires careful assessment. You must consider the intended use and the necessary fixtures. This ensures a functional space that meets your needs.
Identifying Purpose And Fixtures
Start by defining the garage’s purpose. Will it host a home office, workshop, or bathroom? List the fixtures needed for each activity. Sinks, toilets, and showers are common choices.
- Home office: A simple sink may suffice.
- Workshop: Consider a utility sink for cleaning tools.
- Bathroom installation: Include a toilet and possibly a shower.
Determining Water Usage
Estimate the water usage for each fixture. This helps in designing an efficient plumbing system. Use the following table as a guide:
| Fixture | Usage (Gallons per Day) |
|---|---|
| Sink | 2-5 |
| Utility Sink | 5-10 |
| Toilet | 18-26 |
| Shower | 17-20 |
Match the water supply and drainage to the estimated usage. Ensure pipes are sized correctly. This avoids pressure drops and slow drainage.
Planning And Designing The Layout
When adding plumbing to a detached garage, careful planning is essential. A well-thought-out design ensures a smooth installation process. Let’s dive into the steps necessary to create a functional layout.
Creating A Blueprint
Start with a detailed blueprint of your garage. This blueprint should include the existing structure and the intended plumbing additions. Use graph paper or a digital design tool to map out the space accurately. Include all critical dimensions and consider potential obstacles.
Include water supply and drainage lines in your blueprint. Plan for easy access to these lines for future maintenance. Consider the placement of sinks, toilets, or any other water-dependent fixtures. Make sure everything complies with local building codes.
Choosing The Right Pipes
The next step is selecting the appropriate pipes. Choose materials that are durable and suitable for your climate. Pipes can freeze and burst in cold temperatures. Insulation is key to prevent this.
| Pipe Material | Pros | Cons |
|---|---|---|
| PVC | Lightweight, easy to install | Not for hot water use |
| Copper | Durable, resists corrosion | Expensive, requires soldering |
| PEX | Flexible, good for cold and hot water | Can’t be exposed to sunlight |
Consider the water pressure requirements of your garage. Ensure the pipes you choose can handle the load. Consult a professional plumber if unsure about the best type of pipe for your project.
Securing Permits And Understanding Regulations
Securing permits and understanding regulations is a critical step when running plumbing to a detached garage. This section guides you through local codes and the permit application process. Get your project off to a smooth start by staying compliant.
Navigating Local Codes
Local codes dictate plumbing standards. These rules ensure safety and functionality. Different areas have unique requirements. It’s vital to know what applies to your locality.
- Start by contacting your local building department.
- Request code specifics for detached garage plumbing.
- Check for updates regularly, as codes can change.
Applying For Necessary Permits
Permits are official approvals for plumbing work. They confirm that plans comply with local codes. Skipping permits can lead to fines and project delays.
- Gather detailed project plans.
- Visit your local permit office or their website.
- Submit plans and application forms.
- Pay any required fees promptly.
- Wait for approval before starting work.
Connecting To The Main Water Supply
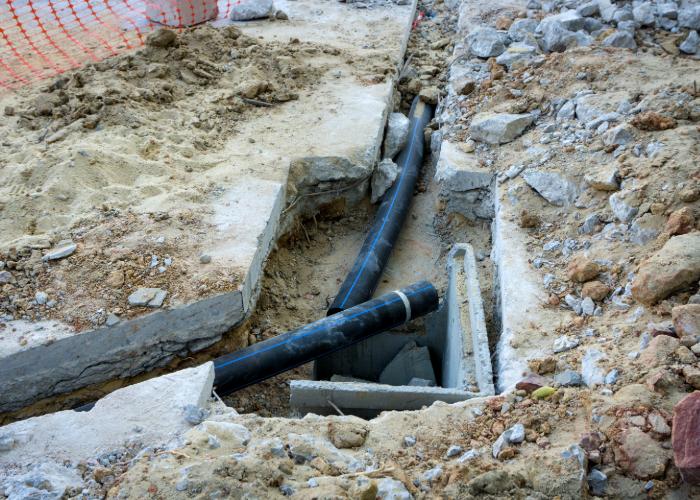
Connecting to the Main Water Supply is crucial for bringing water to a detached garage. This process involves careful planning and execution. We’ll explore excavation methods and how to protect pipes from freezing.
Excavation And Trenching Techniques
Digging the right path for water pipes is important. Here’s how to do it safely:
- Mark the route from your house to the garage. Use flags or spray paint.
- Check for utilities. Call a professional to locate underground lines.
- Choose the right tools. A trenching machine or shovel works well.
- Dig a trench. It must be at least 18 inches deep for frost protection.
Remember, safety comes first. Wear protective gear during the process.
Insulating Pipes Against Freezing
Freezing pipes can cause damage. Keep them safe with insulation:
- Wrap pipes with foam insulation. This keeps them warm.
- Use heat tape for extra protection in cold areas.
- Bury pipes below the frost line. This varies by region.
- Consider pipe sleeves. They add an extra layer of insulation.
Proper insulation saves money on repairs. It keeps water flowing all year.
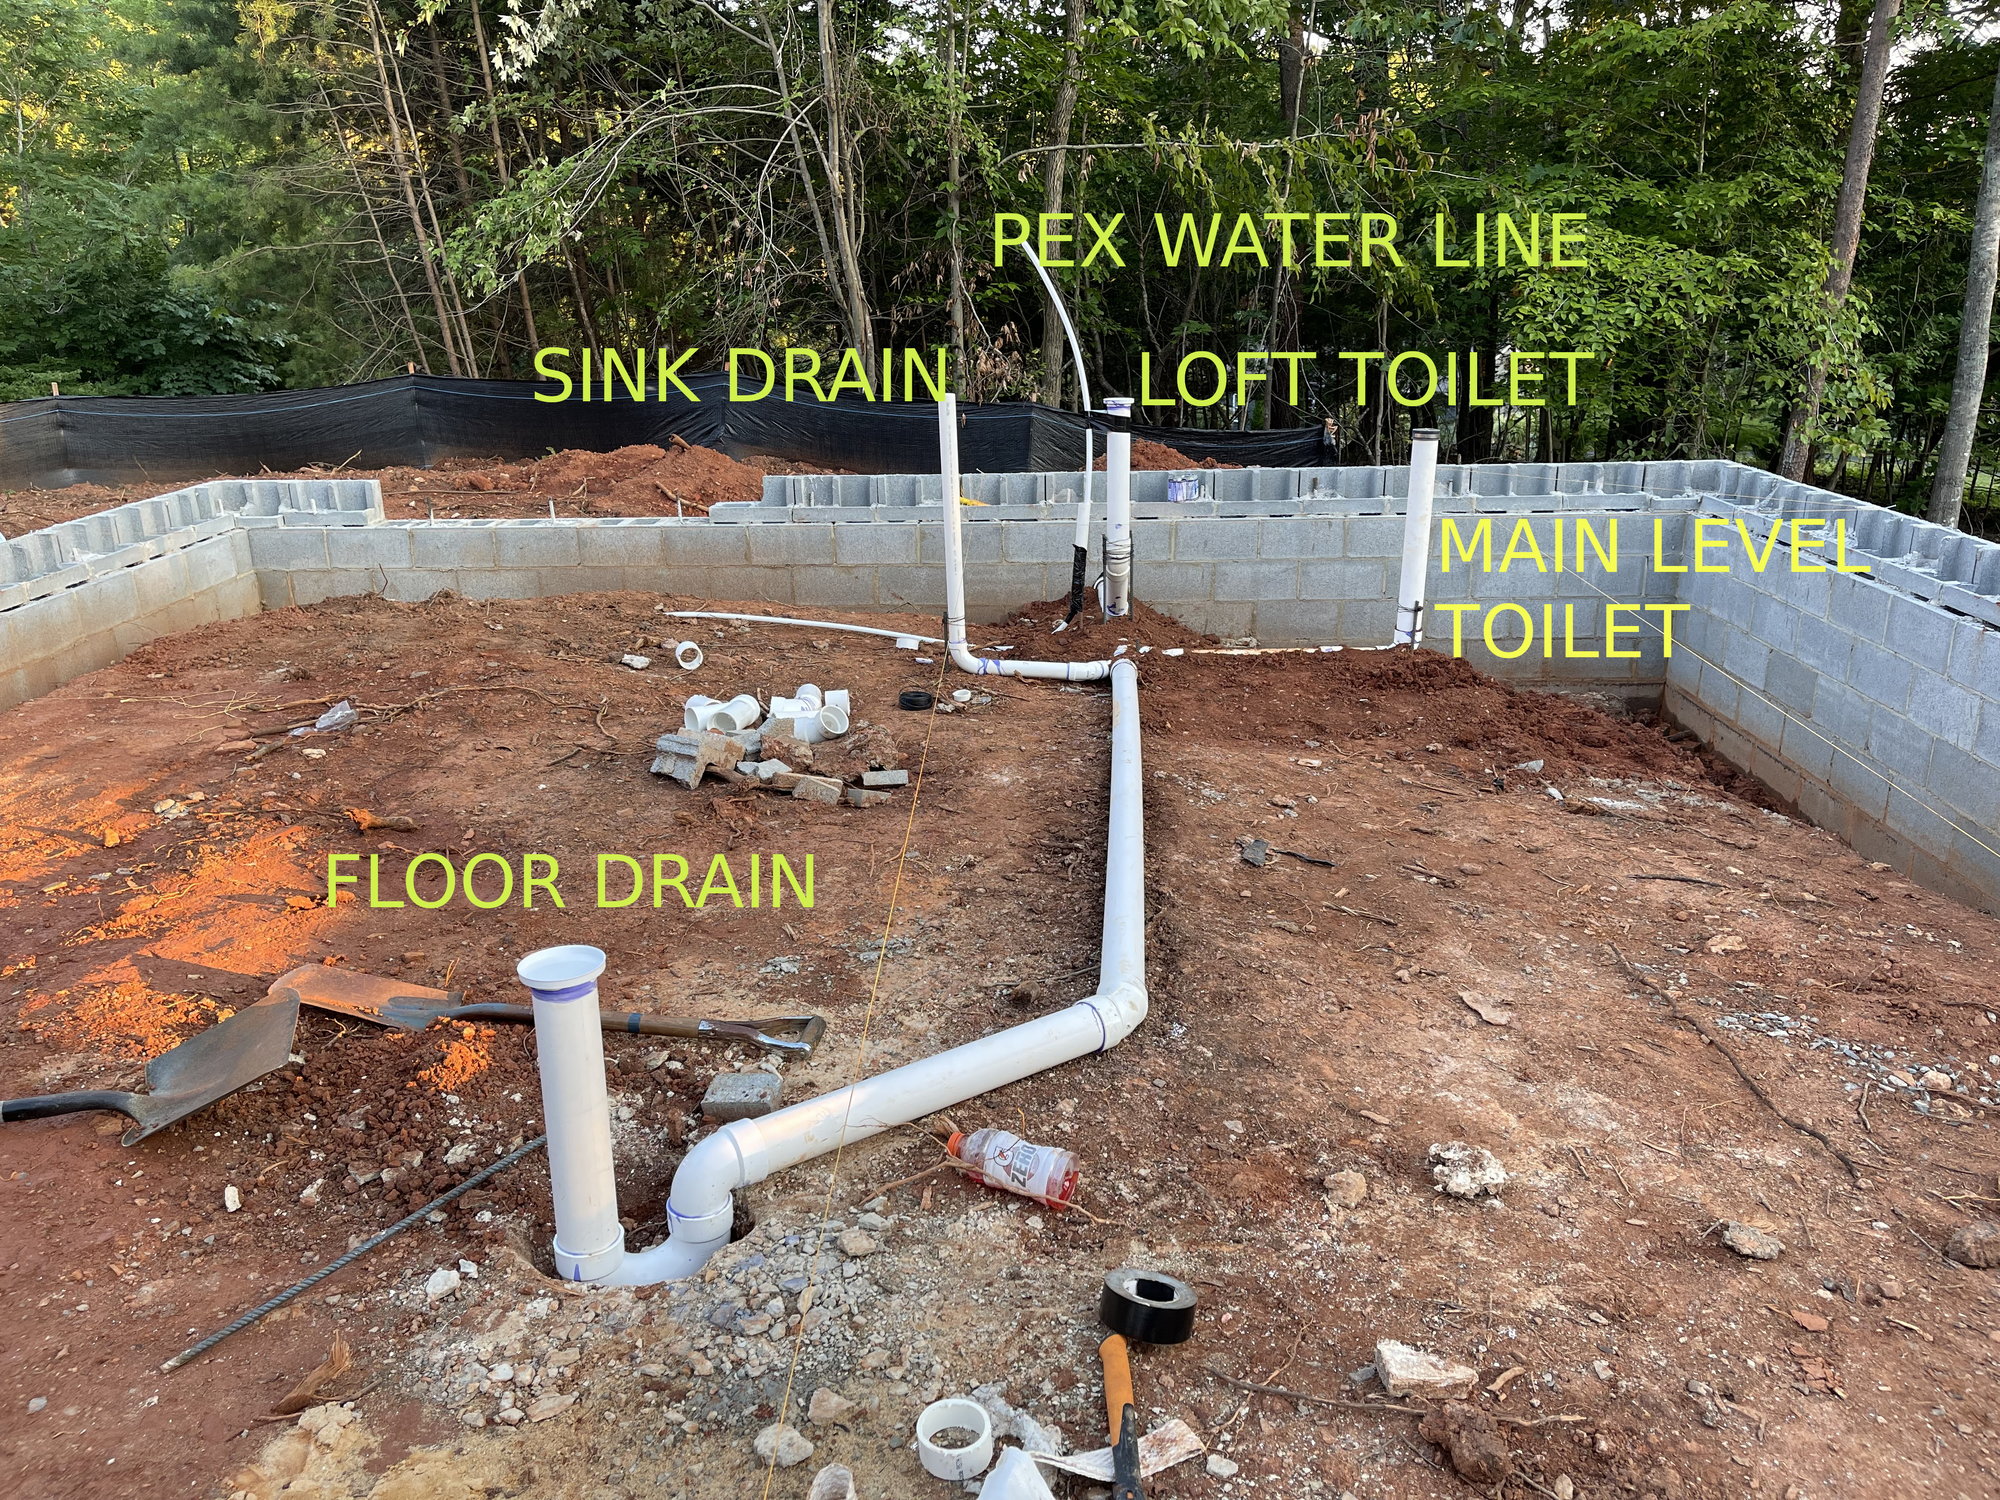
Installing The Drainage System
Installing a drainage system in a detached garage is crucial. It keeps water away from the building. This guide will show you the right steps.
Slope And Ventilation Considerations
The slope of your drainage pipes is important. A good slope ensures water flows away. For every 8 feet of pipe, it should drop 1 inch. This keeps water moving. Also, proper ventilation stops bad smells. It helps the water flow better too.
- Minimum slope: 1/4 inch per foot.
- Vent pipes must go up and out of the garage.
- Check local codes for specific requirements.
Septic Vs. Sewer Connections
Where your drainage goes is important. You can connect it to a septic tank or the city sewer. Septic tanks need more space. They must be far from water sources. City sewers are easier but may need permission.
| Type | Pros | Cons |
|---|---|---|
| Septic | Good for rural areas. | Needs regular maintenance. |
| Sewer | Less maintenance. | May need permissions. |
Always check local regulations before starting. This ensures your project meets all requirements.
Setting Up Hot Water Access
Access to hot water in a detached garage adds comfort and convenience. Whether for cleaning or a cozy workspace, setting up this feature requires planning. Explore water heater options and energy-saving tips to make an informed choice.
Water Heater Options
Choosing the right water heater is crucial for your garage. Consider size, power source, and type. Here are popular choices:
- Tankless water heaters – Save space and provide instant hot water.
- Electric tank heaters – Simple to install and use, but may increase electric bills.
- Gas heaters – Require venting but offer lower operational costs.
Energy Efficiency Tips
Optimizing energy use saves money and protects the environment. Follow these tips:
- Insulate pipes – Reduces heat loss, keeping water hotter for longer.
- Use timers – Heat water only when needed to cut down on waste.
- Regular maintenance – Keeps your system running efficiently.
Finalizing The Plumbing Fixtures Installation
After laying the pipes, it’s time to install the fixtures. This stage gives your detached garage its functional touches. Let’s dive into the essentials of setting up sinks, toilets, showers, and hose bibs.
Mounting Sinks And Toilets
Installing sinks and toilets is straightforward. First, ensure the water supply and drainage lines align. Secure the sink or toilet base using bolts for stability. Connect the water lines to the fixtures. Use sealant to prevent leaks. Test each fixture for proper operation.
- Bolt fixtures securely to the floor or wall
- Connect water lines with care
- Seal connections to avoid water damage
- Check for smooth water flow and drainage
Shower And Hose Bib Setup
Shower installation demands precision. Place the shower base and frame correctly. Ensure the shower head and controls are accessible. Attach the hose bib outside for garden use. This bib allows easy water access. Follow these steps for no-fuss usage.
- Level the shower base for proper drainage
- Install the shower frame and head at suitable heights
- Mount the hose bib near the garage exterior
With these installations, your garage transforms into a practical space. Running water enhances its value and utility. Follow these guidelines for a successful project.
Inspection And Maintenance
Proper inspection and maintenance are key to a successful plumbing project. They ensure safety and long-term functionality. Let’s explore the critical steps for final inspection and routine upkeep.
Preparing For Final Inspection
Final inspection is a crucial step. It verifies the installation meets local codes. Here are steps to prepare:
- Review local codes: Know the requirements.
- Check all connections: Ensure they are tight and leak-free.
- Test water flow: Run water through the system.
- Inspect fixtures: Make sure they operate correctly.
- Organize documents: Have permits and plans ready.
Routine Upkeep And Troubleshooting
Regular maintenance prevents issues. Follow these upkeep tips:
- Inspect regularly: Look for leaks or damage.
- Clean fixtures: Prevents buildup and clogs.
- Winterize pipes: Avoid freezing in cold weather.
Troubleshooting common problems:
| Issue | Solution |
|---|---|
| Leaky faucets | Replace washers or seals. |
| Clogged drains | Use a plunger or snake. |
| Low water pressure | Clean aerators or showerheads. |
Credit: www.doityourself.com
Frequently Asked Questions
What Permits Are Needed For Garage Plumbing?
Securing the correct permits is essential before beginning any plumbing work on a detached garage. Local building codes vary, so consult with your municipal building department.
Can Existing Home Plumbing Extend To A Garage?
Yes, existing home plumbing can often be extended to a detached garage, but this requires careful planning and consideration of pipe sizing and layout to ensure proper functionality and compliance with local codes.
What Is The Cost Of Running Plumbing To A Garage?
The cost can vary greatly depending on factors like distance from the main house, the complexity of the job, and local labor rates. It’s best to get multiple quotes from licensed plumbers for an accurate estimate.
How Deep Should Garage Plumbing Pipes Be Buried?
Plumbing pipes should be buried below the frost line to prevent freezing. The specific depth will depend on your region’s climate and local building codes, typically ranging from 12 to 36 inches.
What’s The Best Piping Material For Garage Plumbing?
PVC is a popular, cost-effective choice for garage plumbing due to its durability and ease of installation. However, PEX and copper are also good options, depending on your needs and budget.
Conclusion
Bringing plumbing to your detached garage can elevate your space’s functionality. By following the steps outlined, you’ll ensure a smooth installation. Always prioritize local codes and quality materials. Embrace the transformation; the effort pays off with enhanced utility and comfort.
Ready to tackle your next home improvement project?