Have you ever tried to unscrew a faucet aerator, only to find it’s stubbornly stuck in place? You’re not alone.
This tiny component plays a crucial role in controlling water flow and preventing splashes. But when it gets jammed, it can be quite frustrating. Imagine effortlessly removing that stuck aerator and getting your faucet back to optimal performance. Sounds great, right?
You might be wondering how to achieve this without damaging your faucet or breaking a sweat. In this guide, we’ll share simple, step-by-step techniques to help you tackle this common household issue. Ready to reclaim your faucet’s functionality and save some money on potential repairs? Let’s dive in and make your stuck aerator a problem of the past.
Identifying The Aerator Type
Identifying the aerator type is crucial before removal. It helps ensure proper tools and techniques are used. This step prevents damage and simplifies the process of detaching a stuck faucet aerator.
Identifying the type of aerator is the first step to removing it. Aerators come in various styles and sizes. Each type has unique features. Understanding these differences helps in removal. This section guides you through the process. Learn to recognize your faucet’s aerator.
Different Aerator Styles
Aerators vary in style. Some are simple and round. Others have unique shapes and designs. The most common types include standard, cache, and dual-thread aerators. Standard aerators have visible threading on the outside. Cache aerators are hidden inside the faucet spout. Dual-thread aerators fit both male and female spouts. Each style requires different tools for removal.
Locating The Aerator
Finding the aerator is crucial. Look at the tip of your faucet spout. This is where the aerator usually sits. Some aerators are visible. Others might be hidden inside the faucet. If you can’t see it, check inside the spout. Use a flashlight to get a better view. Recognizing the aerator’s location helps in planning its removal.
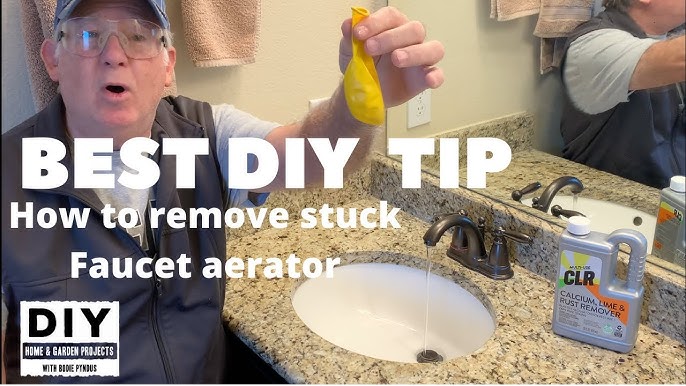
Credit: www.youtube.com
Essential Tools And Materials
Removing a stuck faucet aerator can be a challenging task. It’s crucial to have the right tools and materials. Knowing what to use makes the process easier and more efficient. In this section, you’ll find essential tools and materials needed for the job.
Basic Tools Needed
Several basic tools can help you remove a stuck aerator. A pair of pliers is essential for gripping and turning the aerator. Adjustable wrenches can provide the necessary leverage. A towel or cloth can protect the faucet’s finish. You might need a small brush to clean debris from the aerator. These tools are commonly found in most households.
Specialized Equipment
Sometimes basic tools are not enough. Specialized equipment can make the task easier. A strap wrench is useful for delicate surfaces. It provides a firm grip without scratching. A penetrating oil can loosen the aerator’s threads. Apply it to reduce friction. Aerator keys are designed specifically for removing aerators. They fit perfectly and provide extra torque.
Preparing The Work Area
Organizing tools and clearing clutter is crucial for a smooth faucet aerator removal. Ensure the area is well-lit and dry. This prevents accidents and makes locating and accessing the stuck aerator easier.
Removing a faucet aerator that is stuck can be a frustrating task, especially when you’re eager to fix that pesky slow water flow. But before you dive into the actual removal process, it’s crucial to prepare your work area effectively. A clean, organized space makes the task less daunting and helps prevent any damage to your faucet or sink. So, let’s dive into some practical steps to ensure your work area is ready for the job.
Clearing The Space
Start by decluttering the area around your sink. Move aside any toiletries, soap dispensers, or decorative items. Having a clear space will not only provide easy access but also help prevent accidental damage to items that might fall over during the process. Consider laying down a towel or mat near the sink to catch any small pieces that might drop during removal. This simple step can save you from losing tiny parts like washers and screws, which can be frustrating to search for later.
Protecting Surfaces
When dealing with plumbing tasks, it’s essential to safeguard your sink and countertop surfaces. Wrap a cloth around the faucet and sink edges to prevent scratches or dents. This is especially important if you are using tools like pliers or wrenches, which can easily damage delicate surfaces. Think about using masking tape on the countertop if you expect to use any harsh chemicals or lubricants during the removal process. It’s a small precaution that can save you from potential stains or discoloration. Do you have a story of a time you skipped these steps and ended up with a scratched sink or lost parts? It’s common but easily avoidable. Taking these preparatory actions might seem trivial, but they can make a world of difference, ensuring you tackle the task smoothly and efficiently.
Removing The Aerator
Removing a stuck faucet aerator can be challenging. Try using pliers wrapped in a cloth for grip. Gently twist counterclockwise to avoid damage.
Removing a faucet aerator that’s stuck can be a frustrating experience. You twist and turn, yet it doesn’t budge. But before you reach for the hammer, there are simple techniques you can try. Whether you’re a seasoned DIYer or just starting out, these steps can help you successfully remove the aerator without causing damage to your faucet or your sanity.
Loosening Techniques
Begin by assessing the situation. Sometimes, the aerator is just tightly screwed on. Start with your hands; grip the aerator firmly and turn counterclockwise. If it resists, don’t force it. Consider using a rubber glove for better grip. It increases the friction, making it easier to twist off the aerator. If that doesn’t work, reach for a pair of pliers. Wrap the aerator with a cloth first to prevent scratches, then gently apply pressure while turning. You might be surprised at how effective a simple twist can be when done carefully and with the right grip. Have you ever noticed how a gentle approach can sometimes yield better results than brute force?
Using Lubricants
If the aerator remains stubborn, a lubricant can be your best friend. Penetrating oil is excellent for loosening corroded or rusted parts. Apply a small amount around the base of the aerator and let it sit for a few minutes. WD-40 is another widely available option. Spray it on and give it time to work its magic. After applying the lubricant, try loosening the aerator again with your hand or pliers. Sometimes, a little patience paired with the right product can make all the difference. Have you ever considered how a small investment in time and the right tool can save you from bigger headaches down the road? By combining these techniques, you’re not just removing a stuck aerator—you’re learning valuable skills that can help in countless other DIY projects. Plus, there’s a certain satisfaction in tackling a problem with your own hands. What’s the next DIY challenge you’ll take on?
Dealing With Corrosion
Removing a stuck faucet aerator requires patience and careful steps. Begin by using a wrench to gently twist it off. If stubborn, soak it in vinegar to loosen corrosion, ensuring smooth removal.
Dealing with a stuck faucet aerator can be a frustrating experience, especially when corrosion is involved. Corrosion acts like a stubborn gatekeeper, locking your aerator in place and making a simple task seem daunting. But fear not! With the right tools and techniques, you can tackle this issue head-on and restore your faucet’s functionality. Let’s dive into identifying the signs of corrosion and discovering effective cleaning methods to make your faucet aerator as good as new.
Signs Of Corrosion
Corrosion often manifests in a few tell-tale signs that are easy to spot if you know what to look for. You might notice a greenish or bluish tint around the edges of the aerator, a classic indication of mineral deposits. This is especially common in areas with hard water. Another sign is the feeling of resistance when you try to unscrew the aerator. If it feels like it’s glued in place, corrosion might be the culprit. Don’t force it, as this can cause damage. Lastly, the presence of rust or flaky metal can point to corrosion. If the metal looks worn or degraded, it’s time to address the issue before it worsens.
Cleaning Methods
Once you’ve identified corrosion, it’s time to clean it up. A simple yet effective method involves soaking the aerator in white vinegar. Fill a small bowl with vinegar and let the aerator sit for a few hours. The acidity breaks down mineral deposits and loosens corrosion. If vinegar alone doesn’t cut it, try mixing baking soda with water to form a paste. Apply this to the corroded areas and gently scrub using an old toothbrush. This method is gentle yet effective, removing stubborn build-up without damaging the aerator. For more severe cases, a commercial descaling product may be necessary. Always follow the manufacturer’s instructions and wear gloves to protect your hands. Have you ever thought about how a bit of elbow grease can save you from calling a plumber? Tackling corrosion not only restores functionality but empowers you to take control of minor home repairs.
Alternative Removal Methods
Removing a stuck faucet aerator can be frustrating. Sometimes, traditional methods don’t work. In such cases, alternative techniques can be effective. These methods provide solutions without causing damage. Let’s explore some of these approaches.
Using Heat
Heat can loosen a stuck aerator. Use a hair dryer to warm the area. Direct the heat for a few minutes. This can expand the metal slightly. It helps to break the grip of corrosion. Be cautious not to overheat. Excessive heat might damage the faucet.
Employing Chemical Solutions
Chemical solutions can dissolve rust and mineral deposits. Vinegar is a natural choice. Soak a cloth in vinegar and wrap it around the aerator. Leave it for an hour to work. Commercial rust removers are also effective. Apply them according to instructions. Ensure good ventilation when using chemicals.
Preventing Future Issues
Stuck faucet aerator removal prevents future plumbing issues. Gently use pliers or a wrench to loosen the aerator. Regular cleaning helps avoid stubborn buildup.
Picture this: You’ve just managed to remove that stubborn faucet aerator, and the water is flowing beautifully. But how do you ensure you won’t face the same problem again? Let’s dive into some practical steps to prevent future issues, saving you time and frustration.
Regular Maintenance
Keeping your faucet aerator in top condition doesn’t have to be a chore. A simple routine can work wonders. Consider setting a monthly reminder to check for any mineral buildup or debris. Regular cleaning can be as simple as soaking the aerator in vinegar overnight. This softens mineral deposits, making them easy to wipe away. A quick rinse in the morning, and you’re good to go. You might wonder, “Isn’t this overkill?” Not at all. A little effort now can prevent larger headaches down the line. Imagine avoiding a stuck aerator altogether, simply through consistent care.
Choosing Quality Aerators
Ever considered the material of your aerator? Opting for quality materials can make a huge difference. Aerators made from brass or stainless steel are less likely to corrode. Don’t let the price tag fool you. Investing a bit more upfront in quality can save you money on replacements and repairs. It’s like buying shoes that last—worth every penny. Think about the brands you trust. Have they proven reliable in the past? Often, spending a little more on a reputable brand ensures durability and longevity. Incorporating these strategies not only keeps your faucet functioning smoothly but also extends its lifespan. What steps will you take today to make your faucet troubles a thing of the past?
Credit: www.tiktok.com
:max_bytes(150000):strip_icc()/removing-a-faucet-aerator-2718836-02-9280a2c1a07f448c9d4f1f1511f84446.jpg)
Credit: www.thespruce.com
Frequently Asked Questions
How Can I Identify A Stuck Faucet Aerator?
Look for difficulty in water flow adjustment. If the aerator doesn’t budge, it may be stuck.
What Tools Are Needed To Remove A Stuck Aerator?
Use a wrench, pliers, or rubber jar opener. These can help twist off the stubborn aerator.
Can Vinegar Help Loosen A Stuck Aerator?
Yes, soaking the aerator in vinegar can dissolve mineral buildup. This might make removal easier.
Is It Safe To Use Force On A Stuck Aerator?
Apply gentle pressure. Too much force can damage the faucet. If it feels too tight, try other methods first.
What Should I Do If The Aerator Still Won’t Budge?
Try lubricating with oil or using a rubber grip. If unsuccessful, consult a plumber for help.
Conclusion
Removing a stuck faucet aerator can be tricky. But with patience, it’s doable. Start by gathering the right tools. Pliers and a wrench often help. Next, apply gentle pressure. Avoid damaging the faucet. Warm water might loosen it. Vinegar helps with mineral build-up.
Soak the aerator if necessary. Check for any wear or damage once removed. Consider replacing old parts. Regular cleaning prevents future issues. DIY tasks save money. Plus, they boost confidence. Remember to stay calm and focused. Soon, your faucet will flow freely again.