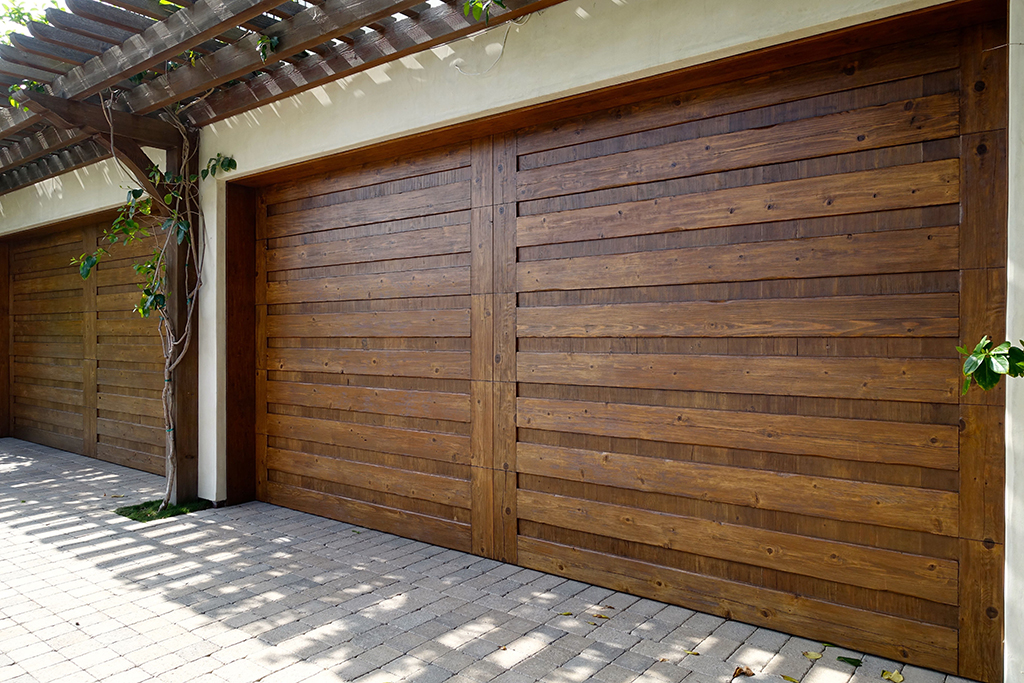
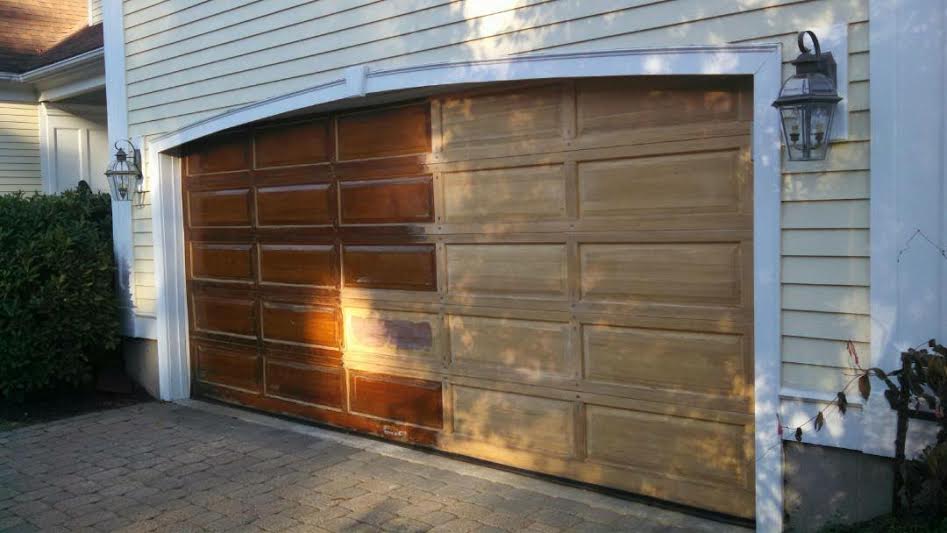
Refinishing a wood garage door revitalizes its appearance and protects it from the elements. Start by cleaning, sanding, and applying a new stain or paint.
Refinishing a wood garage door is an effective way to enhance your home’s curb appeal while safeguarding the door against weather damage. This DIY project requires some elbow grease but pays off by extending the life of your door and boosting the overall look of your property.
A well-maintained wood garage door can add a touch of elegance and charm to your home, making a strong first impression. Whether your door has succumbed to wear and tear or you’re simply looking to update its color, refinishing is a cost-effective solution. By following a step-by-step process, homeowners can achieve professional-looking results without the need for expensive contractors. This guide aims to equip you with the knowledge to tackle this project confidently, ensuring your wood garage door remains a beautiful and durable part of your home exterior.
Introduction To Wood Garage Door Refinishing
Wood garage doors add beauty to homes. They need care to last long. Refinishing is key to protect them from weather. It keeps them looking great. Learn how to refinish your wood garage door here.
The Importance Of Regular Maintenance
- Prevents weather damage
- Stops wood rot and decay
- Keeps doors functioning well
Benefits Of Refinishing Your Wood Garage Door
Refinishing boosts curb appeal. It increases home value. It also saves money on replacements. Your door stays strong against elements. Enjoy a beautiful, durable door for years.
Assessing Your Garage Door’s Condition
Before diving into a refinishing project, evaluate the condition of your wood garage door. Proper assessment can save time and money, ensuring refinishing is done only when necessary. A thorough check helps pinpoint areas needing attention.
Identifying Signs Of Wear And Damage
Look for these clear indicators that your garage door needs refinishing:
- Peeling or flaking finish: Sign of weather impact.
- Discoloration: Suggests sun damage or aging.
- Wood rot: Soft spots or crumbling areas mean decay.
- Cracks and splits: Wooden panels can split from dryness.
When To Refinish: Timing And Frequency
Refinishing is not an annual task. Observe these cues for ideal timing:
| Condition | Refinishing Frequency |
|---|---|
| Mild Wear | Every 3-5 years |
| Severe Damage | Immediately |
| Color Fading | Every 2-3 years |
Climate and door quality affect how often refinishing is needed. Regular maintenance can extend periods between refinishing. Always address severe damage promptly to avoid further deterioration.
Materials And Tools Required
Refinishing a wood garage door breathes new life into your home’s exterior. Proper preparation ensures a successful project. Gather materials and tools before starting.
List Of Supplies Needed
- Sandpaper (medium and fine grit)
- Wood filler
- Paint scraper
- Primer designed for exterior use
- High-quality wood paint or stain
- Sealant for weather protection
- Paintbrushes and rollers
- Drop cloths
- Painter’s tape
- Dust mask and safety glasses
Choosing the right products is critical for durability and aesthetics. Here’s how.
Choosing The Right Products For The Job
For primer, paint, and sealant, opt for weather-resistant options. Check compatibility with wood. Prioritize eco-friendly products to minimize environmental impact.
| Product Type | Recommended Features |
|---|---|
| Primer | Exterior use, wood compatibility |
| Paint/Stain | High-quality, fade-resistant |
| Sealant | Moisture protection, UV resistance |
Choose tools that offer precision and ease of use. Quality brushes and rollers provide a smooth finish. Safety gear is non-negotiable to protect health.

Credit: www.teakmaster.com
Preparing The Door For Refinishing
Preparing the Door for Refinishing is a crucial step. It ensures your wood garage door looks new and lasts longer. Let’s dive into how to prepare your door properly.
Cleaning And Stripping The Old Finish
First, clean the door well. Use a mild soap and water mix. Make sure to remove all dirt and grime. After cleaning, let the door dry completely.
Next, strip the old finish. You might need a paint stripper. Apply it according to the product instructions. Wear gloves and a mask for safety. The old finish will start to peel off. Remove it with a scraper. Be gentle to avoid damaging the wood.
Sanding Techniques For A Smooth Base
Sanding makes the surface smooth. Start with a coarse sandpaper. It helps remove any remaining old finish. Use circular motions for even sanding.
After the coarse sandpaper, switch to a finer grit. It will make the surface smoother. Always sand in the direction of the wood grain. This prevents scratches.
- Start with coarse sandpaper.
- Switch to finer grit for smoothness.
- Sand in the wood grain direction.
Choosing The Right Stain Or Paint
Choosing the right stain or paint for your wood garage door is key. It protects and beautifies. Let’s explore how to make the best choice.
Comparing Stain Vs. Paint Options
Stain and paint are both popular. But they serve different needs. Here’s a quick comparison:
| Feature | Stain | Paint |
|---|---|---|
| Look | Natural wood | Solid color |
| Protection | Good | Great |
| Maintenance | More often | Less often |
| Application | Easier | Needs prep |
Selecting A Color And Finish
After choosing between stain and paint, pick a color and finish. Here’s how:
- Match your home’s style. Think about what looks good.
- Consider the sun. Dark colors fade faster in sunlight.
- Test first. Try a small area before doing the whole door.
Choose a finish that suits your taste:
- Glossy for shine.
- Semi-gloss for less shine.
- Matte for no shine.

Credit: ramsdenpainting.com
Applying The New Finish
Revitalizing a wood garage door enhances curb appeal. Staining and painting are key to a fresh look. Let’s dive into the application process.
Step-by-step Staining Process
Select a stain that complements your home. Gather supplies: stain, brushes, and rags. Ensure the door is clean and dry before starting.
- Test the stain on a small area.
- Apply stain with a brush or rag.
- Work in sections, moving top to bottom.
- Wipe off excess stain for an even coat.
- Let dry and apply a second coat if needed.
- Finish with a clear protective sealant.
Best Practices For Painting
Choose a durable exterior paint. Prep with primer for best adhesion. Paint in optimal weather for drying.
- Prime the door with a quality primer.
- Start with the edges, then panels.
- Use a roller for flat surfaces.
- Brush for hard-to-reach spots.
- Apply at least two paint coats.
- Let dry thoroughly between coats.
Keep the work area dust-free. Follow the paint’s instructions for the best finish.
Curing And Drying
Refinishing a wood garage door can transform its look. Curing and drying are crucial to a lasting finish. Let’s explore these steps.
Timeframes For Drying
Drying times vary based on products and conditions. Check the manufacturer’s recommendations. Aim for a dry, warm day for best results.
- First coat: 6-8 hours before recoating.
- Second coat: Wait 24 hours for light use.
- Full cure: Up to 7 days for heavy use.
Ensuring Proper Curing For Durability
Curing ensures your door’s finish withstands time and weather. Follow these steps for best outcomes.
- Avoid direct sunlight during drying.
- Prevent dust and debris from settling on the wet surface.
- Keep the area well-ventilated.
| Temperature | Curing Time |
|---|---|
| Below 50°F (10°C) | Longer curing time needed |
| 50-70°F (10-21°C) | Optimal curing time |
| Above 70°F (21°C) | Faster curing time |
Check the door after drying. Touch-up any missed spots. Enjoy your door’s new look!

Credit: www.youtube.com
Maintenance Tips For Longevity
Keeping your wood garage door in top condition ensures it lasts for years. Proper maintenance is key. Here are vital tips to follow:
Regular Cleaning And Touch-ups
- Wipe down the door monthly with a mild soap.
- Use a soft cloth to avoid scratches.
- Inspect for peeling or chipped paint regularly.
- Touch up any damaged areas promptly.
- Check for signs of rot or insect damage.
- Apply a fresh coat of paint or stain every few years.
Protecting The Door From The Elements
- Install weather stripping to seal gaps.
- Ensure good drainage away from the door.
- Apply a water-repellent finish annually.
- Trim nearby bushes to prevent moisture buildup.
- Avoid direct sprinkler contact with the door.
- Consider a canopy or overhang for extra protection.
Troubleshooting Common Issues
Troubleshooting Common Issues with your wood garage door can extend its life and improve performance. This section covers fixing problems that often arise with wood doors.
Addressing Sticking Or Swelling
Wood doors may stick or swell due to moisture. Check these steps to fix the issue:
- Inspect Weather Stripping: Replace if worn out.
- Sand Down Swollen Areas: Gently sand to fit the frame.
- Apply Sealant: Protect wood from future moisture.
Repairing Minor Scratches And Nicks
Small imperfections can be fixed with simple steps:
- Clean the Area: Remove dirt before repairing.
- Fill with Wood Filler: Choose a matching color.
- Sand Smooth: Once dry, sand for evenness.
- Finish with Paint or Stain: Seal and protect the repair.
Frequently Asked Questions
What Is Wood Garage Door Refinishing?
Refinishing a wood garage door involves sanding off the old finish, repairing any damage, and applying new stain and sealant to protect the wood and enhance its appearance.
How Often Should You Refinish A Garage Door?
Typically, a wood garage door should be refinished every 1 to 3 years, depending on exposure to the elements and the type of finish previously applied.
What Materials Are Needed For Refinishing?
To refinish a wood garage door, you’ll need sandpaper, wood filler, stain, sealant, and brushes or rollers for application.
Can You Diy Garage Door Refinishing?
Yes, with the right tools and materials, a homeowner can refinish a wood garage door, but it requires time, effort, and attention to detail for best results.
Does Refinishing Increase Garage Door Lifespan?
Regular refinishing can significantly extend the lifespan of a wood garage door by protecting it from weather, wear, and decay.
Conclusion
Refinishing your wood garage door rejuvenates your home’s curb appeal and protects it from the elements. With the right tools and steps, a weekend project can yield lasting results. Embrace the satisfaction of DIY success and enjoy your garage door’s fresh, new look for years to come.


