You’ve invested time and effort into painting your walls, only to realize that the drywall job underneath isn’t quite right. Perhaps there are bumps, uneven surfaces, or visible seams that are driving you crazy.
It’s frustrating, isn’t it? But don’t worry, you’re not alone, and there’s a solution. Fixing a bad drywall job that has already been painted might seem daunting, but with the right guidance, you can transform your walls into a smooth canvas that complements your home beautifully.
Imagine walking into a room where the walls look flawless, enhancing everything else in your space. You deserve that satisfaction. You will discover step-by-step methods that will empower you to correct those imperfections. We’ll dive into practical tips and tricks to ensure your walls look as perfect as you envision them. Whether you’re a DIY enthusiast or someone just looking to improve their living space, this guide is tailored for you. Let’s turn those drywall woes into a triumph. Your perfect walls are just a few steps away.
Identifying Common Drywall Issues
Fixing a poorly painted drywall job requires careful attention. Start by sanding rough spots and filling in cracks. Apply a fresh coat of primer, then repaint for a smooth finish.
Identifying Common Drywall Issues A bad drywall job that’s been painted can be frustrating. It can make a room feel less polished and inviting. But before diving into repairs, it’s crucial to identify the common issues you might encounter.
Uneven Surfaces
Uneven surfaces are a common problem with drywall. You might notice waves or bumps that disrupt the smoothness of your walls. These imperfections often stem from insufficient sanding or improper application of joint compound. Have you ever tried to hang a picture only to find it won’t sit flat? Uneven surfaces can be the culprit. To fix this, you might need to sand down the high spots and apply a fresh layer of compound.
Visible Seams
Visible seams occur when the joints between drywall sheets are not properly taped and mudded. They can become more apparent after painting, catching light and shadow in a way that highlights their presence. You may find yourself staring at these seams every time you enter the room. They can be distracting and make the space feel unfinished. To address this, consider re-taping the seams and applying a new coat of joint compound.
Bubbling Paint
Bubbling paint on drywall is often a sign of moisture problems or poor adhesion. The bubbles can appear out of nowhere, creating an unsightly texture on your walls. Have you noticed bubbles forming after a humid day or a shower? This could indicate a moisture issue behind the wall. Scraping off the bubbles and repainting might only be a temporary fix. Investigate the root cause, ensuring the wall is dry before repainting. Identifying these common drywall issues can save you time and effort in the long run. Have you encountered any of these problems before? Understanding the underlying causes can lead to more effective solutions.
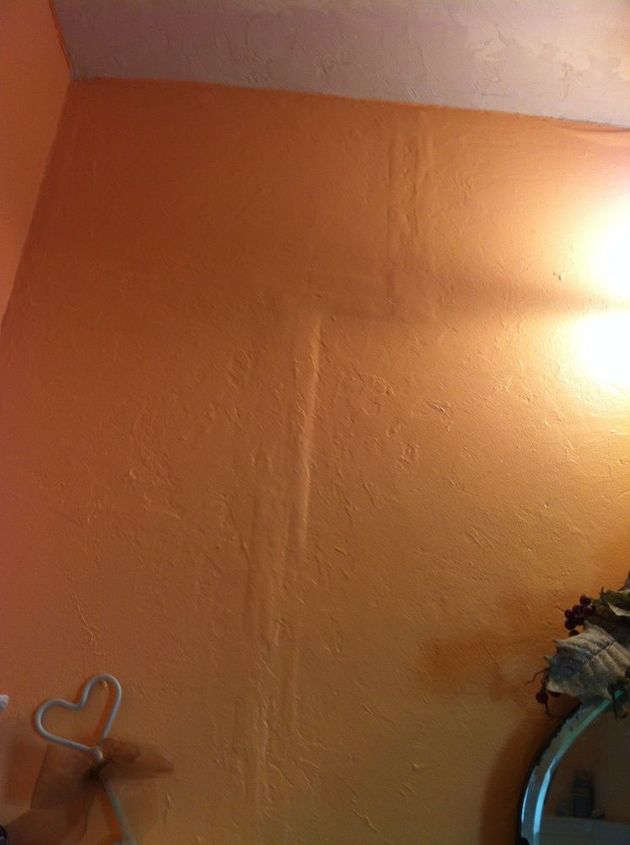
Credit: www.hometalk.com
Tools And Materials Needed
Fixing a painted bad drywall job requires specific tools and materials. Sandpaper, joint compound, and a putty knife are essential. You’ll also need a sanding block, primer, and paintbrushes. A utility knife and a dust mask will help complete the task efficiently.
When faced with a bad drywall job that has already been painted, you might feel overwhelmed. But fear not! With the right tools and materials, you can transform that eyesore into a flawless wall. Let’s dive into the essentials you’ll need to get the job done efficiently and effectively.
Essential Tools
To tackle a poorly done drywall, you’ll need some fundamental tools. A putty knife is crucial for scraping off imperfections and smoothing out new layers. Have a sanding block or an electric sander at hand to ensure a smooth surface, especially if the paint has left uneven textures. A utility knife will help you cut out any damaged sections with precision. A level is indispensable for checking the alignment of your wall. And don’t forget a drill with drywall screws; these will come in handy if you need to replace any sections. Have you ever realized how much easier a project becomes with the right tools? It’s like having a secret weapon in your DIY arsenal.
Recommended Materials
You’ll need quality materials to ensure a professional finish. Joint compound is essential for filling in gaps and smoothing over seams. Opt for a lightweight option for ease of use. Drywall tape is necessary for reinforcing your repairs and preventing future cracks. If you’re repainting, choose a high-quality primer to cover any previous paint mistakes and ensure the new paint adheres well. Finally, don’t forget sandpaper in various grits to achieve that ultra-smooth finish. Remember, investing in good materials now saves headaches later.
Safety Equipment
Safety first, always! Make sure to have a pair of safety goggles to protect your eyes from dust and debris. A dust mask or a respirator will safeguard your lungs, especially when sanding. Have you considered how much dust sanding can create? It’s surprisingly a lot, and you don’t want that in your lungs. Gloves can protect your hands from cuts and abrasions, while ear protection is a smart choice if you’re using power tools. Ensuring your safety gear is complete not only protects you but also makes the process more comfortable and less stressful. Are you ready to roll up your sleeves and fix that drywall? With these tools and materials, you’re well-equipped to tackle the challenge. Have fun and take pride in your DIY journey.
Preparing The Surface
Fixing a bad drywall job painted can be tricky. Preparing the surface is key for a smooth finish. This step ensures your repairs blend seamlessly with the wall. Proper preparation prevents future issues and enhances the final look. Let’s dive into how to prepare the surface effectively.
Cleaning The Painted Wall
Start with cleaning the wall thoroughly. Use a mild detergent and warm water. Wipe the wall gently to remove dirt and grease. Clean surfaces make repairs stick better. Dry the wall completely before moving on.
Sanding Techniques
Sanding is crucial for a smooth surface. Use fine-grit sandpaper for this task. Sand the area lightly to remove imperfections. Focus on uneven spots and rough edges. Dust off the wall after sanding for a clean finish.
Repairing Holes And Cracks
Inspect the wall for holes and cracks. Use drywall compound to fill these gaps. Apply the compound with a putty knife. Smooth the surface with gentle strokes. Let it dry completely before sanding again. Your wall is now ready for painting.

Credit: diy.stackexchange.com
Applying Joint Compound
Correcting painted drywall imperfections requires applying joint compound effectively. Sand down uneven areas to prepare the surface. Spread a thin layer of joint compound to fill gaps and smooth rough patches.
Applying joint compound can fix a bad drywall job. It smooths out imperfections. The process requires patience and precision. The right techniques ensure a flawless finish. This guide will help you navigate the process effectively.
Mixing Joint Compound
Mix joint compound thoroughly before use. A smooth consistency is essential. Use a paddle mixer for best results. Avoid lumps and bubbles. Add water gradually for desired thickness. Test the mixture on a small area. Adjust as needed for smooth application.
Layering Techniques
Apply thin layers of joint compound. Start with a base layer. Use a taping knife for even spread. Cover seams and gaps thoroughly. Allow each layer to dry completely. Sand lightly between layers. This ensures a smooth surface. Repeat until the wall is even.
Drying Time Considerations
Drying time depends on conditions. Humidity and temperature affect drying. Allow 24 hours for each layer. Ensure proper ventilation in the room. Use fans to speed up the process. Check dryness by touching the surface. It should feel firm and dry. Avoid rushing this step for best results.
Finishing And Sanding
Fixing a drywall job gone wrong can seem daunting. Especially when it’s already painted. To achieve a smooth finish, focus on the finishing and sanding process. This step is crucial for hiding imperfections and ensuring a polished look.
Smoothing Out Imperfections
Start by identifying uneven areas. Use a light source to spot bumps or dents. Apply joint compound to cover these spots. Let it dry completely before sanding. This creates a level surface.
Choosing The Right Sandpaper
Selecting the correct sandpaper is essential. Begin with a coarse grit for significant imperfections. Then, switch to finer grit for a smooth finish. A progression in grit ensures a flawless surface.
Dust Management
Sanding generates a lot of dust. Use a vacuum attachment to minimize mess. Wear protective gear like masks and goggles. This keeps the workspace clean and safe. Consider using dust-free sanding tools for better results.
Repainting Strategies
Repainting a poorly finished drywall can seem daunting. But, with the right strategies, you can achieve a smooth, professional look. The key lies in choosing the right primer, applying paint correctly, and avoiding future issues. Each step is crucial to ensure a flawless finish that lasts.
Primer Selection
The right primer is essential for covering flaws. It prepares the surface for paint. Choose a high-quality primer designed for drywall. This helps in hiding imperfections and ensuring paint adheres well. Look for primers that promise stain blocking and smooth coverage. These qualities will help in achieving a uniform finish.
Paint Application Tips
Proper application makes a significant difference. Use a roller with the right nap for your wall texture. Apply paint in even strokes, maintaining a wet edge to avoid lap marks. Two thin coats are better than one thick coat. This ensures even coverage and a more durable finish.
Preventing Future Issues
Avoid future drywall problems with a few precautions. Ensure the room has proper ventilation to prevent moisture damage. Regularly inspect walls for signs of wear or damage. Address issues early to prevent them from worsening. Quality materials and proper techniques keep your walls looking fresh longer.
Professional Help Vs. Diy
Fixing a painted drywall job gone wrong requires skill and patience. Professional help ensures smooth, flawless walls, while DIY attempts can save money but demand effort and attention to detail. Assess the situation carefully to decide the best approach for your home.
When faced with a painted drywall disaster, you have choices. Fix it yourself or call in the pros. Each option has its pros and cons. Understanding these can help you decide the best path.
When To Hire A Professional
Complex issues need expert eyes. Large cracks, uneven surfaces, or water damage often require a pro. These problems need specialized tools and skills. Hiring a professional saves time and stress. They ensure a smooth, lasting finish. Skilled hands can turn a mess into a masterpiece.
Cost Considerations
Money plays a big role in this decision. Pros charge for their time and expertise. Costs can vary based on job size and complexity. DIY might seem cheaper at first. But mistakes can add up. Buying supplies and tools can also increase expenses. Compare costs before deciding.
Diy Benefits And Challenges
Fixing drywall yourself has perks. It’s cheaper and offers personal satisfaction. You work at your own pace. Yet, challenges are present. Inexperience can lead to more damage. Mistakes might need professional correction later. Learning curve can be steep. Assess your skills and patience.

Credit: www.youtube.com
Frequently Asked Questions
How Do You Identify A Bad Drywall Job?
Look for uneven surfaces, visible seams, or cracking. Poor taping and joint compound application are common signs of a bad job.
Can You Paint Over A Poorly Finished Drywall?
Yes, but it’s better to fix imperfections first. Sand the surface smooth, then apply a fresh coat of primer.
What Materials Are Needed To Fix Bad Drywall?
You’ll need sandpaper, joint compound, and a putty knife. Also, consider using a drywall sander for large areas.
How Can I Fix Visible Drywall Seams?
Apply joint compound over the seams, then sand smooth. Repeat until the seams are no longer visible.
Is It Costly To Repair A Bad Drywall Job?
Costs vary based on damage size. Basic repairs are affordable. Complex jobs may require professional help.
Conclusion
Fixing a painted drywall job requires patience and careful steps. Start by assessing the damage. Sand down any rough spots. Fill gaps with joint compound. Smooth it out. Let it dry completely. Sand again for a flawless finish. Prime the surface before repainting.
Choose the right paint for best results. Take your time for a smoother look. Your walls can look fresh and new again. With effort, you can achieve a professional finish. Follow these steps and transform your space. A little work goes a long way in improving your home.