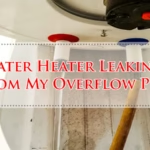
Have you ever walked into your bathroom or kitchen only to find a puddle where there shouldn’t be one? It’s frustrating, right?
You thought those SharkBite fittings would save you time and stress, but now they’re leaking. You’re not alone. Many people face this issue, and it’s more common than you might think. But why are your SharkBite fittings leaking? Understanding the root cause can save you time, money, and a whole lot of hassle.
In this post, we’ll dive into the common reasons behind these leaks and how you can fix them effortlessly. Whether you’re a DIY enthusiast or just someone tired of mopping up water, you’ll find valuable insights to solve this pesky problem once and for all. Stay with us, because a drip-free home is just a few steps away.
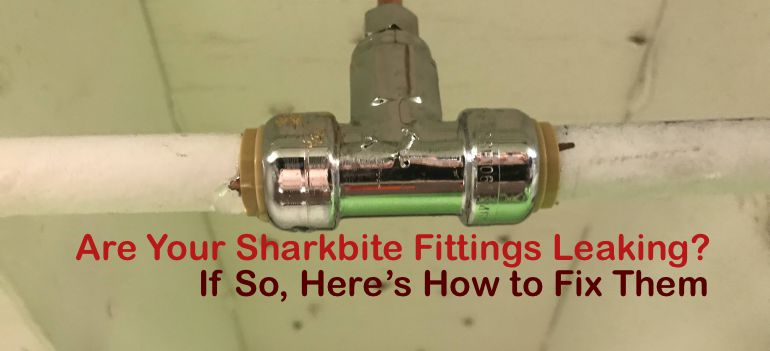
Common Causes Of Leaking Sharkbite Fittings
Sharkbite fittings have become a popular choice for plumbing repairs due to their ease of use and efficiency. However, encountering leaks can be frustrating and puzzling. Understanding the common causes behind these leaks can save you time and money. Let’s dive into some typical reasons why your Sharkbite fittings might be letting water escape and how you can address them.
Improper Installation
One of the primary culprits behind leaking Sharkbite fittings is improper installation. These fittings require a precise technique to ensure a secure connection. Have you ever hurried through a project and missed a crucial step? It’s easy to overlook the importance of pushing the pipe fully into the fitting until it hits the depth mark. This ensures a tight seal. Double-check your installation process to make sure you’ve followed all the steps.
Damaged O-ring
Another common cause of leaks is a damaged O-ring. The O-ring inside your Sharkbite fitting plays a vital role in sealing the connection. Even a small nick or wear on the O-ring can lead to persistent leaks. Imagine using a worn-out rubber band; it just doesn’t hold things together like it should. Inspect your fittings for O-ring damage and replace them if necessary.
Pipe Misalignment
Pipe misalignment can also lead to leaks. If the pipe isn’t perfectly aligned with the fitting, the connection might not be secure. Think of it like trying to fit a square peg into a round hole—it just doesn’t work. Ensure your pipes are cut cleanly and aligned straight with the fitting to prevent any leakage issues.
Corroded Pipes
Corrosion in pipes can compromise the integrity of your Sharkbite fittings. If your pipes are rusted or corroded, they may not form a tight seal with the fitting, leading to leaks. Have you ever tried to glue two surfaces together, and one of them is uneven or flaky? It just doesn’t stick well. Inspect your pipes regularly for signs of corrosion and replace them if needed to maintain a leak-free system.
Leaking Sharkbite fittings can be a hassle, but understanding these common causes can help you troubleshoot effectively. Is there a step or detail you might have overlooked in your plumbing setup? Remember, addressing these issues can lead to a hassle-free plumbing experience and peace of mind.
Credit: www.h2ouse.org
Identifying The Leak Source
Sharkbite fittings might leak due to improper installation or damaged seals. Identifying the leak source is crucial for repair. Ensure pipes are clean and securely attached for a tight seal.
Identifying the source of a leak in your Sharkbite fittings can be a daunting task, but it’s essential for preventing further damage and ensuring your plumbing system runs smoothly. Whether you’re a DIY enthusiast or just someone dealing with an unexpected plumbing issue, knowing where to start can make all the difference. The following sections will guide you through visual inspection, pressure testing, and using leak detection tools to pinpoint the exact origin of the leak.Visual Inspection
Begin with a simple visual inspection. This method is straightforward yet effective. Look closely at the fittings for any obvious signs of wear or damage. You might notice cracks, corrosion, or even loose connections. Pay special attention to the areas where the pipes connect to the fittings. Is there any water pooling around them? These visual cues can often lead you to the source of the leak.Pressure Testing
Pressure testing is another practical method to identify leaks. If you have access to a pressure gauge, it can be extremely helpful. Connect the gauge to your water system and monitor the pressure levels. A drop in pressure may indicate a leak in the system. Consider the pressure fluctuations—are they consistent or sporadic? This information can help narrow down the leak’s location.Using Leak Detection Tools
Technology offers advanced leak detection tools that can make your job easier. Acoustic leak detectors can pick up the sound of water escaping from a pipe, allowing you to pinpoint the leak’s location. Infrared cameras can reveal temperature differences indicating water presence. These tools can be a game-changer, especially for those hard-to-find leaks. Have you ever thought about how much water is wasted due to unnoticed leaks? Identifying the source quickly not only saves water but also prevents potential damage to your home. So, how will you tackle your leaking Sharkbite fittings?Quick Fixes For Leaking Fittings
Dealing with leaking SharkBite fittings can be frustrating. If you’ve encountered this issue, you’re likely wondering how to fix it quickly and efficiently. Fortunately, there are some straightforward solutions that might just do the trick. Let’s dive into some quick fixes to save you from a plumbing nightmare.
Re-seating The Fitting
Sometimes, the simplest solution is the most effective. If your SharkBite fitting is leaking, it could be because it isn’t seated properly. Turn off the water supply and drain the pipes. Then, disconnect the fitting and reattach it, ensuring a snug fit.
Have you ever tightened a jar lid that wasn’t on properly, and it suddenly fit perfectly? The same principle applies here. Ensuring that the fitting is correctly seated could prevent future leaks.
Replacing The O-ring
Leaking can occur if the O-ring inside the SharkBite fitting is damaged or worn out. To address this, you’ll need to replace the O-ring.
Start by disassembling the fitting. Carefully remove the old O-ring and insert a new one of the same size. It’s like changing a bike tire: once you replace the worn-out part, everything runs smoothly again.
Have you noticed how a simple change can make a significant difference? That’s the power of a fresh O-ring.
Adjusting Pipe Alignment
Misaligned pipes can cause unnecessary stress on fittings, leading to leaks. Take a moment to check if the pipes are aligned properly. Adjust them as needed to ensure a straight and secure connection.
Think about the last time you had to adjust a picture frame on the wall. A slight tweak can make all the difference in how it looks and stays put. The same goes for your pipes: proper alignment can prevent leaks and keep your plumbing system running smoothly.
Have you considered how a little adjustment can prevent bigger problems down the line? Proper pipe alignment is key to a leak-free plumbing system.
By addressing these areas, you can tackle the common culprits of leaking SharkBite fittings. Which solution will you try first? Remember, a quick fix today can save a major headache tomorrow.

Credit: www.youtube.com
Long-term Solutions
SharkBite fittings are a convenient solution for many plumbing issues, but when they start to leak, it can be frustrating. Instead of dealing with recurring problems, you might want to consider long-term solutions. These strategies not only save you time but also ensure a more efficient plumbing system in your home.
Upgrading To New Fittings
Sometimes the best solution is to simply upgrade. Modern SharkBite fittings are designed with improved technology to reduce leaks. If your fittings are outdated, they might not be holding up well under pressure.
Consider investing in newer models. They come with enhanced grip and sealing capabilities. It might cost a bit more upfront, but think of the money you’ll save on future repairs.
Regular Maintenance Checks
Neglecting maintenance can lead to unexpected leaks. Regular checks help you catch issues before they escalate. You can schedule bi-annual inspections to ensure everything is in order.
During these checks, look for signs of wear and tear. A small crack or a loosened fitting can be rectified before it turns into a bigger problem. How often do you inspect your fittings?
Using Compatible Pipes
SharkBite fittings work best with compatible pipes. Ensure that the pipes you use are the right size and material. Incompatible materials can cause leaks and damage your fittings.
If you’re unsure, consult a professional plumber. They can guide you on the best combinations to use. Don’t let a simple mismatch cost you peace of mind.
Taking proactive steps can save you from the headache of leaking fittings. What long-term strategy will you implement today to ensure a leak-free home?
Preventing Future Leaks
Sharkbite fittings might leak due to improper installation or damaged pipes. Ensure clean cuts and proper seating for a tight seal. Regular checks and maintenance help prevent future leaks and ensure long-lasting performance.
Preventing future leaks in your SharkBite fittings is crucial for maintaining a reliable plumbing system. Nobody wants the inconvenience of unexpected water damage or costly repairs. By focusing on proper installation techniques, routine inspections, and educating yourself on best practices, you can ensure your fittings remain leak-free for years to come.Proper Installation Techniques
One of the key reasons SharkBite fittings might leak is improper installation. Ensure the pipe is cut cleanly and is free of any burrs. A smooth and even cut creates a secure connection. It’s also vital to push the pipe fully into the fitting. If you’re unsure, use a depth gauge to mark the pipe. This simple step can save you from potential leaks down the line. Don’t forget to check that the fitting is suitable for the type of pipe you’re using. Using mismatched materials can lead to poor seals and leaks.Routine Inspection
Regular inspections can catch potential issues before they turn into problems. Set a schedule to check your SharkBite fittings every few months. Look for signs of moisture or wear. During these checks, gently wiggle the fittings to ensure they remain secure. If anything seems loose or out of place, address it immediately. Maintaining a record of your inspections can help you track any recurring issues. This proactive approach can save you time and money in the long run.Educating On Best Practices
Understanding the right way to use SharkBite fittings is essential. Take the time to read the manufacturer’s instructions thoroughly. They often contain tips specific to their products. You might also consider attending a workshop or watching online tutorials. Hearing from experts can provide insights you might not find in a manual. Share your knowledge with others in your household. If everyone knows how to properly handle and inspect fittings, you’re less likely to encounter issues. Have you ever found a leak at the most inconvenient time? By implementing these steps, you can prevent such surprises and keep your plumbing system in top shape.
Credit: www.sharkbite.com
Frequently Asked Questions
Why Do Sharkbite Fittings Leak?
Sharkbite fittings might leak due to improper installation or damaged O-rings. Ensure a clean cut and proper fit.
How Can I Fix A Leaking Sharkbite Fitting?
To fix, remove the fitting. Check O-rings and pipe ends. Replace if damaged. Reinstall carefully.
Are Sharkbite Fittings Reliable For Plumbing?
Yes, Sharkbite fittings are reliable if installed correctly. Ensure a clean cut and proper alignment for best results.
What Tools Are Needed To Install Sharkbite Fittings?
You need a pipe cutter and a deburring tool. These ensure clean cuts and proper fit for the fittings.
Can Temperature Changes Cause Sharkbite Fittings To Leak?
Extreme temperature changes can affect fitting seals. Ensure fittings are rated for your water temperature conditions.
Conclusion
Understanding why Sharkbite fittings leak is crucial for your plumbing. Common causes include improper installation and worn-out components. Regular checks can prevent issues and save money. Tighten connections carefully. Use appropriate tools. Replace damaged parts promptly. These steps ensure a snug fit.
Avoid over-tightening, which might cause leaks. Inspect fittings regularly for signs of wear. Address problems early to maintain system integrity. Proper maintenance keeps your plumbing efficient. Reduce stress by knowing your fittings are secure. Confidence comes with knowledge and care.
Keep your home safe from water damage. Your plumbing should work seamlessly.