Have you ever noticed uneven, shiny patches on a freshly painted wall? If so, you’ve likely encountered paint flashing.
This frustrating issue can ruin the look of a room and leave you feeling dissatisfied with your painting efforts. Understanding what causes paint flashing and how to prevent it can save you time, money, and the headache of a less-than-perfect paint job.
We’ll uncover the mystery of paint flashing, providing you with simple, effective solutions to ensure your walls have a smooth, flawless finish. Stick around, as what you learn could be the difference between a DIY disaster and a painting triumph.

Credit: www.reddit.com
Paint Flashing Basics
Understanding paint flashing is essential for anyone keen on achieving a smooth, professional finish in their painting projects. You might have spent hours carefully applying paint, only to notice uneven patches or glossy streaks ruining the surface. What causes this blemish, and how can you prevent it? Dive into the basics of paint flashing to find out how to maintain consistency in your painting endeavors.
Definition Of Paint Flashing
Paint flashing refers to the uneven appearance of a painted surface after drying. This is characterized by patches that are shinier or duller than the rest of the surface. It can disrupt the aesthetic appeal of your walls, leaving you frustrated despite meticulous efforts. Often mistaken for a reflection or shadow, flashing is a result of inconsistent absorption or drying patterns.
Imagine you’re painting a wall, aiming for that perfect, uniform look. But upon drying, you notice certain areas catching more light than others. That’s flashing at work. It’s not just about looks; it can also lead to uneven durability, affecting the lifespan of your paint job.
Common Causes
Several factors can lead to paint flashing. One common cause is improper surface preparation. If the surface isn’t cleaned or primed correctly, it can absorb paint unevenly, leading to flashing. Skipping primer is a sure way to invite inconsistency.
Another culprit is varying environmental conditions. Painting under fluctuating temperatures or humidity levels can affect drying times, resulting in patches that dry faster or slower. Have you ever painted on a hot, sunny day only to find your efforts marred by glossy spots?
Choosing the wrong type of paint or applying it incorrectly can also cause flashing. Using incompatible paints or applying layers unevenly creates a patchy look. Consider how a hurried application might leave streaks, causing certain areas to shine more than others.
So, what does this mean for your next painting project? It’s vital to prepare your surfaces thoroughly and choose your paint wisely. Pay attention to environmental conditions and ensure even application to avoid the frustration of flashing. How might you change your approach to prevent this common issue?
Credit: www.youtube.com
Identifying Paint Flashing
Paint flashing occurs when dried paint appears uneven or shiny in spots. This happens due to improper application or surface preparation. Identifying paint flashing helps maintain a consistent and smooth finish on walls.
Identifying paint flashing is crucial for maintaining the aesthetic appeal of your walls. Paint flashing occurs when there is a noticeable difference in sheen or glossiness on a painted surface. This can disrupt the visual harmony of your space. Understanding how to spot these inconsistencies will help you address them promptly, ensuring a flawless finish.
Visual Indicators
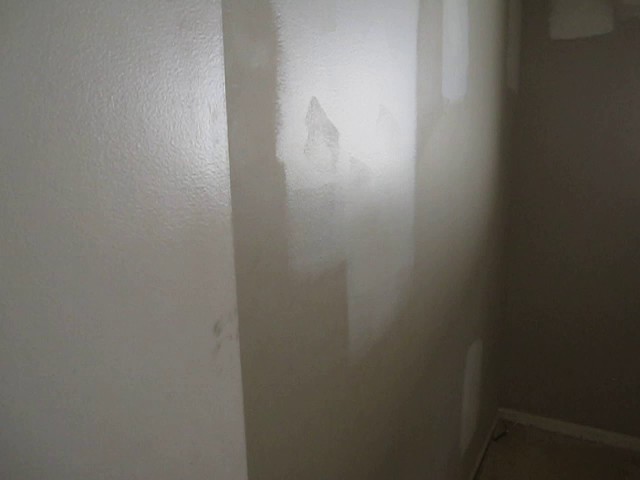
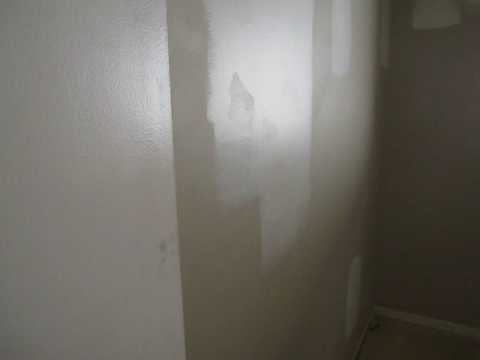
Paint flashing is often visible as shiny patches on a matte surface or dull spots on a glossy wall. These variations are most noticeable under bright light, which accentuates the sheen differences. Have you ever painted a wall and noticed uneven gloss when the sun hits it? That’s paint flashing right there, silently affecting the beauty of your room.
Affected Surfaces
While paint flashing can occur on any painted surface, it is most common on walls and ceilings. These larger surfaces are more susceptible to inconsistencies due to the vast area covered by paint, making them prime candidates for flashing issues. If you’ve noticed that your freshly painted ceiling has different sheen levels, it’s time to inspect those surfaces closely. Consider checking areas around windows and light fixtures, as changes in light can make flashing more evident. Could it be that your application technique or paint type is causing these variations? Identifying the affected surfaces is your first step in rectifying the issue.
Preventing Paint Flashing
Paint flashing is a common issue in home improvement projects. It occurs when painted areas dry unevenly, resulting in patchy finishes. This can ruin the overall appearance of a room or surface. To prevent paint flashing, focus on two key areas: surface preparation and paint selection. Both play crucial roles in achieving a smooth, even finish.
Surface Preparation Tips
Proper surface preparation is essential for avoiding paint flashing. Start by cleaning the surface thoroughly. Dust, dirt, and grease can cause paint to adhere poorly. Use a mild detergent and water to clean walls or surfaces. Rinse and let it dry completely.
Next, inspect the surface for any imperfections. Fill cracks or holes with a suitable filler. Sand the area smoothly to ensure an even texture. Uneven surfaces can cause paint to dry inconsistently.
Priming is a crucial step. A quality primer helps paint adhere better. It also evens out the surface. Choose a primer suitable for your surface type. Apply it evenly and let it dry completely.
Choosing The Right Paint
Selecting the right paint prevents flashing. Different paints have different drying times and finishes. Opt for a high-quality paint that suits your surface.
Consider the finish you desire. Matte, satin, or gloss—each has different properties. Gloss paints reflect more light, highlighting imperfections. Choose a finish that complements your room’s look.
Pay attention to the paint’s drying time. Fast-drying paints can sometimes lead to flashing. Read the paint label carefully to understand its features.
Consistency is key. Stir the paint well before use. This ensures pigments are evenly distributed. Uneven pigments can lead to flashing.
Fixing Paint Flashing Issues
Paint flashing occurs when a painted surface appears uneven or shiny in certain spots. This issue often results from uneven application or drying. Fixing it usually involves sanding the affected area and applying a new coat of paint.
Fixing paint flashing issues can transform a blotchy wall into a sleek surface. Paint flashing, those unsightly shiny or dull spots, can ruin the look of your freshly painted walls. But why does it happen? Sometimes, it’s due to uneven paint application or poor surface preparation. Other times, it’s the result of using different types of paint or failing to allow proper drying time. Whatever the cause, the good news is that you can fix it. Ready to tackle paint flashing and achieve a flawless finish? Let’s dive into the repair process.
Step-by-step Repair Guide
1. Identify the Problem Area Walk around the room and examine the walls under different lighting. This helps you spot areas where the paint appears inconsistent. 2. Sand the Affected Surface Use fine-grit sandpaper to gently sand down the flashing areas. This ensures a smooth base for the new coat of paint. Remember, patience is key here—take your time to avoid damaging the wall. 3. Prime the Surface Apply a quality primer to the sanded area. Primers help to create a uniform surface that prevents flashing from reoccurring. Make sure to choose a primer compatible with the type of paint you’ll be using. 4. Paint Evenly Repaint the area using the same type and finish as the original paint. Use a high-quality brush or roller for a consistent application. Ensure each stroke overlaps slightly with the previous one. 5. Check Your Work Once dried, inspect the painted area. If the flashing persists, a second coat might be necessary. Don’t rush—let the paint dry completely before making this decision.
Tools And Materials Needed
– Fine-Grit Sandpaper: Essential for smoothing out the flashing areas. – High-Quality Primer: A crucial step to prevent future flashing. – Paintbrush or Roller: Choose depending on the area size; rollers are great for large spaces, while brushes work well for edges. – Paint Matching the Original: Ensure it’s the same type and finish to blend seamlessly. – Drop Cloths and Painter’s Tape: Protect your floors and borders while working. Have you ever noticed how the right tools make any job easier? Imagine painting with a brush that sheds bristles—frustrating, right? Investing in quality tools not only saves time but also results in a professional finish. Solving paint flashing may seem daunting at first, but with the right approach, it’s entirely manageable. Have you tackled paint flashing in your home before? What other tips would you add to this guide? Share your thoughts in the comments below!
Professional Solutions
Paint flashing occurs when paint appears uneven or blotchy due to improper application or drying. It often results from variations in surface texture or paint thickness. Professional solutions involve careful preparation and consistent application techniques to ensure a smooth, uniform finish.
When dealing with paint flashing, a common issue where patches on painted surfaces appear shinier or duller than the surrounding area, professional solutions can save you from a frustrating DIY experience. Hiring a professional ensures the job is done right the first time, using techniques and tools you might not have at home. Plus, their expertise can prevent future issues, giving you peace of mind and a flawless finish.
When To Hire A Professional
You might wonder when it’s time to call in the experts. If your wall has a large surface area affected by flashing, it might be more efficient to hire a professional. They have the skills to tackle even the most challenging surfaces, saving you time and potential headaches. Consider your own skill level and available time. Are you confident in your ability to fix the problem on your own? If not, a professional can ensure a seamless finish without the stress. Sometimes, the cost of materials and potential rework can exceed the cost of hiring a professional. Think about whether you’re ready to invest in high-quality tools and paints, or if you’d prefer to leave it to someone experienced.
Cost Considerations
Cost is a crucial factor when deciding to hire a professional. While the initial price might seem high, remember it often includes materials, labor, and expertise. This can be more cost-effective than multiple attempts at fixing the issue yourself. Get a few quotes from different professionals to understand the market rate in your area. Compare their services and what they include to make an informed decision. You might also consider the long-term savings. A professional job can last longer and look better, potentially increasing the value of your home. Would you rather pay a bit more now for a lasting solution or risk additional costs down the line? Engaging professionals for paint flashing issues not only offers a polished finish but also peace of mind. Have you ever struggled with a DIY project and wished you had called in an expert sooner? Sometimes, it’s worth letting the professionals handle it.
Credit: www.youtube.com
Maintaining A Flawless Finish
Paint flashing appears as uneven gloss on a painted surface. It disrupts a flawless finish. This issue often arises from inconsistent application or drying times.
Maintaining a flawless finish on your painted walls can seem like an art form. Paint flashing, the uneven gloss that appears on surfaces, can ruin even the most beautifully painted room. But don’t worry, with a few tips and strategies, you can keep your walls looking pristine. Let’s dive into some practical ways to ensure your paint stays smooth and consistent.
Routine Maintenance Tips
Regular maintenance is key to avoiding paint flashing. Dust and dirt can settle on your walls, affecting their appearance. Make it a habit to gently wipe down your walls with a soft, damp cloth every few weeks. This simple task can prevent buildup that leads to uneven gloss. Consider using a mild detergent if you encounter stubborn stains. However, always test a small hidden area first to ensure no damage occurs. Pay special attention to high-traffic areas where fingerprints and smudges are more likely. Keep an eye out for any chips or cracks. Repairing these promptly can stop them from becoming bigger issues. A quick touch-up with leftover paint can make all the difference in maintaining a flawless finish.
Long-term Prevention Strategies
Long-term strategies can help you maintain that fresh, even finish. Start by investing in high-quality paint. It might cost a bit more initially, but it often provides better coverage and durability, reducing the chance of flashing. Use the right primer before painting. Primer helps create a uniform base, which is crucial for an even finish. It can also block stains from seeping through and causing discoloration. Control the environment where you’re painting. Humidity and temperature fluctuations can affect how paint dries, leading to flashing. Aim to paint in a stable environment to ensure even drying. Think about the lighting in your room. Different types of light can accentuate flashing. Consider how natural and artificial light interact with your walls, and adjust as needed for a consistent appearance. Have you ever noticed how a fresh coat of paint can transform a room? By following these tips, you can keep that transformation looking brand new for years to come.
Frequently Asked Questions
What Causes Paint Flashing?
Paint flashing occurs when paint dries unevenly. Uneven absorption or poor application can cause this issue.
How Can I Fix Paint Flashing?
To fix paint flashing, sand the surface lightly. Then, apply a new coat evenly with quality tools.
Does Primer Help Prevent Flashing?
Yes, primer helps create a uniform surface. It improves paint adhesion and reduces the risk of flashing.
Can Weather Conditions Affect Flashing?
Yes, weather conditions like humidity or direct sunlight can affect paint drying. This can lead to flashing.
Is Paint Flashing Common With Dark Colors?
Dark colors may show flashing more. They absorb more light, making uneven drying more noticeable.
Conclusion
Paint flashing can impact the look of your walls. It results from uneven paint application or drying. Knowing its causes helps prevent this issue. Use consistent strokes and quality paint. Allow proper drying time for best results. Paying attention to these details ensures a smooth finish.
Your walls will look clean and professional. Fixing flashing enhances your space’s appearance. A little effort goes a long way. Understanding paint flashing saves time and money. Enjoy a flawless paint job without stress. A well-painted wall brightens your home.
Keep these tips handy for future projects.