You’ve got a project lined up, but your Ryobi P117 charger seems to have hit a snag. It’s frustrating, isn’t it?
You rely on your tools to be there for you, just like a trusted friend. But now, your charger isn’t working, and the clock is ticking. Don’t worry; you’re not alone. Many people face this issue, and there’s a way out.
Imagine the relief when you finally sort it out and get back to your work without a hitch. This article will guide you through understanding what’s wrong and how to fix it, step by step. Dive in, and let’s solve this together so you can get back to doing what you love.
Credit: www.walmart.com
Common Issues
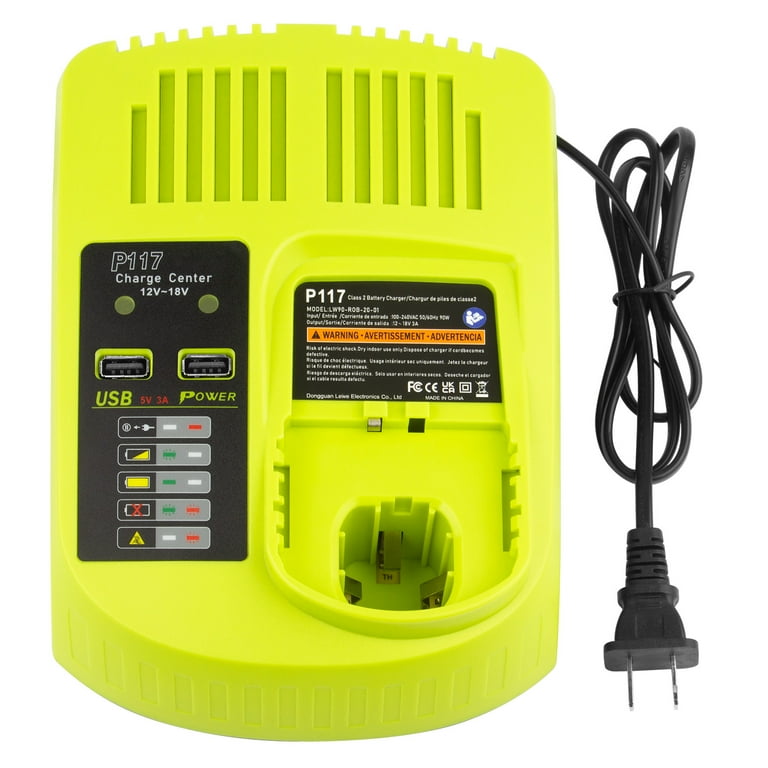
The Ryobi P117 charger is a vital tool for power tool users. It ensures batteries are ready for action. But sometimes, it may not work as expected. Understanding common issues can help troubleshoot effectively. Below are some frequent problems users encounter with this charger.
Power Supply Problems
Power supply issues often lead to charger malfunctions. Ensure the outlet provides consistent electricity. A faulty outlet can prevent the charger from working. Sometimes, the power cord might be damaged. Inspect it for any visible cuts or frays. A broken cord won’t transmit electricity properly. Using a different outlet can help identify the issue. This simple step often resolves the problem.
Indicator Light Malfunctions
The indicator light tells you the charger’s status. When it doesn’t work, diagnosing issues becomes tricky. Sometimes, the light might be burned out. This makes it hard to know if the charger is working. Ensure the battery is placed correctly in the charger. A misplaced battery won’t trigger the indicator light. If the light still doesn’t work, consider replacing it. A new light can restore functionality.
Battery Compatibility
Not all batteries work with the Ryobi P117 charger. Using an incompatible battery can cause charging failures. Check the battery’s compatibility before use. The charger may not support older battery models. Ensure the battery is clean and free from debris. Dirt can prevent a good connection. A compatible battery ensures smooth charging. Always use recommended battery models for best results.

Credit: www.amazon.com
Initial Checks
Experiencing issues with your Ryobi P117 charger can be frustrating. Before jumping to conclusions, conducting a few initial checks might resolve the problem. These steps are simple and can save you from unnecessary hassle. Let’s delve into some basic troubleshooting techniques.
Inspect Power Source
Begin by checking the power outlet. Ensure it’s functional. Try plugging another device into the same outlet. This will confirm if the outlet works. If it doesn’t, switch to a different one. Sometimes, a tripped breaker could be the issue. Resetting the breaker may restore power to the outlet.
Examine Connections
Inspect the charger connections. Ensure they are secure and clean. Dust or debris can interfere with the charging process. Use a dry cloth to wipe the charger contacts. Also, check the battery terminals. They should be free from corrosion or dirt.
Verify the cord’s condition. Look for any cuts or frayed sections. Damaged cords can interrupt power flow. If you notice any defects, consider replacing the cord. A healthy connection ensures efficient charging.
Advanced Troubleshooting
Experiencing issues with your Ryobi P117 charger can be frustrating. Before you decide on a replacement, consider advanced troubleshooting. This process involves checking both the charger and the battery. By following these steps, you can pinpoint the problem. It saves time and money.
Testing The Charger
First, ensure the charger is plugged into a working outlet. Double-check the connection. Look for any damage on the charger cord. A damaged cord can prevent proper charging. Next, use a multimeter to test the output voltage. Set the multimeter to DC voltage. Connect the probes to the charger’s terminals. Compare the reading to the charger’s specifications. If the voltage is low or absent, the charger may be faulty.
Evaluating Battery Condition
The battery also plays a crucial role. Inspect the battery for visible damage. Look for cracks, leaks, or corrosion. A damaged battery may not charge properly. Test the battery with a multimeter as well. Ensure the battery terminals are clean. Dirty terminals can hinder the charging process. If the battery voltage is significantly lower than expected, it might be time for a replacement.

Credit: www.youtube.com
Diy Solutions
Experiencing issues with your Ryobi P117 charger? Explore simple DIY solutions to get it working again. Check connections, inspect for damage, and ensure the power source is reliable.
If your Ryobi P117 charger is acting up, don’t rush to buy a new one just yet. There are several DIY solutions that might bring it back to life. Tackling the issue yourself can be both rewarding and cost-effective. Let’s dive into some practical steps you can take to troubleshoot and possibly fix the problem.Cleaning Contacts
Dirt and grime can disrupt the connection between the charger and battery, leading to charging issues. Start by unplugging your charger. Use a clean, dry cloth to wipe the metal contacts on both the charger and battery. If there’s stubborn residue, a small amount of rubbing alcohol on a cotton swab can help. Be gentle to avoid damaging the contacts. Once clean, let everything dry completely before plugging the charger back in. You might be surprised at how often this simple cleaning can solve the problem.Resetting The Charger
Resetting your Ryobi P117 charger can sometimes fix minor glitches. Begin by unplugging the charger from the power source. Leave it unplugged for a few minutes to ensure a full reset. While waiting, check the power outlet with another device to confirm it’s working properly. After a few minutes, plug the charger back in and insert the battery. Has the status light changed? If so, you might have just fixed your charger without spending a dime. Have you tried these DIY solutions before? They might just be the quick fixes you need. If the problem persists, it might be time to consult a professional or consider a replacement. But for now, give these steps a try and see if your charger gets back on track.When To Seek Professional Help
Experiencing issues with your Ryobi P117 charger? Consider seeking expert assistance if it fails to charge batteries consistently. Professional help ensures safe and effective solutions, extending the life of your device.
When your Ryobi P117 charger suddenly stops working, it can disrupt your projects and leave you feeling frustrated. While some issues can be fixed with a simple reset or by checking the power source, others might require professional help. Knowing when to call in an expert can save you time, money, and further damage to your charger.Recognizing Complex Issues
If your charger isn’t powering on despite being plugged in, or if it’s generating strange noises or smells, these are signs of complex issues. Such symptoms often indicate problems with internal circuitry or the charger’s components, which are not easily fixable at home. Another red flag is if your charger intermittently charges or overheats. These can be signs of underlying electrical faults that need professional attention. Have you noticed any melted plastic or visible damage? These are definite signs that it’s time to seek expert help.Finding A Qualified Technician
To find a qualified technician, start by checking Ryobi’s official service centers. They have the expertise and authentic parts to handle your charger. You can visit their website to locate the nearest center. If a service center isn’t accessible, look for certified electricians or technicians with experience in handling power tools. Ask for recommendations from friends or family, or read online reviews to ensure reliability. Would you trust your charger with someone whose credibility you can’t verify? Ensure the technician provides a warranty on their repairs. This guarantees that if the problem persists, you have a safety net. By recognizing when to seek professional help, you not only ensure the longevity of your charger but also maintain the safety of your workspace. Remember, sometimes taking a step back and letting the experts handle it is the smartest move.Preventive Measures
Ensure the Ryobi P117 charger functions well by regularly checking for dust and debris. Avoid overloading sockets to prevent electrical issues. Use a clean, dry cloth to wipe connectors, enhancing performance and longevity.
When your Ryobi P117 Charger isn’t working, it can be a major inconvenience. To keep your charger in top condition and avoid unexpected failures, consider some preventive measures. These steps can extend the life of your charger, ensuring it’s ready when you need it most.Proper Storage
Storing your Ryobi P117 Charger properly is crucial. Keep it in a dry place to prevent moisture damage. Moisture can cause electrical issues and shorten the lifespan of your charger. Avoid areas with extreme temperatures. High heat or freezing cold can damage the internal components. Store your charger in a location that maintains a stable temperature. Keep it away from dust and debris. Dust can clog the ventilation and lead to overheating. Consider using a protective cover if your storage area is prone to dust.Regular Maintenance
Regular maintenance can make a significant difference. Inspect your charger for any visible damage or wear. Check the cables and connectors for any signs of fraying or corrosion. Clean the charger periodically. Use a soft, dry cloth to wipe off dust and grime. Ensure the ventilation holes are clear to allow proper airflow. Test the charger regularly. Even if you don’t use it often, plug it in to make sure it’s working. This simple step can help you catch potential issues early. Have you ever found yourself with a dead battery and a malfunctioning charger right before an important task? Taking these preventive steps can save you from such stress. With a little effort, you can keep your Ryobi P117 Charger running smoothly for years.Frequently Asked Questions
Why Is My Ryobi P117 Charger Not Working?
Check the power source first. Ensure the outlet is functioning. The charger might need resetting.
How Can I Reset My Ryobi P117 Charger?
Unplug the charger. Wait a few minutes. Plug it back in. This can reset the charger.
What Do The Lights On The Ryobi P117 Mean?
Red light indicates charging. Green means fully charged. Flashing lights may signal an error.
Can A Faulty Battery Cause The Charger To Fail?
Yes, a bad battery can prevent charging. Try another battery to confirm the issue.
Where To Get A Replacement Ryobi P117 Charger?
Purchase from Ryobi’s official site or trusted retailers. They offer genuine products.
Conclusion
Solving issues with your Ryobi P117 charger can save time and money. Check connections and ensure outlets work properly. Clean contacts for a better connection. Always follow safety guidelines when troubleshooting. A faulty charger can be frustrating, but simple steps often help.
If problems persist, consider reaching out to customer support. They can provide further assistance. Regular maintenance can prevent future issues. Keep your tools in good condition for optimal performance. With these tips, your Ryobi charger should work efficiently. Enjoy a smooth charging experience every time.