Imagine stepping into your bathroom, anticipating a refreshing shower, only to be greeted by a damp smell or the sound of dripping water. You may not see it immediately, but a leaking shower valve hidden behind the wall could be the culprit.
This common household issue can lead to unexpected headaches, like increased water bills and potential damage to your home. You may wonder how you can fix it before it spirals out of control. Your attention to this problem can save you time, money, and stress.
With the right approach, you can tackle it head-on. Discover how to identify the signs of a leaking shower valve, understand its potential impact, and learn practical steps to resolve it. Dive into the details and empower yourself to take action, ensuring your home remains a sanctuary of comfort.

Credit: www.reddit.com
Identifying The Leak
Discovering a leak in your shower can be troublesome. Especially when it’s hidden behind the wall. Identifying the source early helps prevent further damage. It saves time and money too. Understanding the signs is the first step. Then, locating the source ensures effective repair.
Signs Of A Shower Valve Leak
Water stains on walls or ceilings are common signs. They often appear near the shower area. Mold or mildew growth is another indicator. These thrive in damp environments. Unusual water bills can also hint at a leak. Increased water usage without explanation should raise a flag. Listen for dripping sounds in the wall. It might be your shower valve leaking.
Locating The Source
Start by turning off the water supply. This helps in safely inspecting the valve. Remove the shower handle carefully. Look for moisture or corrosion around the valve. Use a flashlight to check for wet spots. Moisture on the wall or floor points to the leak. Use a moisture meter for accurate detection. It measures humidity levels in hidden areas. These methods help pinpoint the leak source.

Credit: diy.stackexchange.com
Tools And Materials Needed
Fixing a leaking shower valve behind the wall can be daunting. But with the right tools and materials, the task becomes manageable. Preparing beforehand ensures a smooth repair process. Below, we outline the essential tools and necessary materials you’ll need.
Essential Tools
Begin with a set of quality tools. A screwdriver is vital to remove screws. Have a set with different sizes. A wrench will help in loosening nuts and bolts. Choose an adjustable one for versatility. Pliers are handy for gripping and twisting. Needle-nose pliers work best in tight spaces.
A utility knife is necessary for cutting. It helps in trimming materials to size. Use a flashlight to illuminate dim areas. This ensures you see clearly behind the wall. Lastly, a bucket is essential to catch leaking water. This prevents a mess and keeps the area dry.
Necessary Materials
The right materials ensure a lasting fix. You’ll need plumber’s tape. It seals threaded connections to prevent leaks. A replacement shower valve is crucial. Ensure it matches your existing setup. You might need caulk to seal gaps. It prevents water from seeping behind the wall.
A patch kit can repair any wall damage. Ensure it matches your wall finish. Lastly, have some towels on hand. They help clean up spills and keep the area dry. With these tools and materials, you’re ready to tackle the repair.
Accessing The Valve
Fixing a leaking shower valve hidden behind a wall can be tricky. It involves locating the valve, removing wall tiles, and repairing or replacing the valve. Regular maintenance can prevent future leaks and save on water bills.
Accessing the valve behind your shower wall might feel like a daunting task. But with the right approach, you can tackle this issue head-on, saving you from further damage and costly repairs. It’s more straightforward than you might think, and with a few tools, you can get to the root of the problem. Are you ready to roll up your sleeves?Removing The Shower Handle
Start by turning off the water supply to avoid any accidents. Locate the screw holding the handle, usually hidden beneath a decorative cap. Use a screwdriver to carefully remove the cap and unscrew the handle. Once the handle is off, you can see the stem and the escutcheon plate. The stem connects to the valve, and the escutcheon plate is the metal piece covering the wall opening. Unscrew the escutcheon plate to reveal the valve behind the wall. Taking off the handle might seem intimidating, but it’s a straightforward process once you know where to look. Have you ever wondered why it’s always hidden? It’s all about aesthetics and protecting the screws from rust.Opening The Wall
To access the valve behind the wall, you need to cut an opening. Use a stud finder to locate the pipes and studs, ensuring you don’t cut into them. Mark the area around the valve and use a drywall saw to carefully cut out the section. Remove the drywall piece gently. You’ll see the valve and possibly some insulation or other materials. Inspect the valve for any signs of leaks or damage. Getting into the wall might sound like a renovation project, but it’s not as complex as it seems. Does the thought of cutting the wall make you nervous? Remember, you’re solving a problem before it escalates and becomes a bigger issue. Taking these steps allows you to access the shower valve efficiently, ensuring you can fix any leaks before they cause significant damage.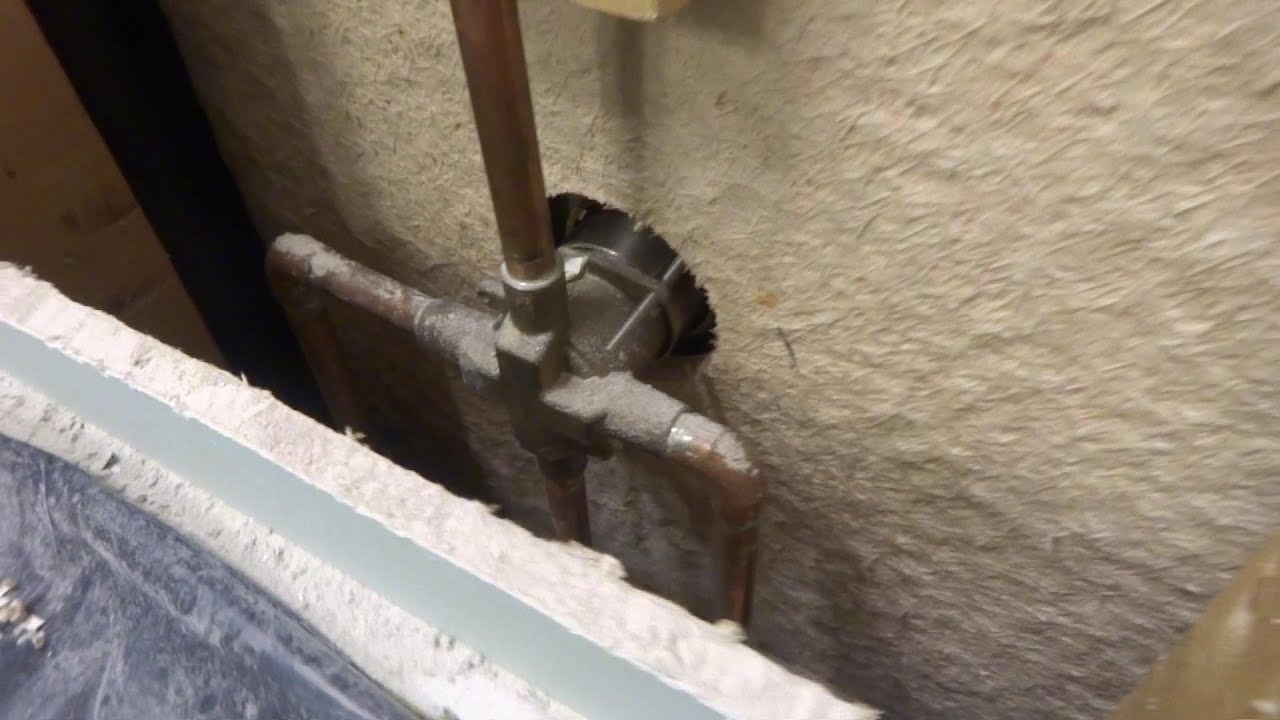
Credit: www.youtube.com
Fixing The Leak
Fixing a leaking shower valve behind the wall requires precision. Water stains or mold might signal the issue. Addressing the problem quickly can prevent further damage and costly repairs.
Fixing a leak in a shower valve behind the wall might sound daunting, but it’s definitely something you can tackle with a little guidance. No one likes the constant drip-drip of water, especially when it threatens to damage your walls and rack up your water bill. By addressing the issue head-on, you can save yourself a lot of future hassle and expense.Replacing The Valve Cartridge
The valve cartridge is often the culprit behind a leaky shower. To replace it, first ensure the water supply to the shower is turned off. This is crucial to avoid flooding your bathroom and making the problem worse. Next, remove the handle and any trim that’s in your way. You might find some screws hidden under caps or decorative plates. Keep these parts organized to make reassembly easier. Once you reach the cartridge, gently pull it out. Sometimes, you might need a cartridge puller tool. When you have the new cartridge, ensure it matches the old one. Install it by reversing the removal steps. If you’ve ever replaced a battery in a toy, you can handle this.Tightening Loose Connections
Loose connections can also cause leaks. It’s surprising how often this simple issue is overlooked. Start by checking any visible connections. Use an adjustable wrench to snug them up, but be cautious not to overtighten. Over-tightening can strip threads or crack parts, leading to more problems. If the leak persists, it might be from connections behind the wall. This could mean removing a section of the wall. It sounds extreme, but it might be necessary if tightening visible connections doesn’t stop the leak. Have you ever considered how a small effort now can prevent a bigger issue later? Fixing these leaks not only saves water but also protects your home from potential water damage. It’s an empowering skill to have and can be a rewarding experience.Testing The Repair
Testing the repair of a leaking shower valve behind the wall ensures no further water damage. Carefully inspect for leaks by turning on the shower. Listen for unusual sounds and check for any dampness on the wall surface. A dry wall and quiet operation signal a successful fix.
Testing the repair of a leaking shower valve is crucial. It ensures the fix is successful. This process involves checking for leaks and ensuring proper water flow. These steps guarantee that the repair is effective and complete.Checking For Leaks
Start by turning on the shower. Observe the repaired area closely. Look for any signs of water. Feel the wall for dampness. A dry surface indicates success. If you notice moisture, investigate further. Small leaks can be hard to spot. Use a flashlight for better visibility. Check all connections thoroughly. Make sure everything is sealed tight.Ensuring Proper Water Flow
Next, assess the water flow. Turn the shower to full pressure. The water should flow smoothly. Any interruptions suggest an issue. Check both hot and cold settings. Ensure the temperature adjusts correctly. Listen for unusual sounds. Squeaking or hissing indicates a problem. Inspect the valve and pipes. They should be free of obstructions. If everything works well, the repair is solid.Preventative Measures
Leaking shower valves behind walls can cause significant damage. Preventing them is crucial for home maintenance. Implementing regular checks can save money and prevent headaches. Understanding the signs of a leak early can make a big difference. Here, we delve into essential preventative measures.
Regular Maintenance Tips
Regular maintenance keeps your shower valves functioning well. Check for any loose parts every few months. Tighten them to prevent leaks. Inspect seals and gaskets for wear and tear. Replace them if damaged. Keep an eye on water pressure. High pressure can strain valves, leading to leaks.
Signs To Watch For
Detecting leaks early helps prevent major issues. Watch for water stains on walls. They indicate moisture build-up behind the wall. Listen for unusual sounds when the shower is off. This can signal a leak. Check for mildew or mold near the shower area. They thrive in damp environments.
Notice any increase in your water bill. This might mean there’s a hidden leak. Pay attention to water temperature fluctuations. They can be a symptom of valve issues. Regular inspections can help catch these signs early. Protect your home by staying alert.
Frequently Asked Questions
How Can I Detect A Leaking Shower Valve Behind The Wall?
Look for water stains on walls or floors. Notice any unusual dampness or mold growth.
What Causes A Shower Valve To Leak Behind Walls?
Worn-out seals or gaskets often cause leaks. Corrosion or loose connections can also be culprits.
Is A Leaking Shower Valve Dangerous?
Yes, it can cause water damage. Mold growth is also a risk, impacting health.
How Do I Fix A Leaking Shower Valve Behind The Wall?
Turn off water supply first. Remove the valve. Replace seals or faulty parts.
Can I Prevent Shower Valve Leaks?
Regular inspections help. Tighten loose connections and replace worn parts promptly.
Conclusion
Fixing a leaking shower valve behind the wall can be tricky. Start by turning off the water supply. Examine the valve to find the exact leak source. Regular maintenance prevents future problems. Use the right tools for the repair process.
If unsure, calling a professional is wise. They ensure proper installation and repairs. Always check for hidden damage in the wall. Leaks can cause mold or other issues. Keeping an eye on your plumbing helps avoid costly repairs. Remember, a small leak can lead to big problems.
So, act quickly to save time and money.