To seal a concrete garage floor, first clean it thoroughly, then apply a concrete sealer evenly. Let it dry completely before using the area.
Sealing your concrete garage floor is an essential step in maintaining its durability and enhancing its appearance. A well-sealed floor resists oil stains, reduces dust, and prevents moisture damage. This process not only prolongs the life of your garage floor but also makes it easier to clean.
The key to a successful sealing job lies in preparation and the choice of the right sealer. With numerous options available, selecting a product that suits your specific needs can significantly impact the outcome. Whether you’re a DIY enthusiast or planning to hire a professional, understanding the basics of sealing your concrete floor will ensure a smoother, more efficient process. Remember, a little effort now can save a lot of hassle in the future, keeping your garage floor looking great for years to come.
Introduction To Concrete Garage Floor Sealing
Sealing a concrete garage floor is an essential step in maintaining its durability and appearance. Over time, garage floors endure heavy use, stains, and exposure to chemicals. A well-sealed floor can resist these challenges, keeping your garage in top condition.
Benefits Of Sealing Your Garage Floor
- Protects against stains and spills
- Prevents moisture damage
- Enhances durability
- Makes cleaning easier
- Improves appearance
- Reduces dust and prevents dusting
Types Of Concrete Sealers
| Type | Features | Best For |
|---|---|---|
| Acrylic | Easy application, cost-effective | Light traffic areas |
| Epoxy | High durability, glossy finish | Workshops, heavy-duty use |
| Polyurethane | UV resistant, scratch-resistant | Areas with high sun exposure |
| Penetrating | Protection without altering appearance | Preserving natural look |

Credit: www.garageflooringllc.com
Preparation Steps Before Sealing
Before sealing your concrete garage floor, proper preparation is key. This process ensures a smooth, durable finish. Follow these steps to prep your floor the right way.
Cleaning The Concrete Surface
A clean surface is crucial for a strong sealant bond. Start with these steps:
- Remove all items from the garage.
- Sweep the floor to remove loose debris.
- Wash the surface with a concrete cleaner.
- Scrub stubborn stains with a stiff brush.
- Rinse thoroughly and let it dry completely.
Repairing Cracks And Damage
Fixing imperfections is vital for a seamless finish. Tackle repairs with these steps:
- Inspect the floor for cracks and damage.
- Chisel out the cracks to create a clean edge.
- Fill the cracks with concrete repair compound.
- Smooth the surface with a trowel.
- Allow repairs to cure as directed.
Choosing The Right Sealer For Your Garage Floor
Protecting your garage floor with the right sealer is crucial. It prevents damage from oil spills, chemicals, and wear. It can also enhance the floor’s appearance. But with various options available, it’s essential to choose the best fit for your needs.
Epoxy Vs. Acrylic Vs. Polyurethane Sealers
Epoxy sealers are durable and resistant to stains. They create a high-gloss finish that can transform your garage’s look. Acrylic sealers are less durable but dry faster and are easier to apply. They offer a matte finish. Polyurethane sealers are tough against chemicals and abrasions. They add a protective layer without changing the floor’s look.
Factors To Consider When Selecting A Sealer
- Durability: Consider the sealer’s lifespan and resistance to wear.
- Finish: Decide on the gloss level and aesthetic appeal.
- Application: Some sealers require professional installation.
- Maintenance: Think about the cleaning and upkeep needed.
- Cost: Balance your budget with the sealer’s quality and benefits.
Credit: www.youtube.com
Tools And Materials Needed For Sealing
Before sealing your concrete garage floor, gathering the right tools and materials is crucial. This ensures a smooth and effective application process. Let’s dive into what you’ll need.
List Of Necessary Supplies
To start, here’s a comprehensive list of supplies you’ll need:
- Concrete sealer: Choose based on your floor’s needs.
- Paint roller and extension pole: For easy application.
- Paint tray: To hold the sealer.
- Concrete cleaner: Prepares the surface.
- Stiff brush: For scrubbing the floor clean.
- Pressure washer (optional): Deep cleans the floor.
- Degreaser: Removes oil stains.
- Crack filler: Fixes cracks before sealing.
Safety Equipment
Protecting yourself is just as important as preparing the floor. Here’s what you’ll need:
- Gloves: Protect your hands from chemicals.
- Safety glasses: Keep your eyes safe.
- Respirator mask: Breath easily, avoid fumes.
- Knee pads (optional): Comfort for long projects.
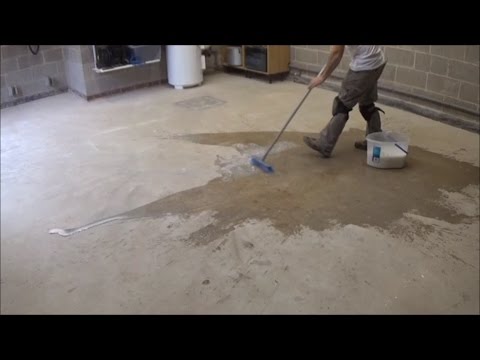
Application Techniques For Sealers
Sealing a concrete garage floor keeps it strong and clean. Proper application techniques are key for the best results. Let’s explore how to apply sealers correctly.
Best Practices For Even Application
- Clean the floor thoroughly before starting. Dust and dirt can prevent good adhesion.
- Use a paint roller or sprayer for even coverage. Rollers work well for water-based sealers, while sprayers are better for solvent-based products.
- Apply sealer in thin layers. Two thin coats are better than one thick coat.
- Allow the first coat to dry completely before applying the second. Check the product’s instructions for drying times.
- Overlap your passes with the roller or sprayer to avoid missed spots.
Common Mistakes To Avoid
- Applying too thick. This can lead to peeling or bubbles in the sealer.
- Not waiting for the first coat to dry. This can make the sealer sticky or uneven.
- Skipping prep work. A clean, smooth floor is critical for a good seal.
- Using the wrong tools. Make sure you have the right roller or sprayer for the type of sealer you’re using.
- Ignoring temperature and humidity. These can affect drying times and how well the sealer adheres.
Drying And Curing Time
Understanding the drying and curing time for a concrete garage floor sealer is crucial. It ensures a long-lasting finish. Proper drying and curing prevent issues like peeling or flaking.
Expected Timeframes For Sealer Drying
The time it takes for sealer to dry varies. Generally, sealer should be touch-dry within hours. Complete drying might take up to 24 hours. Always check the product’s instructions for specific times.
- Water-based sealers: Dry in 1-4 hours.
- Solvent-based sealers: May take longer, up to 24 hours.
How Temperature And Humidity Affect Curing
Temperature and humidity play big roles in curing. Ideal conditions lead to the best results.
| Condition | Effect on Curing |
|---|---|
| High Temperature | Speeds up drying |
| Low Temperature | Slows down drying |
| High Humidity | Extends drying time |
| Low Humidity | Reduces drying time |
Always aim for a balance. The best temperature is between 50-90°F. Ideal humidity ranges from 40-70%.
Maintenance Of Sealed Concrete Floors
Sealed concrete floors offer durability and aesthetic appeal. Proper maintenance ensures longevity and preserves the floor’s luster. This section provides practical advice on maintaining your sealed concrete garage floor effectively.
Routine Cleaning Tips
Regular upkeep prevents dirt accumulation and surface damage. Follow these simple steps:
- Remove debris with a soft broom.
- Wipe spills immediately to avoid stains.
- Clean with a microfiber mop weekly.
- Use a pH-neutral cleaner for deep cleaning.
- Avoid harsh chemicals that can deteriorate the sealer.
Rinse the floor with clean water after cleaning. Dry thoroughly to prevent water spots.
When To Reapply Sealer
Sealers protect floors but wear over time. Signs it’s time to reapply:
- Fading or yellowing of the current sealer.
- Concrete absorbs water instead of repelling it.
- Wear and tear from heavy traffic.
Typically, reseal every 1-3 years. Check the manufacturer’s recommendations for specific products.
Note: Always test the new sealer on a small area first. Ensure compatibility and desired appearance before full application.

Credit: allgaragefloors.com
Troubleshooting Common Issues
Sealing a concrete garage floor extends its life and enhances its appearance. Yet, sometimes issues arise post-application. Knowing how to address these can save time and money.
Dealing With Bubbles And Streaks
Bubbles and streaks can mar a freshly sealed concrete floor. These defects often result from improper application or environmental factors. Here’s how to tackle them:
- Check the temperature. It should be between 50°F and 90°F for ideal application.
- Avoid heavy application. Apply sealer in thin, even layers.
- Use the right tools. High-quality rollers and brushes make a difference.
- Pop bubbles early. A spiked roller can remove bubbles during application.
What To Do If The Sealer Peels
Peeling sealer is a frustrating issue. It often happens due to moisture or a dirty floor before sealing. Follow these steps to fix peeling sealer:
- Remove the peeling sealer. A scraper or a power washer can be effective.
- Clean the area. Use a degreaser or etching solution for a clean surface.
- Let it dry. The concrete must be completely dry before reapplication.
- Apply a new sealer layer. Ensure it’s a thin, even coat for best results.
Frequently Asked Questions
What Is Concrete Sealing?
Sealing concrete involves applying a protective coating to prevent damage from water, stains, and abrasions, thereby extending the floor’s lifespan.
How Often Should I Reseal My Garage Floor?
Typically, concrete garage floors should be resealed every 1-3 years, depending on the sealer type and the floor’s exposure to traffic and chemicals.
Can I Seal Concrete Myself?
Yes, sealing a concrete garage floor can be a DIY project. It requires cleaning the floor, repairing any cracks, and applying the sealer according to the manufacturer’s instructions.
What Are The Benefits Of Sealing Concrete?
Sealing concrete provides protection against moisture, stains, and wear, enhances the floor’s appearance, and makes maintenance easier by creating a non-porous surface.
Which Concrete Sealer Is Best For Garages?
Epoxy and polyurethane sealers are popular for garages because they offer durable protection, resist chemicals, and can withstand heavy traffic.
Conclusion
Sealing your concrete garage floor offers lasting benefits. From protection against stains to an enhanced appearance, the effort pays off. By following the steps outlined, homeowners can achieve a durable, attractive surface. Remember to choose the right sealant for a job well done.
Embrace the change; enjoy a refreshed garage space.