Is your propane torch not lighting up like it used to? A faulty igniter can be frustrating, especially when you need your torch to work perfectly.
But don’t worry—you don’t have to buy a new one or call a professional just yet. In this guide, you’ll learn simple, step-by-step ways to fix your igniter quickly and safely. Keep reading, and you’ll have your propane torch sparking again in no time.
Signs Of A Faulty Igniter
Knowing the signs of a faulty igniter helps fix your propane torch quickly. The igniter is key for starting the flame. If it stops working, the torch won’t light properly. Watch for clear signs that show the igniter needs attention. Catching problems early saves time and avoids frustration.
No Spark Or Flame
The most obvious sign is no spark or flame. You press the igniter button, but nothing happens. No clicking sound or spark appears. This means the igniter is not creating the spark needed to light the gas. The torch stays off, even if gas flows. This issue often means the igniter is broken or disconnected.
Intermittent Ignition
Sometimes the igniter works only part of the time. It sparks on some tries but fails on others. This inconsistent ignition can be tricky. The flame may light but then go out quickly. This problem often happens due to weak battery power or loose wiring. It shows the igniter is not reliable and needs fixing.
Physical Damage To Igniter
Visible damage also signals igniter problems. Check for cracks, burns, or broken parts on the igniter. Dirt or corrosion may cover the spark tip. Any damage can stop the igniter from working well. Physical wear means the igniter may need cleaning or replacing soon. Do not use a damaged igniter for safety reasons.
Credit: www.reddit.com
Tools And Materials Needed
Fixing an igniter on a propane torch requires the right tools and materials. Having everything ready makes the repair easier and safer. This section covers the essential items you need before starting the work.
Safety Gear
Protecting yourself is the top priority. Use safety goggles to shield your eyes from sparks. Wear gloves to protect your hands from heat and sharp edges. A long-sleeve shirt can prevent burns. Work in a well-ventilated area to avoid gas buildup.
Basic Tools
Some simple tools help you fix the igniter quickly. A small screwdriver set, both flathead and Phillips, is necessary. Needle-nose pliers help you handle tiny parts. A multimeter checks the igniter’s electrical function. A wrench set may be needed to remove fittings.
Replacement Parts
You might need new parts to restore the igniter. A replacement igniter or piezo spark module is often required. Keep some small screws and washers handy. Use parts designed for your torch model to ensure a good fit and safe operation.
Safety Precautions Before Repair
Before starting to fix the igniter on a propane torch, safety is the top priority. Propane is a flammable gas, and careless handling can cause accidents. Taking the right precautions protects you and others around you. Follow these simple steps to create a safe repair environment.
Turn Off Gas Supply
Always shut off the propane gas supply before any repair work. This stops gas from leaking and causing fire risks. Check that the valve is fully closed. Never work on the torch if gas is still flowing.
Work In A Well-ventilated Area
Fix the igniter in a place with good airflow. Fresh air helps prevent gas buildup. Open windows or work outside if possible. Avoid small, enclosed spaces that trap gas fumes.
Avoid Open Flames
Keep away all sources of open flame or sparks. No smoking, candles, or electrical sparks nearby. Even a small flame can ignite propane gas. Use only tools that do not create sparks.
Removing The Old Igniter
Removing the old igniter is the first step to fixing your propane torch. The igniter may stop working due to wear or dirt. Replacing it can make your torch light safely and quickly again.
Follow these clear steps to remove the old igniter carefully. Take your time and keep all parts safe. This will help you install the new igniter without problems.
Disconnecting The Torch
Before starting, turn off the propane supply. Make sure the torch is cool to touch. Unplug or disconnect any power source if your igniter uses batteries or electricity. Safety first.
Next, detach the torch from the propane tank. Use a wrench if needed to loosen the connection. Keep the torch steady to avoid damage or gas leaks.
Accessing The Igniter
Locate the igniter on the torch. It is usually near the tip or handle. Check your torch manual if unsure.
Remove any screws or covers blocking access to the igniter. Use a screwdriver that fits well to avoid stripping screws. Place the screws somewhere safe for reassembly.
Carefully pull away the cover to reveal the igniter and its wiring. Avoid pulling too hard to prevent damage.
Detaching The Igniter
Identify how the igniter connects to the torch. It may be clipped, screwed, or plugged in.
Use pliers or a screwdriver to loosen the fasteners. Gently disconnect any wires or clips holding the igniter in place.
Remove the igniter completely. Inspect the area for dirt or damage before installing the new igniter.
Cleaning The Igniter And Surrounding Area
Cleaning the igniter and the area around it improves the propane torch’s performance. Dirt, dust, and corrosion can block the spark. Regular cleaning helps the igniter work smoothly and safely. Follow simple steps to clear away grime and check for damage. Use the right tools to avoid harm and keep the torch in good shape.
Removing Dirt And Debris
Start by turning off the propane torch and letting it cool. Use a soft brush to gently remove dirt and dust from the igniter. Blow air into small spaces to clear hidden debris. Avoid using water or harsh chemicals that can damage the igniter. Clean both the igniter tip and the nearby area carefully.
Checking For Corrosion
Look closely at the igniter for any signs of rust or corrosion. Corrosion can stop the igniter from sparking properly. Use a flashlight for a better view if needed. If you see corrosion, clean it gently with a small wire brush. Replace the igniter if corrosion is severe or cannot be removed.
Using Proper Cleaning Tools
Choose tools that are soft and safe for delicate parts. A soft-bristle brush, compressed air, and a microfiber cloth work well. Avoid metal tools that might scratch or damage the igniter. Use cotton swabs for tight spots. Clean tools after use to keep them effective and safe for next time.

Credit: www.youtube.com
Installing The New Igniter
Installing the new igniter on a propane torch requires careful attention. Proper installation ensures the torch lights safely and works well. Follow these steps to install the igniter correctly and avoid common issues.
Positioning The Igniter Correctly
Place the igniter where the spark can reach the gas flow easily. The tip should be near the burner but not touching it. Check the manual for exact placement. Incorrect position can stop the torch from lighting.
Securing Connections
Connect the igniter wires tightly to their terminals. Loose wires may cause the igniter to fail. Use a screwdriver to tighten screws or clips firmly. Avoid over-tightening, which can damage parts.
Testing The Fit
Once installed, test the igniter by pressing the trigger. The spark should ignite the gas quickly. If it does not work, recheck the position and connections. Adjust until the fit allows a strong spark every time.
Testing The Propane Torch
Testing the propane torch is an important step after fixing the igniter. It helps ensure the torch works safely and properly. This process checks the gas flow, ignition, and flame consistency. Follow each step carefully to avoid risks and get the best results.
Reconnecting The Gas Supply
Start by securely reconnecting the propane tank to the torch. Check the hose for any leaks or damages before attaching. Tighten the connection by hand, then use a wrench for a firm fit. Open the gas valve slowly to avoid sudden gas bursts.
Igniting The Torch
Press the igniter button while holding the torch nozzle near a safe area. A spark should light the gas quickly. If the igniter does not spark, check the battery or wiring. Repeat the process until you see a steady flame.
Checking For Consistent Flame
Observe the flame for a few minutes. It should be steady, blue, and without flickering. A yellow or irregular flame means incomplete combustion or a gas issue. Adjust the gas flow valve to achieve a clean and strong flame.
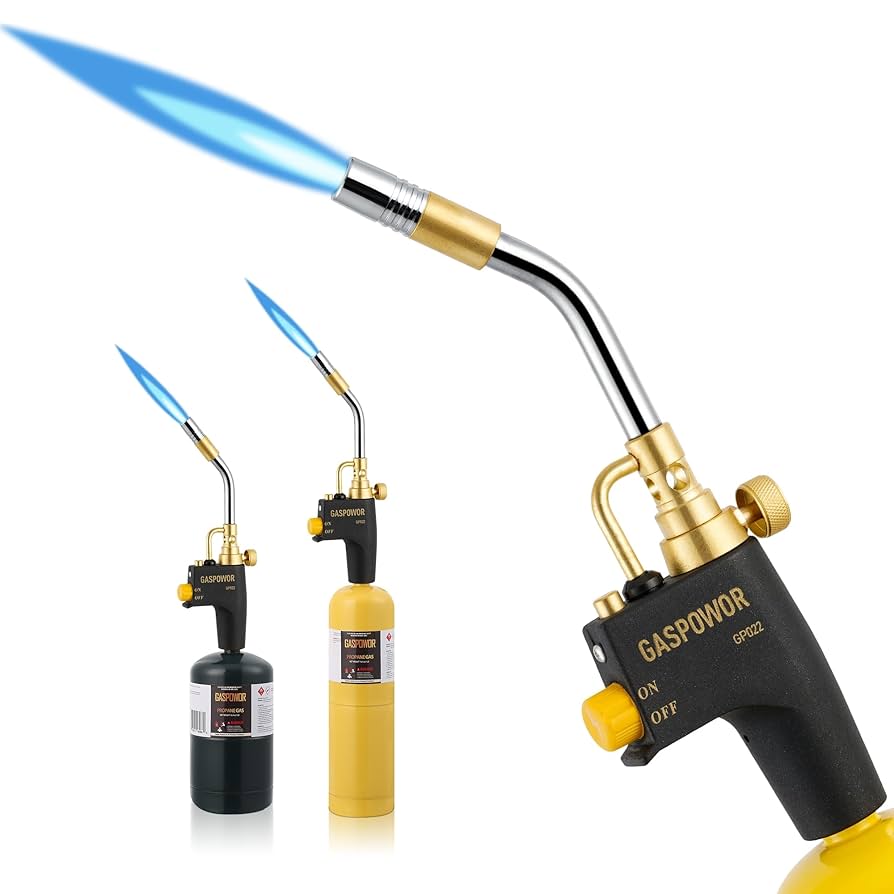
Credit: www.amazon.com
Troubleshooting Common Issues
Troubleshooting common issues with a propane torch igniter helps you find quick fixes. Many problems come from simple causes. Fixing them saves time and avoids buying new parts.
Start by checking the igniter carefully. Look for signs of damage or dirt. Clean or adjust parts as needed. Troubleshoot each issue step by step for best results.
Igniter Still Not Sparking
Check if the igniter tip is dirty or covered. Clean it gently with a soft cloth. Make sure the igniter clicks when pressed. Replace the igniter if no spark appears after cleaning.
Gas Flow Problems
Confirm the propane tank is open and has gas. Look for kinks or blockages in the hose. Clear any dirt or debris near the torch nozzle. Low gas flow can stop ignition completely.
Electrical Connection Issues
Inspect wires connecting the igniter to the torch. Look for loose or broken connections. Tighten loose wires or replace damaged ones. Good electrical contact is needed for sparking.
Maintaining Your Propane Torch Igniter
Maintaining your propane torch igniter is key for safety and performance. A well-kept igniter lights up quickly and lasts longer. Regular care stops small issues from turning into big problems. Follow simple steps to keep your igniter working well every time you use it.
Regular Cleaning Schedule
Clean the igniter after every few uses. Dirt and soot build up easily. Use a soft brush or cloth to wipe away debris. Avoid water on electronic parts. A clean igniter sparks better and lasts longer.
Inspecting For Wear
Check the igniter before each use. Look for cracks, rust, or loose parts. Replace worn parts quickly. Damaged igniters can fail or cause safety hazards. Regular checks keep your torch ready and safe.
Proper Storage Tips
Store the torch in a dry, cool place. Keep the igniter away from moisture and dust. Use a protective case or cover. Proper storage prevents rust and damage. Always store your torch safely after use.
Frequently Asked Questions
How Do I Know If My Propane Torch Igniter Is Broken?
A broken igniter won’t produce sparks when pressed. Check for dirt or damage first.
Can I Fix A Propane Torch Igniter Myself?
Yes, simple fixes like cleaning or replacing the igniter are possible at home.
What Tools Do I Need To Repair A Propane Torch Igniter?
You usually need a small screwdriver, cleaning brush, and a replacement igniter part.
How Often Should I Clean My Propane Torch Igniter?
Clean the igniter after every few uses to prevent dirt buildup and ensure sparks.
Why Does My Propane Torch Igniter Spark Weakly Or Not At All?
Weak sparks often mean a dirty igniter, low battery (if electronic), or worn parts.
Conclusion
Fixing an igniter on a propane torch is easier than it seems. Follow each step with care and patience. Small tools and a little time make a big difference. A working igniter saves fuel and keeps you safe. Regular checks help spot issues early.
Keep your torch ready for any project. Stay calm, take your time, and fix it right. You now know how to handle the problem yourself. No need to call for help every time. Simple fixes bring your torch back to life.