Do you have a waterlogged galvanized pressure tank that’s causing you headaches? You’re not alone.
Many homeowners face this common problem, which can lead to inconsistent water pressure and even damage your plumbing system if left unchecked. But don’t worry, fixing a waterlogged tank isn’t as daunting as it might seem. In fact, with the right guidance, you can handle it yourself without the need to call in a professional.
Imagine enjoying steady water flow again, free from those annoying spurts and splashes. By the end of this article, you’ll have a clear, step-by-step plan to restore your tank to peak performance, saving both time and money. Ready to dive in and solve this issue once and for all? Let’s get started!
Credit: www.youtube.com
Causes Of Waterlogging
Understanding the Causes of Waterloggingin your galvanized pressure tank is crucial to prevent future issues and maintain efficient performance. Waterlogging can lead to reduced water pressure, higher electricity bills, and more frequent pump cycles. Knowing why it happens will help you address the problem effectively.
Signs Of A Waterlogged Tank
Have you noticed a drop in water pressure lately? This could be a sign of a waterlogged tank. Other indicators include your pump running more often than usual or irregular cycling. If these symptoms sound familiar, your tank might be struggling with water accumulation. Pay attention to these warning signs to avoid bigger issues down the road.
Common Reasons For Water Accumulation
One typical cause of waterlogging is a malfunctioning air valve. When the air valve fails, the tank can’t maintain the right air-to-water ratio, leading to water buildup. Another reason could be a tear in the tank’s bladder, allowing more water to enter than it should. Have you checked these areas recently?
Corrosion is another culprit that might be affecting your tank. Over time, the galvanized coating can deteriorate, causing leaks and water accumulation. Regular inspections can help identify corrosion early. Is your tank as robust as it was when you first got it?
Proper maintenance is vital for avoiding these issues. Simple tasks like checking air pressure regularly and inspecting the tank for any signs of wear can make a big difference. Are you keeping up with these maintenance checks?
Tools And Materials Needed
Fixing a waterlogged galvanized pressure tank requires the right tools and materials. Proper preparation ensures efficiency and safety during the repair process. This section covers the essential tools and safety equipment needed for the task.
Essential Tools
Start with a wrench. It’s vital for loosening nuts and bolts. A pipe cutter is necessary for cutting through pipes easily. Use a screwdriver for removing and tightening screws. Having a pliers set is helpful for gripping and twisting tasks. A pressure gauge is crucial to check the tank’s pressure levels. An air compressor will help in refilling the tank with air.
Safety Equipment
Safety is a priority during any repair work. Wear protective gloves to shield your hands from sharp edges. Safety goggles protect your eyes from debris. Use ear protection if operating loud tools. A dust mask is important if working in dusty conditions. Ensuring proper lighting will improve visibility and reduce risks.
Preparation Steps
Fixing a waterlogged galvanized pressure tank begins with careful preparation. Proper preparation ensures a smooth and safe process. It also helps you avoid unnecessary issues. Follow these steps to get started.
Turning Off The Pump
Start by turning off the main power supply. This ensures safety while working. Locate the pump switch and turn it off. Confirm that the pump is not running. Double-check the power supply to be sure.
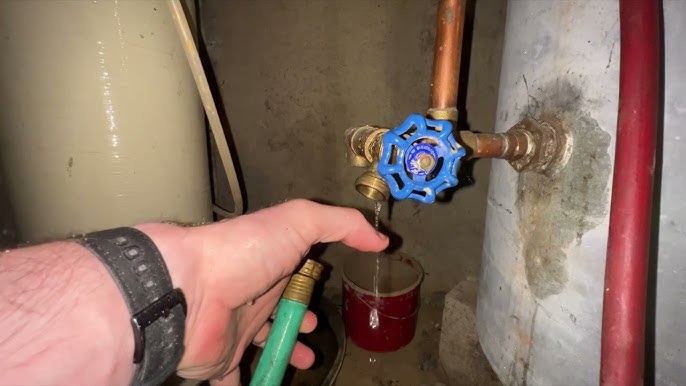
Draining The Tank
After turning off the pump, you need to drain the tank. Attach a hose to the tank’s drain valve. Ensure the hose leads to a proper drainage area. Open the valve and allow the water to flow out. Wait until the tank is completely empty.
Once empty, close the drain valve tightly. This prevents air from entering the tank. Ensure no water remains in the tank. Check all connections and seals.

Credit: support.boshart.com
Assessing The Damage
When a galvanized pressure tank becomes waterlogged, it can cause a range of issues from reduced water pressure to potential system failure. Before you can fix the problem, it’s crucial to assess the damage effectively. By doing so, you can determine the severity of the issue and decide on the most appropriate repair method.
Inspecting The Tank Exterior
Begin by examining the outside of the tank. Look for visible signs of wear and tear, such as rust spots, dents, or leaks. If you notice any rust, it could indicate that the tank’s integrity is compromised.
Check the seams and joints for any water drips. A small leak can grow into a bigger problem if not addressed immediately. Feel the surface of the tank; if it feels damp, there might be a hidden leak.
Remember the time when my neighbor ignored a tiny rust spot? It turned into a full-blown leak, flooding their basement. Don’t let a small issue escalate.
Checking The Pressure Valve
The pressure valve is a crucial component of your pressure tank system. Check if it’s functioning properly by releasing a bit of air. A healthy tank should have a small burst of air.
If no air escapes, the tank might be fully waterlogged. This often happens when the valve gets stuck or clogged with debris.
Consider how often you’ve overlooked simple maintenance tasks. Regular valve checks can prevent more extensive issues, saving you time and money in the long run.
Could a faulty valve be the root of your problem? It’s worth checking before diving into more complex repairs.
By thoroughly assessing the damage, you set the stage for a successful repair. It’s a proactive step that often reveals simple fixes before they become significant problems.
Repairing Or Replacing Components
Fixing a waterlogged galvanized pressure tank involves inspecting for leaks or corrosion. Drain water and check the air charge. Replace damaged components to ensure proper function. Regular maintenance prevents future issues.
When dealing with a waterlogged galvanized pressure tank, you might face the choice of repairing or replacing components. This decision can significantly impact the efficiency and longevity of your tank. Understanding which parts to fix and which to replace can save you time and money. Let’s dive into some practical steps you can take.Fixing The Pressure Valve
A malfunctioning pressure valve often leads to a waterlogged tank. Begin by shutting off the power to your pump. This is crucial for your safety. Remove the pressure valve carefully. Check for debris or mineral build-up, which might be blocking the flow. Clean it thoroughly with a vinegar solution or replace it if it’s beyond repair. Reinstall the valve and turn the power back on. Monitor the pressure gauge to ensure the valve is functioning properly. Have you noticed an improvement? If not, further investigation might be needed.Replacing Rusted Parts
Galvanized tanks can suffer from rust over time, especially in humid environments. Inspect the tank for any signs of rust, particularly around joints and fittings. If you find rust, use a wire brush to scrub it away. For severely rusted parts, replacement is necessary to prevent leaks and maintain pressure. Consider using rust-resistant materials when replacing parts. Stainless steel or plastic components can offer better durability. Have you thought about how this simple change might extend the life of your tank? Regular maintenance checks can prevent these issues from escalating. By addressing problems early, you can avoid costly replacements down the road. Are you ready to take charge of your tank’s maintenance?
Credit: www.youtube.com
Reassembling The Tank
Discovering a waterlogged galvanized pressure tank can be frustrating. Drain excess water and inspect for leaks to ensure optimal performance. Regular maintenance prevents future issues and prolongs tank life.
Reassembling the Tank Once you’ve addressed the issue of a waterlogged galvanized pressure tank, it’s time to put everything back together. This step is crucial, as a proper reassembly ensures your tank functions efficiently without any additional problems. You might feel a bit daunted by this, but with careful attention, you can do it effectively. Remember the last time you had to reassemble furniture from a big box store? That feeling of satisfaction once it was standing sturdy in your living room? Reassembling your pressure tank is similar. Take each part carefully, ensure it fits well, and soon enough, your tank will be back to peak performance.Securing All Connections
Begin by ensuring all pipe connections are tight and secure. Loose connections can lead to leaks and inefficiencies, much like leaving a window open with the air conditioning running. Use a wrench to tighten fittings, checking that they are snug but not overtightened. Consider labeling the connections as you secure them. This small step can be a lifesaver if you need to revisit the tank later. Have you ever wished you’d labeled those holiday decoration boxes? This is the same idea, but for your plumbing.Testing For Leaks
Once everything is reassembled, it’s essential to test for leaks. Fill the tank with water and look closely at each connection point. A simple visual inspection can save you from future headaches. You might ask, how do you know if there’s a leak? Look for any drips or moisture around the fittings. This process is much like checking your car tires for a slow leak—patience and attention to detail are key. If you spot a leak, don’t panic. Tighten the connection slightly and check again. Sometimes, a small adjustment can fix the issue entirely. Remember, ensuring everything is watertight now saves you from bigger problems later. By taking these steps, you’re not just fixing a tank; you’re extending its life and ensuring your water supply remains steady and reliable. What could be more satisfying than that?Refilling The Tank
Refilling the tank involves draining excess water and air from the galvanized pressure tank. Start by shutting off the water supply and opening the drain valve to remove water. Ensure proper air pressure by adjusting the tank’s air valve, restoring optimal function and preventing future waterlogging issues.
Refilling a waterlogged galvanized pressure tank can seem daunting, but it’s a crucial step in restoring its functionality. Once you’ve successfully drained the tank, refilling it requires patience and attention. This step ensures that your water system operates efficiently, delivering optimal pressure.Gradual Refill Process
Start by slowly opening the water supply valve. This prevents air pockets and allows the tank to fill evenly. Rapid refilling can cause pressure fluctuations, leading to system stress. Consider setting a timer. Gradually increase the flow every few minutes. This helps maintain a balanced pressure. Have you ever hurried through a task only to realize you missed a crucial step? Refilling too quickly can lead to similar issues. A slow, steady approach ensures you don’t have to repeat the process.Monitoring Pressure Levels
Keep an eye on the pressure gauge as you refill. It provides real-time insights into the tank’s status. Aim for the manufacturer’s recommended pressure. If the pressure rises too quickly, pause the refill. This could indicate a potential blockage or issue within your system. Think of monitoring as a safeguard. It helps you catch problems before they escalate. Regularly checking the gauge can prevent unnecessary repairs. By taking a measured approach to refilling and closely monitoring pressure levels, you can ensure your galvanized pressure tank operates smoothly. Have you ever tackled a project and realized the importance of patience and precision? This process is no different. It rewards those who take the time to do it right.Preventive Maintenance Tips
Fixing a waterlogged galvanized pressure tank is essential for efficient water flow. Drain the tank completely to remove excess water. Ensure regular checks to prevent future waterlogging and maintain optimal performance.
Preventive maintenance is your best ally when it comes to extending the life of your galvanized pressure tank. A few simple habits can save you time and money in the long run. Imagine avoiding unexpected headaches by keeping your tank in top condition. Below, you’ll find practical tips to help you stay ahead of potential issues and maintain a smooth-running system.Regular Inspections
Regular inspections are crucial to catch problems early. Set a reminder on your calendar to check your tank every few months. Look for signs of rust, leaks, or any unusual noises. A quick glance can reveal small issues before they grow into costly repairs. If you notice anything out of the ordinary, address it immediately. This proactive approach ensures your tank remains in good health. During inspections, ensure all connections are tight and secure. Loose fittings can lead to leaks, which might compromise the tank’s functionality. Keep a wrench handy for quick adjustments.Maintaining Optimal Pressure
Maintaining the right pressure is key to avoiding waterlogging. Too much or too little pressure can lead to inefficiencies. Use a pressure gauge to monitor the tank’s pressure regularly. Adjust the pressure settings as needed to align with your system’s requirements. Consistent pressure helps the tank operate smoothly, preventing unnecessary strain. Consider sharing your own experiences or tips with neighbors or friends who have similar systems. You might learn something new or help someone else in the process. Have you ever thought about how a small tweak could lead to big savings? By focusing on these preventive maintenance tips, you can keep your pressure tank running efficiently. The effort you invest now will pay off when your system continues to function smoothly without unexpected breakdowns. Keep your eyes open, stay informed, and enjoy the peace of mind that comes with a well-maintained system.Frequently Asked Questions
What Causes A Pressure Tank To Become Waterlogged?
A pressure tank can become waterlogged due to a failed bladder or excessive sediment buildup. This reduces its efficiency.
How Can You Identify A Waterlogged Tank?
Signs include frequent pump cycles, low water pressure, and unusual noises from the tank. Check for these symptoms.
Can A Waterlogged Tank Be Repaired?
Yes, it can often be repaired by replacing the bladder or cleaning the tank. Regular maintenance helps prevent issues.
What Tools Are Needed To Fix A Waterlogged Tank?
You might need wrenches, a pressure gauge, and a replacement bladder. Always ensure safety when working with pressure systems.
How Often Should You Check A Pressure Tank?
Inspect the tank every six months. Regular checks help catch problems early and maintain water pressure efficiency.
Conclusion
Fixing a waterlogged galvanized pressure tank is not complex. Regular checks prevent future issues. Always monitor pressure levels closely. Follow safety guidelines during repairs. Consult professionals if unsure about steps. Proper maintenance extends tank life. Keep tools ready for quick fixes.
Understand tank mechanics for efficient troubleshooting. Address problems early to save costs. Enjoy a well-functioning tank with these simple tips. Your effort ensures reliable water supply. Stay proactive and protect your investment. Reliable tanks lead to peace of mind. Keep learning and improving your skills.
Happy tank fixing!