A leaky shower can quickly turn from a minor annoyance into a major headache. You might feel a sense of dread creeping in, imagining the costly repairs and the mess of removing tiles.
But what if you could tackle this problem without tearing your bathroom apart? Imagine the relief of knowing that you can fix that leak without the need for an expensive renovation. By following a few straightforward steps, you can protect your home from water damage and keep your shower in top shape.
Ready to discover how you can save time, money, and hassle? Keep reading to learn the surprisingly simple solutions that are right at your fingertips. Your shower—and your wallet—will thank you.
Identifying The Leak Source
Locating the leak source is crucial for effective repair. Check the showerhead, faucet, and grout for visible damage. A careful inspection prevents unnecessary tile removal.
Identifying the source of a shower leak is crucial. It prevents further damage to your bathroom. Leaks can be hidden and tricky to find. Knowing where to look saves time and effort. In this section, we will explore common leak areas and signs of hidden leaks. Understanding these aspects helps pinpoint the problem efficiently.Common Leak Areas
The showerhead is a frequent culprit. Check for dripping or spraying water. Loose showerhead connections can lead to leaks. Inspect the area where the showerhead meets the pipe. Another common area is the shower faucet. Faulty washers or seals may cause leaks. Look for water pooling around the faucet. The shower door is also a potential source. Broken seals or gaps can allow water to escape. Examine the door frame for moisture.Signs Of A Hidden Leak
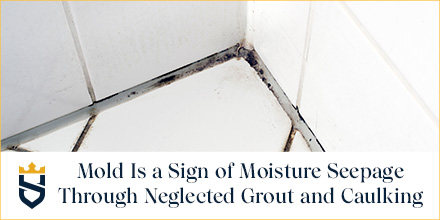
Hidden leaks can cause significant damage. Look for water stains on walls or ceilings. Musty odors may indicate mold growth. Check for peeling paint or wallpaper. These are signs of excess moisture. Listen for unusual sounds. Dripping or hissing noises can reveal a leak. Monitor your water bill for unexplained increases. A sudden spike may suggest a hidden leak.Tools And Materials Needed
Fixing a leaky shower without removing tiles can be simple. You need the right tools and materials. These essentials make the process smooth. Here’s a guide to help you gather what you need.
Essential Tools
A screwdriver is crucial for accessing shower fixtures. Ensure you have a wrench to loosen and tighten parts. A caulking gun helps seal leaks effectively. A flashlight is useful for inspecting dark or hidden areas. Safety gloves protect your hands during the repair.
Plumber’s tape is vital for securing joints. A utility knife is handy for cutting old seals. Have a bucket ready to collect water or debris. A sponge helps in cleaning surfaces before sealing. An adjustable spanner is needed for various nut sizes.
Recommended Materials
High-quality silicone sealant is necessary for sealing gaps. Choose waterproof and mold-resistant options for durability. Replacement washers may be needed if existing ones are worn. Use grout sealant to reinforce tile edges. Epoxy putty is ideal for filling larger gaps or cracks.
Purchase a leak detection dye to identify leaks effectively. This helps pinpoint the exact location of the problem. Consider anti-mold spray for preventing future mold growth. Ensure you have clean rags for wiping surfaces during repairs. Having these materials on hand saves time.
Preparing The Shower Area
Fixing a leaky shower without removing tiles starts with a thorough cleaning. Identify the leak source to ensure effective repair. Apply waterproof sealant to cracks and joints to prevent further leakage.
Preparing the shower area is crucial for fixing a leaky shower without removing tiles. A clean and dry surface ensures proper adhesion of sealants and prevents future leaks. This step involves thorough cleaning and drying of the shower area, setting the foundation for effective repair.Cleaning The Surface
Start by removing grime and soap scum from the shower surface. Use a mild detergent and a soft scrubber. This avoids scratches on the tiles. Rinse thoroughly to remove any residue. Pay special attention to grout lines and corners. These areas can trap dirt and mold. A clean surface improves sealant adhesion.Ensuring A Dry Environment
Dry the shower area completely before applying any sealant. Moisture can affect the effectiveness of repair materials. Use a towel or cloth to wipe down tiles and grout. Consider using a fan or dehumidifier. This speeds up the drying process. Ensure no water drips from the showerhead during this time. A dry environment is essential for successful leak repair.
Credit: www.youtube.com
Sealant Application Techniques
Fixing a leaky shower without removing tiles may seem difficult. Sealant application techniques offer a practical solution. These methods ensure the leak is stopped and the shower remains intact. Understanding the right sealant and applying it correctly is crucial. Let’s explore these techniques in detail.
Choosing The Right Sealant
Selecting the correct sealant is essential for a successful repair. Not all sealants work for showers. Silicone sealants are popular for their water-resistant properties. They create a durable barrier that prevents leaks. Acrylic sealants are less flexible but easier to apply. Consider the shower’s environment. High humidity areas require stronger sealants. Read labels carefully. Ensure the sealant is mold-resistant and suitable for bathrooms.
Applying Sealant To Joints
Proper application of sealant ensures a leak-free shower. Begin by cleaning the area thoroughly. Remove old sealant and debris. Dry the surface completely. This helps the new sealant adhere better. Apply sealant evenly along the joints. Use a steady hand for a smooth finish. A caulk gun can aid in precise application. Avoid gaps or bubbles. These can lead to future leaks. Allow the sealant to cure fully. This may take 24 hours or more. Follow the manufacturer’s instructions for best results.
Repairing Grout And Caulk
Repairing grout and caulk can fix a leaky shower without removing tiles. Grout and caulk often wear out, leading to leaks. Fixing them can save money and time. This process is simple and doesn’t require tile removal. Follow these steps to repair grout and caulk effectively.
Grout Repair Steps
First, clean the grout area thoroughly. Remove any dirt or mold using a brush. Ensure the surface is dry before proceeding. Use a grout saw to remove damaged grout carefully. Work slowly to avoid damaging tiles. Once old grout is removed, prepare new grout. Follow the instructions on the package for mixing. Apply new grout with a grout float. Press it firmly into the gaps between tiles. Let it set for about 20 minutes. Then, wipe excess grout with a damp sponge. Allow the grout to cure for 24 hours before using the shower.
Caulking Tips
Start by removing old caulk with a utility knife. Be gentle to avoid scratching tiles. Clean the area with a mild cleaner. Ensure it is completely dry. Select a high-quality caulk suitable for bathrooms. Cut the tip of the caulk tube at a 45-degree angle. Apply caulk evenly along the seams. Use a caulk tool or finger to smooth it out. Ensure there are no gaps or bubbles. Let the caulk dry completely before using the shower. Check the label for the recommended drying time.
Credit: www.sirgrout.com
Inspecting Shower Fixtures
Leaky showers can cause frustration and unwanted water bills. Fixing them without removing tiles is possible. Begin by inspecting shower fixtures carefully. This task helps identify the source of the leak. It’s crucial to focus on each element of the shower setup. Addressing these components can lead to a quick solution.
Checking Faucet Connections
Faucet connections often hide leaks. Inspect them closely. Ensure all fittings are tight. Loose connections can cause water seepage. Use a wrench to tighten any loose nuts. Check for rust or damage. Replace worn-out washers promptly. This step often resolves minor leaks.
Showerhead Leak Fixes
Leaky showerheads waste water. First, unscrew the showerhead. Examine the rubber gasket inside. Replace it if worn or damaged. Clean the threads of the pipe. Use plumber’s tape for a secure seal. Reattach the showerhead tightly. Regular maintenance prevents future leaks. Addressing these issues preserves water and reduces costs.
Preventing Future Leaks
Fixing a leaky shower without removing tiles involves sealing gaps and inspecting grout. Use waterproof sealant around fixtures and edges. Regular maintenance and timely repairs prevent future leaks effectively.
Preventing future leaks in your shower can save you time, money, and the headache of dealing with water damage. It’s not just about fixing the current leak; it’s about ensuring that your shower remains leak-free for years to come. Simple changes in your maintenance routine can make a significant difference. Routine Maintenance Tips Regular maintenance is key to avoiding leaks. Check your showerhead and faucet regularly for any signs of wear and tear. Tighten any loose parts and replace worn-out washers. This simple step can prevent water from seeping into unwanted areas. Inspect your grout and caulk lines. These are the first lines of defense against water infiltration. If you notice cracks or gaps, reapply caulk or grout to seal them. It’s a small task that can prevent bigger problems down the line. Keep an eye on the drain. Ensure that it’s not clogged, as a blocked drain can lead to water pooling, increasing the risk of leaks. Cleaning it monthly can help keep water flowing smoothly. Using Water-Resistant Products Investing in water-resistant products can be a game-changer. Use a waterproof sealant on your shower walls and floors. This can add an extra layer of protection against leaks without the need to remove tiles. Consider using water-repellent sprays. These sprays can be applied to your tiles and grout, creating a barrier that repels water. It’s an easy, yet effective way to enhance the durability of your shower. When was the last time you checked your bathroom accessories? Water-resistant shower curtains and liners can also play a part in preventing leaks. Opt for materials like vinyl or polyester that can withstand moisture better than traditional fabric. By implementing these straightforward tips, you can keep your shower in excellent condition and avoid the hassle of future leaks. What steps will you take today to protect your shower from leaks tomorrow?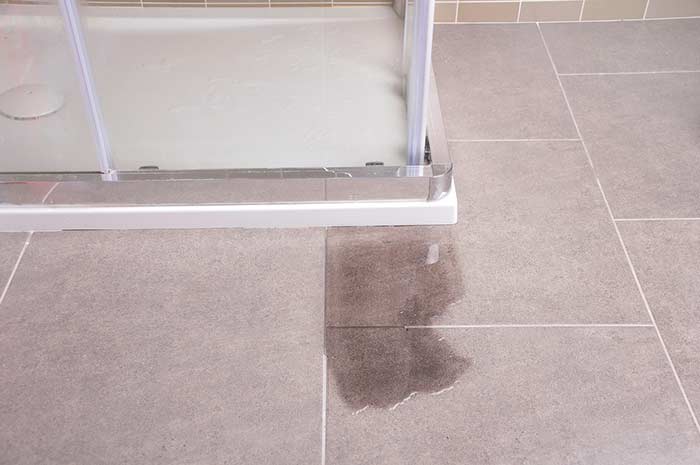
Credit: www.myshower.com.au
When To Call A Professional
Leaky showers can be frustrating, especially when tiles don’t need removal. Sometimes, a quick fix isn’t enough. Knowing when to call a professional is crucial. They have the skills to tackle tough problems efficiently. In some cases, expert intervention saves time and prevents further issues.
Complex Leak Scenarios
Some leaks are not straightforward. They involve multiple sources or hidden pipes. These complex scenarios require professional assessment. Experts can identify the true cause of the leak. They use specialized tools to detect hidden problems. Attempting to fix such leaks alone might worsen the situation.
Assessing Damage Severity
Not all leaks are minor. Some cause significant damage over time. Professionals assess the severity accurately. They check for mold or structural issues. Ignoring serious damage can lead to costly repairs. A professional ensures the problem is fully resolved. Their expertise guarantees a thorough solution.
Frequently Asked Questions
How Can I Identify A Leaky Shower?
Check for water stains or damp patches outside the shower area. Listen for dripping sounds. Look for mold.
Can I Fix A Shower Leak Without Removing Tiles?
Yes, you can. Use waterproof sealant or epoxy to seal gaps and cracks without removing tiles.
What Tools Do I Need To Fix A Leaky Shower?
You’ll need a caulking gun, waterproof sealant, a scraper, and possibly a screwdriver or wrench.
How Often Should I Check For Shower Leaks?
Check for leaks every few months. Regular checks can prevent major water damage.
What Causes A Shower To Leak?
Worn-out seals, cracked grout, or damaged pipes often cause leaks. Regular maintenance helps prevent these issues.
Conclusion
Fixing a leaky shower can be simple and stress-free. By following these steps, you avoid removing tiles. Save time and money while keeping your bathroom intact. Check seals and grout regularly to prevent future leaks. Use waterproof sealant effectively. Regular maintenance ensures your shower stays leak-free.
Always address leaks promptly to avoid bigger issues. Proper care keeps your shower in good condition. Now, enjoy your shower without worrying about leaks. Feel confident in maintaining your bathroom. Keep these tips handy for future reference. Happy showering!