Imagine stepping into your kitchen or bathroom and noticing a broken tile glaring back at you. It’s frustrating, right?
The thought of replacing it can be daunting, not to mention costly. But here’s the good news: you don’t have to replace it! Yes, you can fix that broken tile without tearing it out. This article is your guide to saving time, money, and your sanity by showing you how to repair it effectively and easily.
Picture a home that looks pristine without the hassle of a major renovation. Intrigued? Keep reading to discover the secrets to making your tiles look new again with simple techniques that anyone can master. Your space deserves to shine, and you deserve to know how to make it happen—right now!
Credit: www.homedepot.com
Assessing Tile Damage
Fixing a broken tile without replacing it involves cleaning, applying adhesive, and sealing the crack. This method preserves the tile’s look while preventing further damage. Simple tools and materials make it an easy DIY task.
Repairing a broken tile without replacing it might sound daunting, but it’s often manageable if you start by understanding the extent of the damage. Evaluating the condition of your tile is crucial. It helps you identify the best repair method, saving time and money.Types Of Tile Damage
Tiles can experience various types of damage. You may notice cracks, chips, or scratches. Cracks can range from hairline fractures to deeper splits. Chips are small pieces missing from the tile, often around the edges. Scratches are surface-level imperfections that occur from wear and tear. Understanding these types can make a significant difference in your approach. Imagine finding a tiny chip on your kitchen floor tile. You might think the entire tile needs replacing. However, a minor repair is often sufficient.Severity Of Damage
Assessing the severity of the damage is your next step. A superficial scratch might be a cosmetic issue, while a deep crack could affect the tile’s functionality. The deeper the crack, the more urgent the repair. Consider a bathroom tile with a noticeable crack. You might worry about water seeping through and causing further issues. In such cases, addressing the damage promptly can prevent additional complications. Think about the last time you overlooked a small crack. Did it eventually become a bigger problem? Sometimes, timely action can save you from a costly replacement.Taking the time to assess your tiles allows you to make informed decisions. What will you discover about your tiles today?

Credit: diy.stackexchange.com
Cleaning The Tile Surface
Fixing a broken tile without replacing it can be simple. Clean the tile surface thoroughly. Then apply a waterproof adhesive to seal the crack, ensuring it blends seamlessly with the surrounding tile.
Cleaning the tile surface is a crucial step in repairing a broken tile without having to replace it entirely. Imagine your tile as a canvas that needs a fresh start before you can apply a touch-up. Ensuring that the surface is spotless allows repair materials to adhere properly, giving you a seamless finish. It’s like preparing for a painting project; you wouldn’t start on a dirty surface, would you?Removing Dirt And Debris
First, sweep away loose dirt and debris using a soft-bristle brush or a vacuum cleaner. This step is vital as leftover particles can interfere with the repair process. A friend once tried fixing a tile without cleaning it first and ended up with a lumpy surface, which nobody wants. Next, use a mild detergent mixed with warm water to scrub the tile gently. This will help remove stubborn stains and grime, ensuring a clean base for your repair. Avoid using harsh chemicals that might damage the tile’s finish. Have you ever noticed how a clean tile looks almost new? That’s the magic of proper cleaning.Preparing For Repair
After cleaning, dry the tile thoroughly with a clean cloth. Any lingering moisture can affect adhesive performance, so take your time here. You want your tile to be as dry as a desert. Once dry, inspect the tile for any remnants of dirt or soap, especially in the cracks or broken areas. You might need a small brush to get into those tight spaces. Think of it as prepping for a culinary masterpiece; you wouldn’t leave crumbs in a mixing bowl, right? Finally, ensure the surrounding area is clean and organized. Have your repair tools and materials ready and within reach. This preparation not only saves time but also helps prevent mistakes during the repair process. Are you ready to transform that broken tile into a work of art? Let’s make it happen!Filling Cracks And Chips
Cracks and chips in tiles can be frustrating. They can appear out of nowhere. You might think you need to replace the entire tile. But, there are simpler ways to fix these issues. Filling cracks and chips is a cost-effective solution. It brings back the beauty of your floor or wall.
Using Epoxy For Small Repairs
Epoxy is perfect for tiny cracks and chips. It is durable and easy to use. Begin by cleaning the damaged area thoroughly. Remove dust and debris. Mix the epoxy as per instructions. Apply it carefully to the crack or chip. Use a small tool for precision. Smooth the epoxy evenly over the surface. Let it dry completely before using the tile. Epoxy also comes in different colors. This helps it match the existing tile color.
Applying Grout For Larger Damage
Grout can repair larger cracks or chips. It is a versatile material. First, clean the damaged area well. Make sure it is dry. Mix the grout according to the package. Apply it to the damaged area using a spatula. Push it deep into the cracks. Remove the excess grout with a damp cloth. Let it dry and then clean the tile surface. Grout is available in various colors. Choose one that matches your tiles for a seamless look.
Recoloring And Blending
Fixing a broken tile can be easy. Recoloring and blending techniques help restore its look without replacement. This method saves time and maintains your floor’s beauty.
Recoloring and blending a broken tile can be an excellent alternative to replacement. It allows you to maintain the visual appeal of your space without the hassle of removing and installing new tiles. This method not only saves time and money but also offers you a creative outlet to refresh your home decor.Matching Tile Color
The key to successful recoloring is finding the right color match. Start by assessing the color of your existing tiles. Consider lighting variations in the room since they can affect how colors appear. Visit your local hardware store and grab a few paint samples. You can even bring a small piece of the broken tile for reference. This ensures you pick a shade that’s as close as possible to your original tile color.Using Paint For Touch-ups
Once you have the perfect color match, it’s time to get painting. Use high-quality ceramic or tile paint for the best results. These paints are specially formulated to adhere to tile surfaces and withstand wear and tear. Apply the paint with a small brush to focus on cracks and chips. Be patient and layer the paint as needed for better coverage. This attention to detail will make the repair seamless and almost invisible. Have you ever tried using paint to fix a broken tile? It can feel like magic as the flaws start to disappear under the brush. It’s a simple yet rewarding DIY project that can make a big difference in your home’s aesthetic. If you find imperfections after the paint dries, don’t worry. You can easily apply another coat to perfect the finish. Taking your time during this process will ensure a long-lasting repair. By investing a little effort, you can transform a broken tile into a stunning part of your home decor. Wouldn’t it be satisfying to know that you turned a flaw into a feature with just a few strokes of a brush?Sealing The Repair
Repairing a broken tile without replacing it involves sealing the damage effectively. Clean the tile surface thoroughly and apply a high-quality epoxy to the cracked area. This technique restores the tile’s appearance and prevents further damage, offering a cost-effective solution.
Sealing the repair is an essential step in fixing a broken tile. It ensures the repair lasts long and remains durable. A good sealant protects against moisture and dirt. It can keep your tile looking like new. Here’s how to choose and apply the right sealant.Choosing The Right Sealant
Select a sealant compatible with your tile type. Ceramic and porcelain tiles need specific sealants. Read the label before buying. Look for water-resistant options. Check for a sealant that matches your tile’s finish. Some sealants add gloss, others keep it matte. Decide what suits your style best. Always opt for high-quality products. This ensures better protection and longevity.Applying Sealant Properly
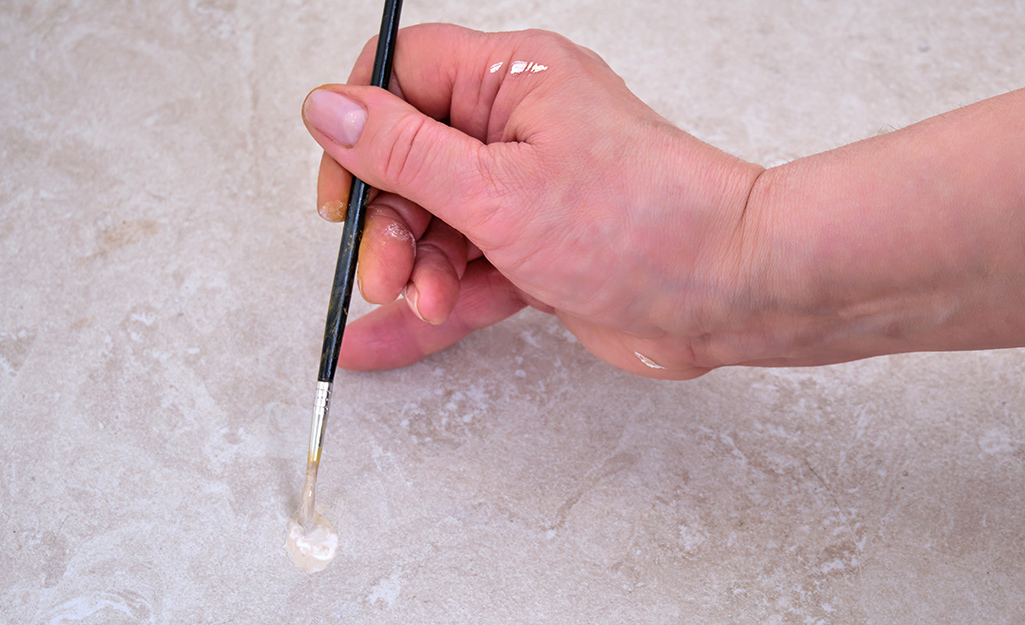
Clean the tile surface before applying the sealant. Remove all dust and debris. Use a damp cloth to wipe it down. Let it dry completely. Apply the sealant with a small brush or applicator. Cover the repaired area thoroughly. Avoid applying too much at once. Use even strokes for a smooth finish. Let the sealant dry as per instructions. Some sealants may require multiple coats. Follow the recommended drying time for best results.:max_bytes(150000):strip_icc()/GettyImages-95702789-40683b0536954f77a62bee9baa445abc.jpg)
Credit: www.thespruce.com
Preventing Future Damage
Repairing a broken tile can prevent future damage. Fill cracks with epoxy to restore its surface. Seal it well to shield from moisture, ensuring longevity without costly replacements.
A broken tile can be an eyesore, but did you know that it’s possible to fix it without the hassle of replacing it entirely? Keeping your tiles in pristine condition involves more than just a quick repair; it requires proactive measures to prevent future damage. By adopting a few simple strategies, you can extend the life of your tiles and maintain a flawless appearance in your space.Regular Maintenance Tips
Regular maintenance is your first line of defense against tile damage. Begin by establishing a routine cleaning schedule using gentle, non-abrasive cleaners. This helps prevent dirt and grime from settling into the tile’s surface or grout lines. Inspect your tiles frequently for signs of wear or minor cracks. Early detection allows you to address small issues before they escalate. Consider applying a sealant to your tiles to add an extra layer of protection against moisture and stains.Avoiding Common Mistakes
Avoid some common pitfalls that lead to tile damage. One frequent mistake is using harsh chemicals or abrasive tools for cleaning, which can scratch or weaken tiles. Opt for soft cloths or mops and mild detergents instead. Be mindful of heavy objects. Dragging furniture across tiled floors can chip or crack them. Use furniture pads or lift items to prevent this kind of damage. Also, ensure that you address any water leaks promptly, as prolonged exposure to moisture can lead to tile degradation. Taking these proactive steps can save you time and money. Have you ever thought about the simple ways you can protect your tiles? With these tips, you’re well on your way to preventing future damage and keeping your tiles looking their best.Frequently Asked Questions
How Can I Fix A Cracked Tile?
Clean the tile and apply epoxy glue to the crack. Let it dry.
What Materials Do I Need To Repair A Tile?
You’ll need epoxy glue, a putty knife, and a matching paint or marker.
Can I Repair A Chipped Tile At Home?
Yes. Use epoxy and a paint marker to fill and color the chip.
Is It Possible To Fix Loose Tiles Without Replacing?
Absolutely. Reattach with tile adhesive and ensure it’s securely in place.
How Do I Hide Hairline Cracks In Tiles?
Use a matching paint or marker to fill and blend the crack. Simple and effective.
Conclusion
Fixing a broken tile can be simple and cost-effective. You don’t need to replace it entirely. Just follow the steps outlined in this guide. Remember to clean the area well first. Use the right adhesive for best results. Patience and precision are key.
This method saves you time and money. Plus, it keeps your space looking neat. Practice makes perfect, so don’t rush. With these tips, your tiles can look great again. Happy fixing!