Is your exterior door leaking at the bottom corners every time it rains? You’re not alone, and understanding why this happens is the first step to solving the problem.
Water seeping in through the bottom corners of your door can cause more than just a small puddle; over time, it can lead to significant damage to your home. Imagine the peace of mind knowing your home is protected from water damage, and your floors are safe from rot and mold.
This article will walk you through the common causes of leaks and provide you with simple solutions to keep your entryway dry and secure. Stick with us, and you’ll find out how to safeguard your home efficiently.

Credit: www.reddit.com
Identifying Leak Sources
Water can enter through gaps around exterior doors. Check seals and weatherstripping for damage. Inspect corners for cracks or wear. Addressing these issues helps prevent leaks effectively.
Identifying the sources of leaks at the bottom corners of exterior doors is crucial. Leaks can cause serious water damage if not addressed promptly. Understanding where these leaks originate helps prevent further issues.Common Problem Areas
Exterior doors often have gaps or cracks. These can let water seep inside. The corners of the door are particularly vulnerable. Weather stripping may wear out or become loose. Seals around the door can deteriorate over time. Poor installation can also lead to leaks. Check the threshold and door frame. These areas are common culprits for leaks.Visual Inspection Tips
Conduct a thorough visual inspection. Look closely at the door’s edges. Examine the seals and weather stripping. Check for visible cracks or gaps. Use a flashlight for better visibility. Test the door in wet conditions. Observe how water behaves around the door. See if water pools or flows inside. Identify any areas where water enters.Signs Of Water Damage
Look for signs of water damage. Peeling paint or warped wood indicate issues. Stains or discoloration on floors are warning signs. Moisture can lead to mold growth. Check for a musty odor near the door. This can suggest hidden water damage. Promptly addressing these signs can prevent costly repairs.Necessary Tools And Materials
Fixing an exterior door leaking at bottom corners requires silicone caulk, a caulking gun, and weatherstripping. These tools help seal gaps, preventing water damage and drafts. Proper use ensures a secure, leak-free door.
Have you ever found yourself frustrated with water seeping through the bottom corners of your exterior doors? You’re not alone. This common issue can turn into a real headache if not addressed properly. Tackling the problem requires the right tools and materials, and understanding what works best can save you time, effort, and money. Let’s dive into the essentials that will help you seal your door effectively and keep your home dry and safe.Sealants And Caulking
Sealants and caulking are your first line of defense against leaks. You might be surprised by the variety available—each designed for different surfaces and conditions. Silicone sealant is a popular choice due to its flexibility and waterproofing capabilities. It works well on most door materials, providing a long-lasting barrier against moisture. Acrylic caulk is another option, ideal for painting over if aesthetics matter to you. Choose one that matches your door frame to maintain a seamless look. Applying these products is straightforward. Just make sure your surfaces are clean and dry before you start.Weatherstripping Options
Weatherstripping helps seal the gaps around your door, preventing drafts and leaks. There are several types, like foam tape, felt, and rubber strips. Foam tape is easy to apply and works well for small gaps. Rubber strips are durable and perfect for wider spaces. Reflect on your door’s needs—where is the leak occurring? If it’s at the bottom, a door sweep might be the answer. Door sweeps attach to the bottom edge, blocking out water and cold air. Don’t forget to measure your door accurately to ensure a perfect fit.Essential Repair Tools
Repairing your door requires more than just materials; you need the right tools. A caulking gun is essential for applying sealant smoothly. A utility knife comes in handy for trimming weatherstripping to size. You might find a screwdriver useful for adjusting door hinges. Sometimes, a small shift can close gaps and stop leaks. Consider having a level on hand to check for alignment issues. Does your toolbox have these items? Equipping yourself with these tools not only makes the task easier but also ensures a professional finish. It’s empowering to tackle repairs yourself, turning frustration into satisfaction. Each tool and material plays a pivotal role in safeguarding your home from water damage. Are you ready to take action and keep your space dry?Preparing The Door For Repair
Leaks at the bottom corners of exterior doors can be frustrating. Preparing your door for repair is the first step to solving this issue. This process ensures effective sealing and prevents future leaks. Follow these steps to get your door ready for repair.
Cleaning The Door Frame
Start by cleaning the door frame thoroughly. Use a mild detergent and warm water. Remove all dirt and debris from the surface. This ensures a good bond for new sealants. A clean frame prevents mold growth and damage.
Removing Old Sealants
Old sealants often lose their effectiveness over time. Use a scraper or utility knife to remove them. Be gentle to avoid damaging the door frame. Ensure every bit is gone for a smooth surface.
Drying Affected Areas
Moisture can interfere with new sealants. Use a dry cloth or towel to absorb water. Make sure the entire area is dry before proceeding. This will help the new sealant adhere properly.

Credit: www.reddit.com
Applying New Sealants
Water damage often starts with exterior door leaks at the bottom corners. Applying new sealants can prevent this issue. Ensure proper coverage to protect your home from moisture intrusion.
Applying a new sealant to your exterior door can be a simple yet effective way to prevent leaks at the bottom corners. It’s a task that may seem daunting but can save you from future headaches and costly repairs. With a little guidance and the right tools, you can ensure your door is properly sealed and your home remains dry and cozy.Choosing The Right Sealant
Selecting the correct sealant is crucial for a successful application. Consider the material of your door and the climate where you live. Silicone-based sealants are great for durability and flexibility, especially in areas with extreme weather conditions. Read product labels carefully. Look for sealants specifically designed for exterior use. This ensures they can withstand rain, wind, and temperature changes without breaking down.Proper Application Techniques
Before applying sealant, make sure the area is clean and dry. Dirt and moisture can prevent the sealant from adhering properly. Use a putty knife or scraper to remove any old sealant residue. Apply the sealant in a continuous bead along the bottom edge of the door. Use a caulking gun for precision and control. Smooth the sealant with your finger or a tool to ensure even coverage.Ensuring A Tight Seal
Check for gaps or missed spots after the sealant dries. A tight seal is essential to prevent water from seeping in. You can test the seal by spraying water at the bottom of the door and checking for leaks inside. Think about the last time you faced a leaky door. Wouldn’t it be reassuring to know you’ve done everything to prevent it from happening again? Regularly inspect your work and reapply sealant if you notice any deterioration over time. Applying new sealants doesn’t have to be a daunting chore. With the right sealant, proper application techniques, and a focus on ensuring a tight seal, you can protect your home from unwanted water damage. Are you ready to tackle this project and keep your home safe and dry?Installing Weatherstripping
Exterior door leaks can be frustrating. Water seeping through door corners damages floors and walls. Installing weatherstripping helps seal these gaps effectively. It keeps moisture out and saves energy.
Selecting Suitable Weatherstripping
Choose weatherstripping that matches your door type. Rubber and foam are common choices. Rubber is durable and withstands heavy use. Foam is easy to install and inexpensive. Consider thickness and material flexibility.
Installation Process
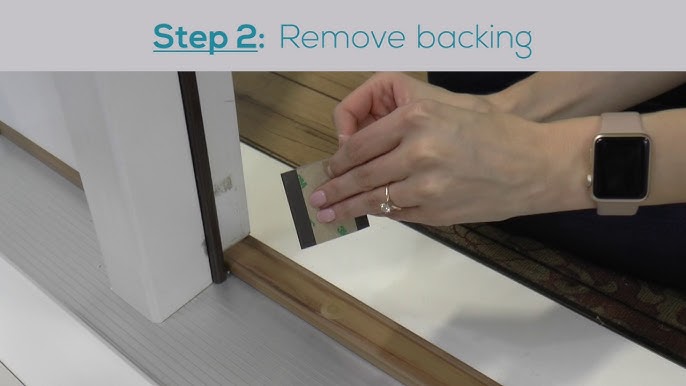
Clean the door edges thoroughly. Dust and dirt hinder adhesion. Measure the gap size accurately. Cut the weatherstripping to fit the door frame. Peel off backing and press firmly along the door edge. Ensure no gaps are left.
Testing For Effectiveness
After installation, check for leaks. Close the door and inspect edges. Use a flashlight to spot gaps. Test during rainy days for best results. Adjust or replace weatherstripping if leaks persist.
Addressing Door Alignment Issues
Exterior door leaks at the bottom corners can be a hassle. Proper door alignment can prevent these leaks. Misalignment allows water to seep through gaps. Fixing door alignment issues is crucial. Proper alignment ensures a snug fit. This reduces the risk of leaks.
Checking Door Alignment
Inspect the door for gaps around the edges. Use a flashlight to spot uneven spaces. Close the door and check if it latches smoothly. Uneven gaps indicate misalignment. The door should fit snugly in the frame.
Adjusting Hinges And Latches
Tighten loose screws on the hinges first. Use a screwdriver for accuracy. Adjust the strike plate on the door frame if needed. Move it slightly to improve the latch fit. Ensure the door swings freely without sticking.
Re-testing For Leaks
After adjustments, test for leaks again. Close the door and pour water at the base. Watch for any seepage at the corners. No water should come through. If it does, further adjustments may be needed.
Regular Maintenance Tips
Exterior doors often face wear due to weather changes and frequent use. Proper maintenance can prevent leaking at the bottom corners. Regular care keeps doors functional and looking good. Follow these simple tips to ensure your doors stay in top shape.
Routine Inspection Schedule
Check doors monthly for signs of wear or damage. Look for gaps or cracks in seals. Inspect hinges and ensure screws are tight. Examine the door surface for any signs of rot or mold. Early detection can save money on repairs.
Preventative Measures
Apply weatherstripping to prevent leaks. Ensure door sweeps are intact and effective. Use caulk to seal any visible gaps. Keep the area around the door clean and dry. Regularly paint or varnish to protect against moisture.
Long-term Care Strategies
Invest in quality materials for durability. Replace worn-out seals promptly. Schedule professional maintenance checks yearly. Consider upgrading to water-resistant doors. This can prevent future problems.
Credit: www.youtube.com
Frequently Asked Questions
Why Is My Exterior Door Leaking At Corners?
Water may enter due to poor seals or damaged weatherstripping. Check for gaps and replace worn-out parts.
How Can I Fix A Leaking Door Bottom?
Use quality seals or weatherstripping. Apply waterproof sealant. Ensure the door is properly aligned and closes tightly.
What Causes Door Leaks During Heavy Rain?
Heavy rain can expose gaps in seals and weatherstripping. Ensure all seals are intact and replace any damaged ones.
Can Door Leaks Lead To Home Damage?
Yes, leaks can cause mold and wood rot. Address leaks promptly to prevent damage and maintain a healthy environment.
Should I Call A Professional For Door Leaks?
If DIY fixes don’t work, consult a professional. They can identify and solve underlying issues effectively.
Conclusion
Fixing a leaking exterior door is crucial for home protection. Water can damage floors and walls, causing costly repairs. Check seals and weatherstripping regularly. They help keep water out. Tighten screws on hinges if needed. Sometimes, the door frame shifts, leading to leaks.
Use caulk to fill any visible gaps. It’s affordable and effective. Regular maintenance saves money and prevents damage. Don’t wait for bigger issues. Act now. Secure your home with these simple steps. Your door will last longer and work better.
Keep your living space dry and safe.