For Blendjet 2 troubleshooting, first ensure it’s fully charged and the blades are free of obstructions. Reset by quickly pressing the power button three times.
Facing issues with your Blendjet 2 can be frustrating, especially when you’re looking forward to a smoothie or shake. This compact, powerful blender is designed for on-the-go lifestyles, making it a popular choice for health enthusiasts and busy individuals alike.
Yet, like any gadget, it might encounter problems that hinder its performance. Understanding the basics of troubleshooting can quickly turn the situation around, ensuring your Blendjet 2 serves you efficiently. Whether it’s charging issues, blade malfunctions, or operational glitches, a few simple checks and adjustments are often all that’s needed. This guide aims to demystify the process, offering clear, actionable solutions to get your Blendjet 2 back in action.

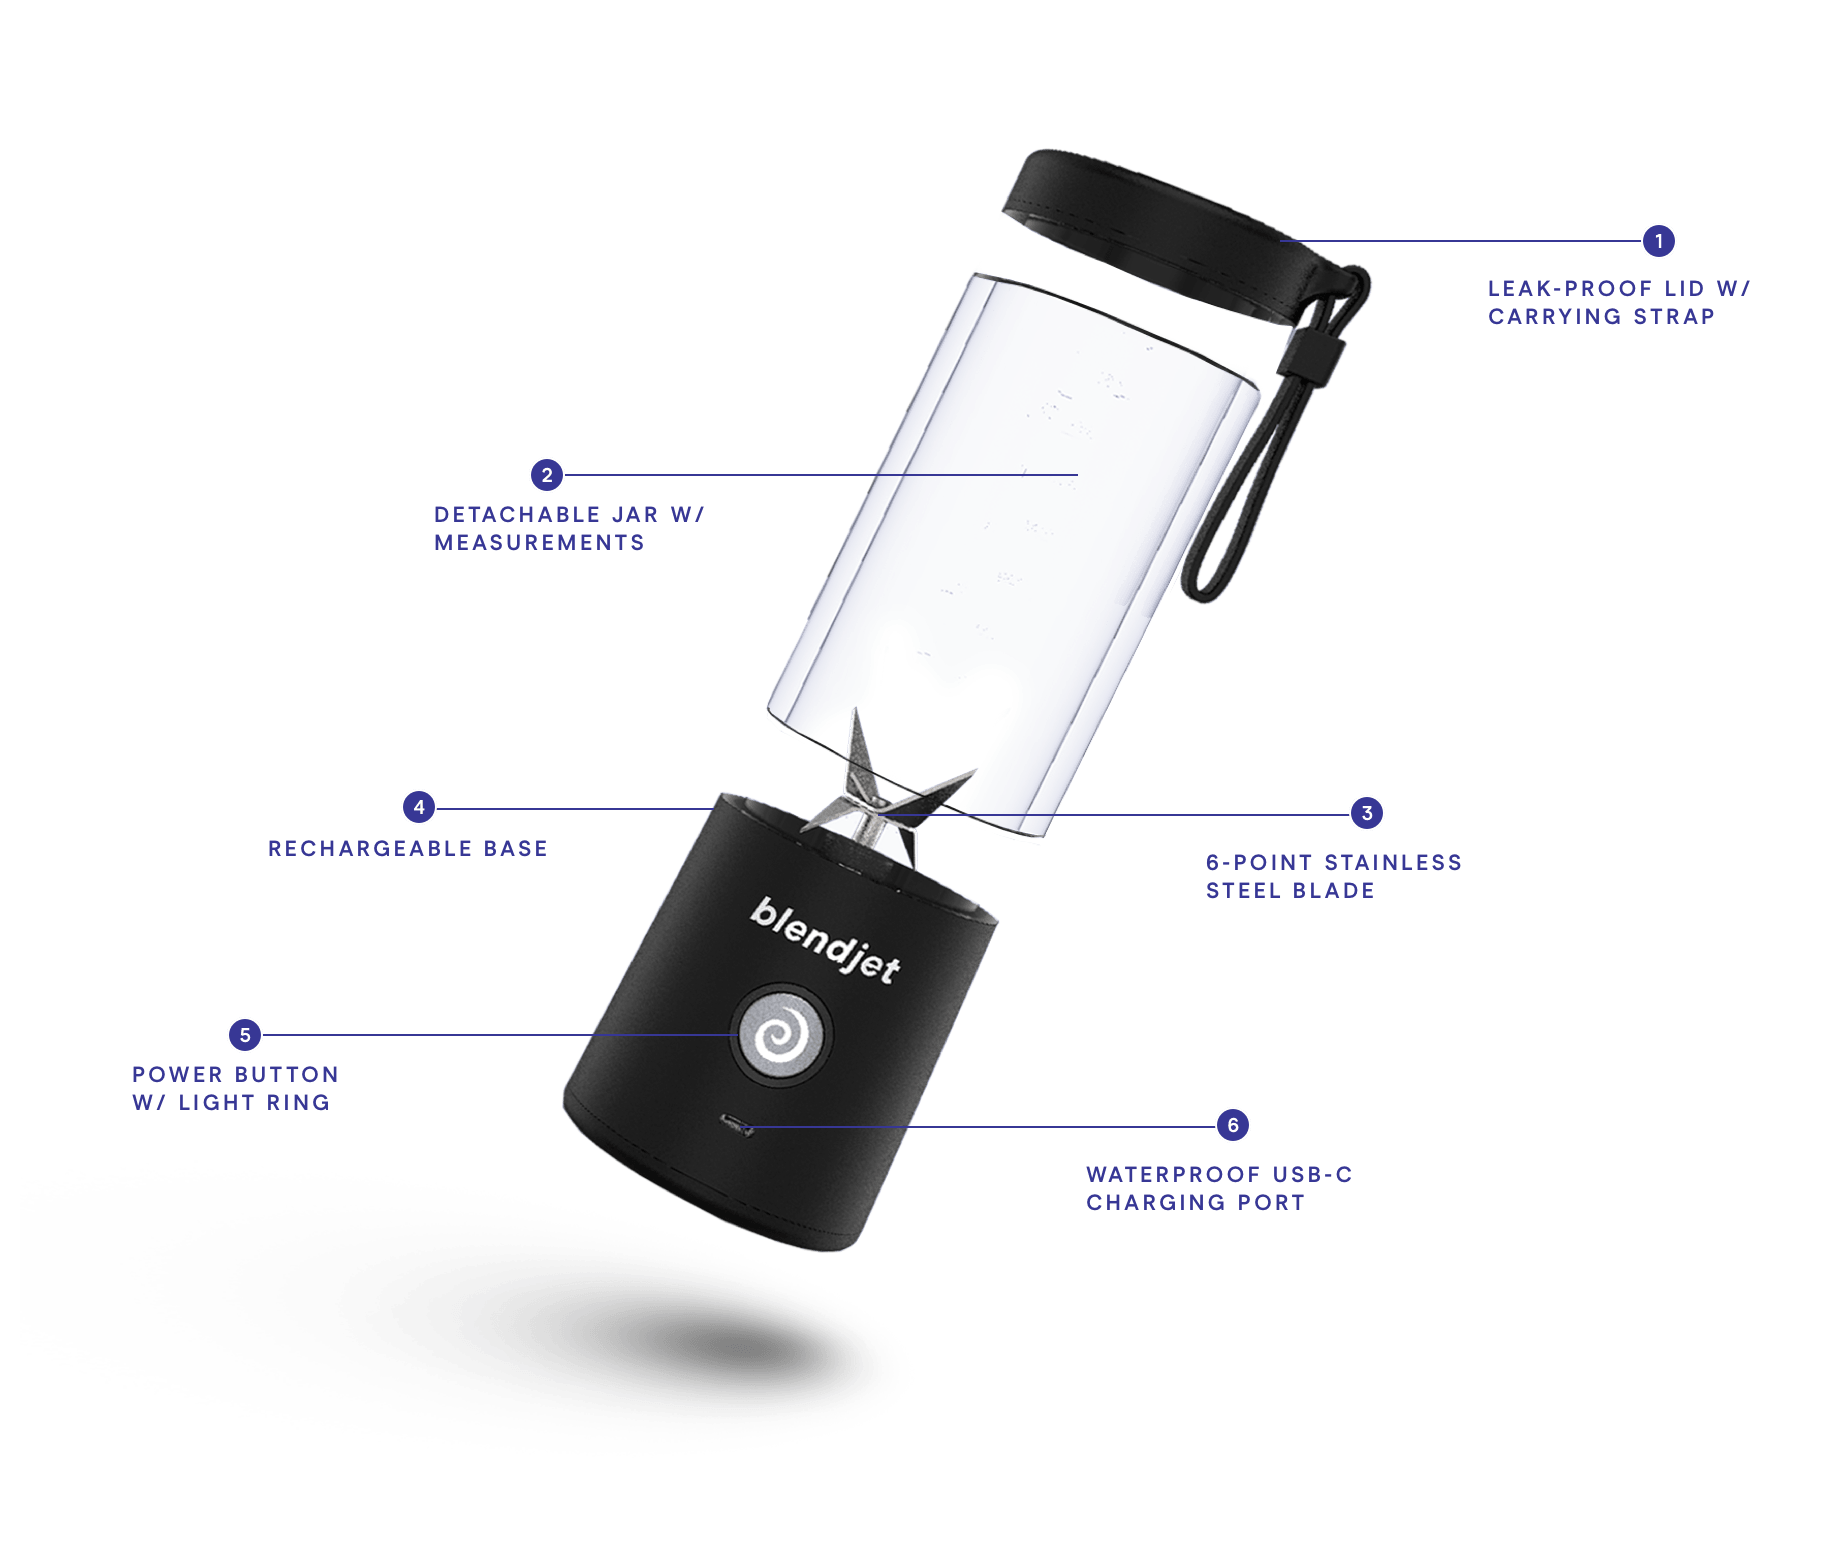
Credit: blendjet.com
Blendjet 2 Not Starting
Encountering issues with your BlendJet 2 not powering up can be frustrating. This section will guide you through common fixes to get your device blending smoothly again.
Checking Battery Life
A dead battery is often the culprit behind a BlendJet 2 that won’t start. To check the battery life:
- Press the power button.
- Observe the indicator light.
- No light means the battery is empty.
A simple recharge might be all you need to do. Always check battery life before assuming your BlendJet 2 has a serious issue.
Proper Charging Techniques
Using the right charging method ensures your BlendJet 2’s battery stays healthy. Follow these steps:
- Use the original USB cable.
- Connect to a reliable power source.
- Charge until the light turns solid.
This process ensures your device gets the correct power needed to function. If the BlendJet 2 still doesn’t start, contact customer support for further assistance.
Inconsistent Blending
Experiencing inconsistent blending with your Blendjet 2?
It can turn smoothie-making into a chore. Let’s troubleshoot.
Assessing Blade Sharpness
Dull blades blend poorly. Check your Blendjet’s blades.
Signs of dullness:
- Chunks in smoothies
- Uneven textures
Fix it: Replace blades. Always handle with care.
Evaluating Motor Performance
Is your motor struggling? It affects blending consistency.
Check for:
- Unusual noises
- Slower operation
Solution: Charge fully. Still sluggish? Contact support.
| Problem | Symptom | Action |
|---|---|---|
| Dull Blades | Chunks in drink | Replace blades |
| Weak Motor | Slow blending | Recharge/Support |
Unusual Noises During Operation
Is your Blendjet 2 making unusual noises during operation? Don’t worry. This section will guide you through identifying and fixing these sounds. A quiet and smooth operation is key for the best performance of your Blendjet 2. Let’s dive into troubleshooting together.
Identifying Source Of Sound
First, find where the sound comes from. Different sounds mean different issues. Here are steps to identify the source:
- Make sure the blender is off and unplugged.
- Check if the blade assembly is tight. A loose blade can make noise.
- Inspect for any visible damage or objects stuck in the blender.
- Plug in and turn on your Blendjet 2 without any ingredients. Listen carefully.
If the noise persists, the issue might be internal. Consider reaching out to customer support.
Maintenance Tips
Regular maintenance keeps your Blendjet 2 quiet and efficient. Follow these tips:
- Clean after every use. Stuck ingredients can cause noise.
- Check the blade assembly. Tighten if necessary.
- Store in a dry place. Moisture can damage the motor.
For deep cleaning, refer to the user manual. Never immerse your Blendjet 2 in water.

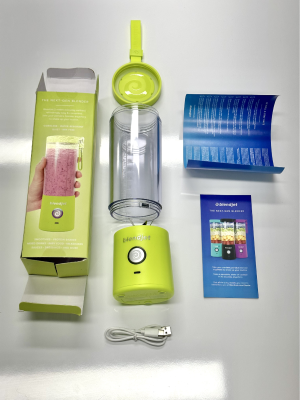
Credit: www.cpsc.gov
Difficulty With Cleaning
Keeping your Blendjet 2 pristine ensures lasting performance. Proper cleaning can feel tricky. Regular maintenance prevents residue build-up. Learn the best cleaning practices for your Blendjet 2.
Step-by-step Cleaning Process
- Disconnect your Blendjet 2 from any power source.
- Remove any remaining contents from the blender.
- Rinse the jar with warm water. Use a drop of dish soap.
- Fill the jar halfway with water. Run the blender for 10 seconds.
- Pour out the soapy water. Rinse the jar thoroughly.
- Wipe the outside with a damp cloth. Avoid getting the motor wet.
- Air dry the components separately before reassembling.
Avoiding Common Mistakes
- Don’t submerge the motor base in water.
- Avoid using abrasive cleaners or sponges. They scratch surfaces.
- Never leave residues to dry inside the blender. Clean promptly.
- Ensure the jar is fully dry before storing or charging.
- Check the blades. Remove any stuck particles with a soft brush.
By following these guidelines, your Blendjet 2 remains clean and functional. Embrace these habits for a spotless blender every time.
Battery Issues
Is your BlendJet 2 not holding charge as it used to? You’re not alone. Many users face battery problems after frequent use. Let’s explore how to tackle these issues effectively.
Extending Battery Life
To keep your BlendJet 2 running longer, follow these tips:
- Charge fully before first use.
- Avoid partial charges.
- Use the provided cable.
- Store in a cool, dry place.
These simple steps can greatly extend your battery’s life.
Replacement Options
Is your BlendJet 2 battery dead? Here’s what you can do:
- Contact BlendJet support for help.
- Consider a certified replacement battery.
Remember, using unofficial batteries can void your warranty.
Leakage Problems
Many BlendJet 2 users face leakage problems. This issue can mess up your bag or kitchen. Let’s fix it together!
Seal Inspection
First, check the BlendJet’s seal. A damaged seal causes leaks.
- Remove the blender’s base carefully.
- Look for cracks or tears in the rubber seal.
- If the seal is damaged, replace it.
Always handle the seal gently to avoid damage.
Preventive Measures
Stop leaks before they start. Here’s how:
- Fill the blender correctly. Do not overfill.
- Ensure the lid is tight and secure.
- Store the blender upright to avoid spills.
Regular cleaning keeps the seal healthy. Wash it after each use.
Trouble With Charging Port
Blendjet 2 users often face issues with their charging ports. It’s common and fixable. Let’s troubleshoot this together.
Cleaning The Charging Port
Over time, your Blendjet 2’s charging port may gather dust and debris. This can prevent proper charging. Regular cleaning ensures a good connection. Below are steps to safely clean the port:
- Turn off your Blendjet 2 before cleaning.
- Use a dry, soft brush to gently sweep away dust.
- Avoid sharp objects that might damage the port.
- For stubborn debris, lightly dampen a cotton swab with isopropyl alcohol and carefully clean the area.
Never insert metal objects or pour liquids directly into the port.
When To Seek Professional Help
Sometimes, cleaning might not solve the issue. Professional help may be needed. Seek assistance if you notice:
- Visible damage to the charging port.
- Charging is inconsistent even after cleaning.
- Your Blendjet 2 doesn’t charge at all.
Contact Blendjet customer service for support. They can guide you on the next steps or repairs. Don’t attempt DIY fixes as this might void your warranty.
Understanding Indicator Lights
Understanding Indicator Lights on your Blendjet 2 is key to its operation. These lights provide essential information about the device’s status. They alert you to the current mode, battery level, and potential issues.
Decoding Light Patterns
The Blendjet 2 features a series of lights. Each pattern has a meaning. Solid lights indicate a full charge. A pulsing light means the device is charging. When lights blink, your attention is needed.
| Light Pattern | Meaning |
|---|---|
| Solid | Device ready or fully charged |
| Pulsing | Battery charging |
| Blinking | Potential issue or action needed |
What To Do When Lights Flash Unexpectedly
Unexpected flashing lights on your Blendjet 2 can be worrying. Don’t panic. Simple steps can often resolve these issues.
- Check the battery: A quick recharge may be all that’s needed.
- Secure the lid: Ensure it’s tightly closed.
- Inspect for blockages: Remove any obstruction.
- Reset the Blendjet: Hold the power button for three seconds.
Following these steps often restores normal function. If lights continue to flash, contact support for further assistance.
Connectivity Issues With Blendjet App
Many users face issues when connecting their BlendJet 2 to the app. The BlendJet 2 is a convenient gadget for on-the-go smoothies. But when tech glitches appear, it can be frustrating. Let’s tackle common problems and get your device blending smoothly with your app.
Bluetooth Pairing Process
Getting your BlendJet 2 to sync with your phone should be simple. Start with these steps:
- Ensure your BlendJet 2 is charged and powered on.
- Turn on Bluetooth on your phone.
- Open the BlendJet app and follow the instructions.
- Select ‘Pair new device’ and choose your BlendJet 2.
- A confirmation message should appear once connected.
If issues persist, restart your phone and try again. Still stuck? Move closer to the blender. Walls and other devices can cause interference.
App Functionality And Troubleshooting
Is the BlendJet app not behaving? Try these fixes:
- Update the app to the latest version.
- Clear the app cache in your phone’s settings.
- Check your phone’s compatibility with the app.
For persistent problems, contact BlendJet support. They can guide you through more complex issues. Remember, keeping your app updated is key to a smooth experience.

Credit: www.reddit.com
Blendjet 2 Performance Tips
Unlock the full potential of your BlendJet 2 with these performance tips. Keep your portable blender running smoothly.
Optimal Filling Strategies
To ensure your BlendJet 2 works best, follow these filling tips:
- Start with liquids to create a smooth blending base.
- Add soft ingredients next, like bananas or berries.
- Top off with harder items such as ice or frozen fruit.
- Do not fill past the max fill line to avoid overflow.
Maintaining Your Blendjet 2
Keep your BlendJet 2 in top shape with these maintenance steps:
- After each use, rinse immediately with warm water.
- For a deep clean, blend water with a drop of soap, then rinse.
- Charge regularly to keep the battery healthy and strong.
- Store in a cool, dry place away from direct sunlight.
Frequently Asked Questions
Why Is My Blendjet 2 Not Charging?
The Blendjet 2 may not charge due to a faulty cable, inadequate power source, or a depleted battery. Ensure the charging cable is properly connected and the power source is functioning.
How Do I Clean My Blendjet 2?
Clean your Blendjet 2 by adding water and a drop of soap, then pulse for a thorough clean. Rinse well and dry before storing.
Can Blendjet 2 Blend Ice?
Yes, the Blendjet 2 is designed to crush ice, making it perfect for smoothies and frozen drinks. Use small ice cubes for best results.
What Is The Blendjet 2 Battery Life?
The Blendjet 2 battery can last for 15+ blends per charge, depending on the ingredients and blend duration.
How To Reset A Blendjet 2?
To reset your Blendjet 2, charge it for a full hour, then press the power button three times quickly. This should restart the device.
Blendjet 2 Won’t Start, What To Do?
Check if your Blendjet 2 is fully charged and the jar is correctly aligned. If it still won’t start, contact customer support for assistance.
Conclusion
Tackling issues with your Blendjet 2 doesn’t have to be a hassle. With the tips covered, you’re now equipped to solve common problems swiftly. Remember, proper care and maintenance keep your device blending smoothly. For more guidance, reach out to customer support.
Happy blending!


